How to Use IPRoyal Proxies With Python Requests
Python

Vilius Dumcius
Proxy integration with Python requests is relatively simple and effective as the library directly supports such features. Since many people use the Python Requests library for web scraping, integrating proxies is an essential part of the process.
In this article, we’ll go through the process of integrating IPRoyal residential proxies through the Requests library. However, a nearly identical approach will work for all other proxies.
What Is the Python Requests Library?
Python Requests is a HTTP library that’s intended to be as simple and easy to understand as possible. While there’s a few inbuilt options available, the Requests library is a lot more intuitive and greatly simplified.
Additionally, Requests natively support basic proxy integration, making it a great choice for various web scraping projects. There’s a few complications with advanced proxy authorization techniques, but these are solvable as well.
Finally, Python Requests is a common choice for many developers due to how lightweight and efficient the library is. So, coupling all of the major benefits, the library is the go-to for most simple HTTP-based projects.
There’s one major drawback – Python Requests don’t support asynchronous programming. Many larger applications will perform best when you can send numerous requests to different URLs at the same time instead of doing so in sequential order.
You can find various add-ons and extensions to the regular Python Requests library. However, a lack of native support can turn away many developers. It also bloats the code base with various lesser-known libraries, which can be an issue for some projects.
How to Set Up IPRoyal Proxies?
Before you can even begin integrating proxies into the Python Requests library, you’ll need to get the tools themselves. Regardless of the provider, we recommend avoiding free proxies for any purpose as these will either be slow or built with malicious intent.
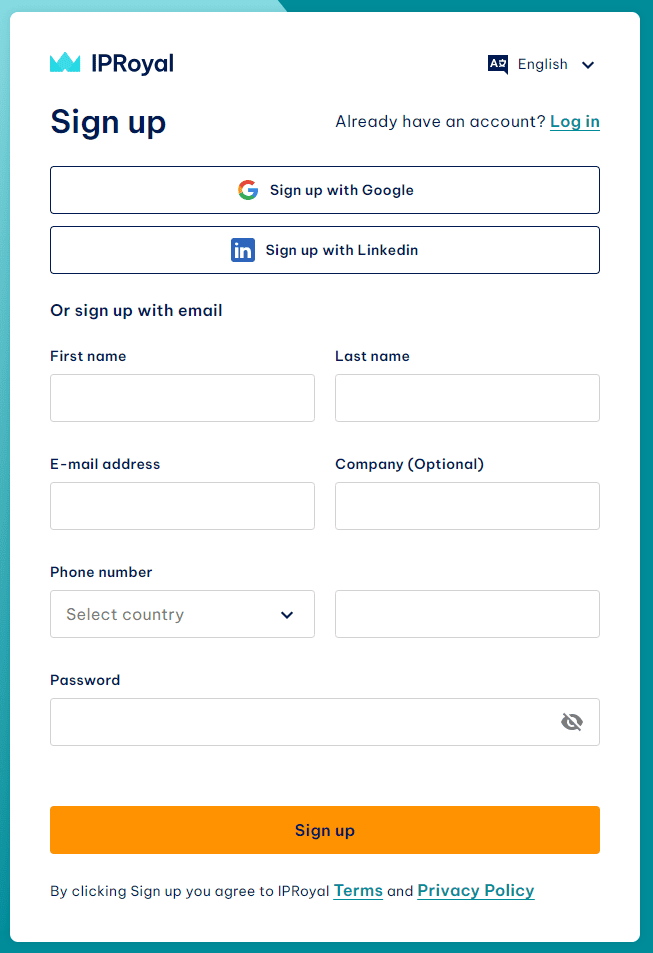
1. To get IPRoyal residential proxies, start by creating an account on our dashboard.
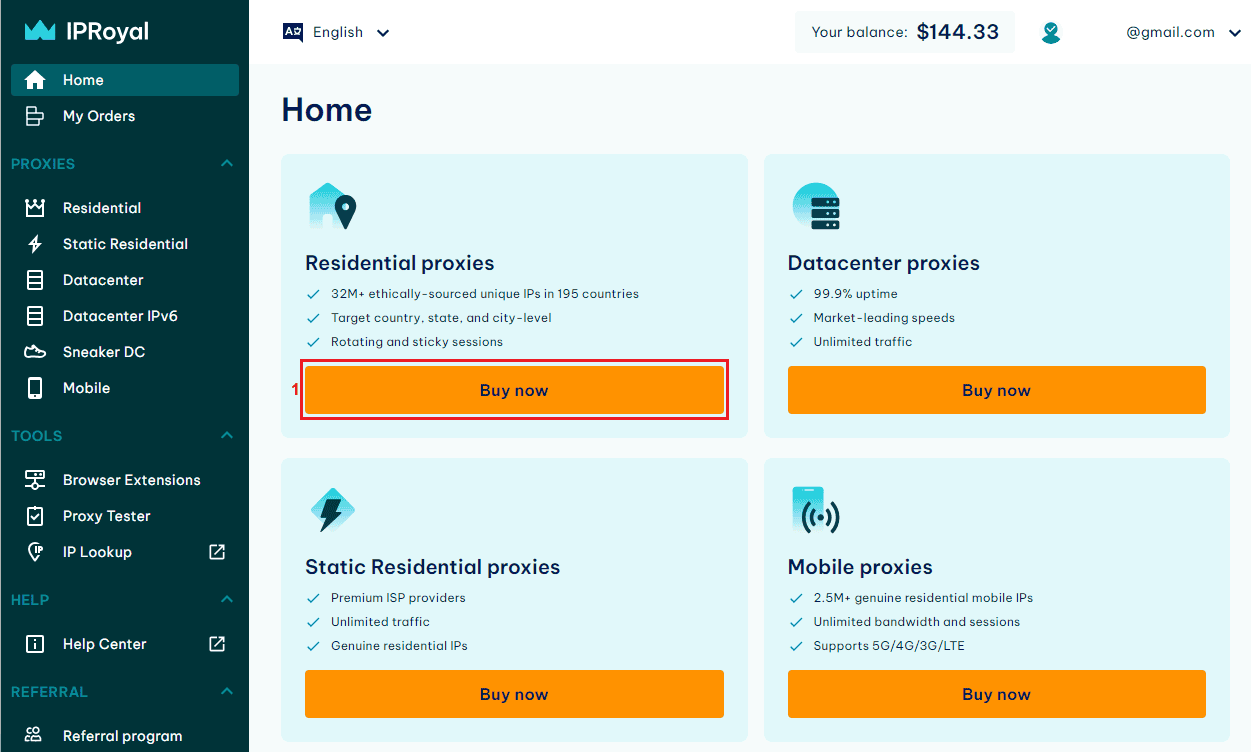
2. Once you log in, you’ll be greeted with a selection of various proxies. Click the Buy now (1) button below Residential proxies.
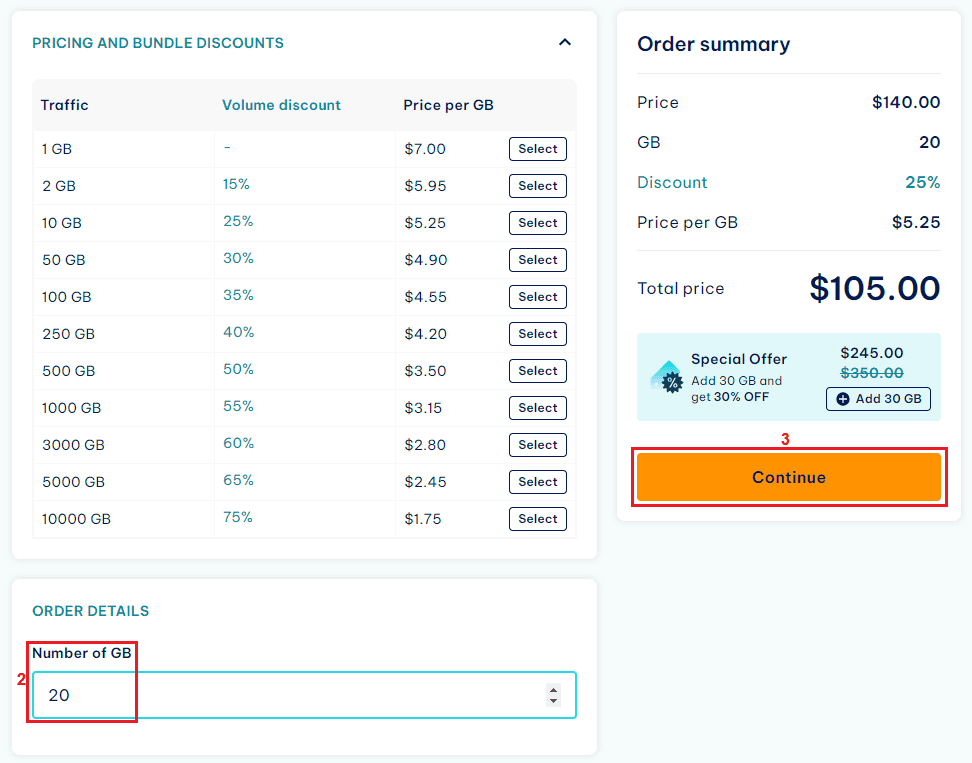
3. Once the next page loads, type in the amount of traffic (2) that fits your needs best and click the Continue (3) button.
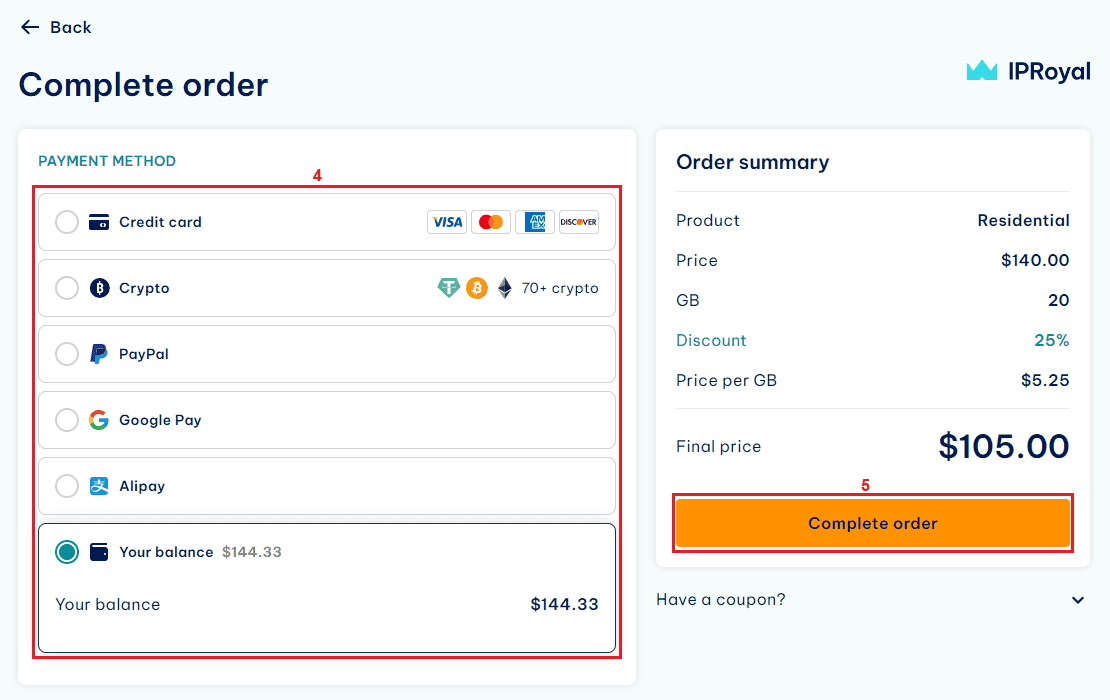
4. You’ll be brought to the payment page – pick your preferred payment method (4) and click the Complete order (5) button.
After the payment has been finalized, you’ll be ready to integrate IPRoyal residential proxies into any project that uses Python Requests. But first, you’ll need all the authorization and connection information.
Visit your proxy dashboard and scroll down. You’ll see various settings and options. For now, the most important is the Format section. Select the user:pass@host:port proxy server format as it’s used by the Requests library.
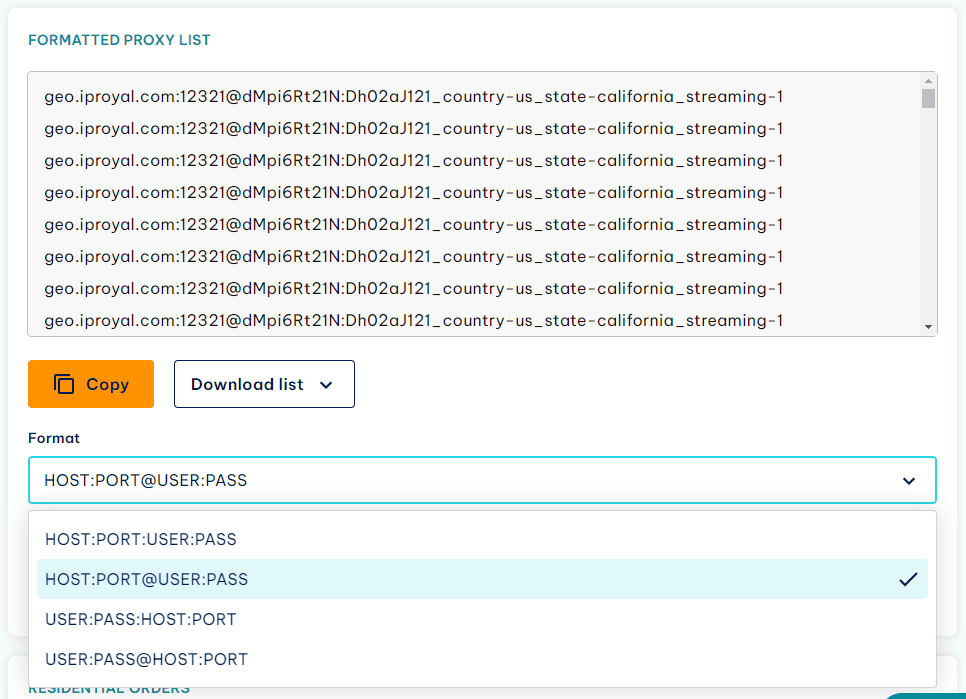
Alternatively, you can whitelist your IP address and use the proxy server without authentication credentials. It makes proxy configuration slightly easier. However, you’ll have to get the IP of every device whitelisted for them to work, which can be a hassle.
How to Configure Python Requests to Use IPRoyal Proxies?
You might have noticed that you get a long list of proxy servers in the Formatted proxy list section. Getting all of these is not necessary as we currently perform proxy rotation on our endpoint. All of the addresses provided are identical, so picking just one proxy server address is more than enough.
Our IP list is kept as a legacy feature due to customer requests. If you’re a new user, you can completely ignore that part of the process.
Additionally, since proxy rotation is handled by our endpoint, you don’t need to implement anything similar on the development side. If you need sticky sessions, that can also be done by using the options in the dashboard. Proxy rotation will be changed to maintain IP addresses for the selected amount of time.
Once every setting is in place, you’ll need to open your Python IDE (e.g., Pycharm ) and start up a project. Start by installing the Requests library by opening the Terminal:
pip install requests
Whenever the installation is complete, you’ll be able to start coding. Since we’re just showcasing proxy integration with Python Requests, we’ll be sending a simple HTTP request and avoid developing something akin to a web scraping project.
import requests
proxy = "http://USER:PASS@HOST:PORT"

# Proxy dictionary to be passed to requests
proxies = {
    "http": proxy,
    "https": proxy,
}

# Example URL to test the proxy
url = "http://httpbin.org/ip"

# Make a request using the proxy
response = requests.get(url, proxies=proxies)

# Print the response
print(response.json())
All the code does is define a proxy server and use it to route a GET request to HTTPbin’s IP checker. Using an IP checker for your testing purposes is great as it lets you see if proxy rotation is working properly.
Another important note is that all proxy server URLs have to be provided with “http://” in front. You can use “https://” if it’s a HTTPS proxy as well, however, take note that additional changes may need to be made. Additionally, it only influences your machine’s communication with the proxy server.
A website will use either “http://” or “https://” to communicate with the proxy server. So, unless you have a particular reason to run “https://” for communication between your machine and the proxy servers in question, don’t sweat it too much.
Alternatively, you may want to use whitelisting as your proxy authentication method. Here’s how to do that:
1. Head back to the dashboard and select the Whitelist (1) option.
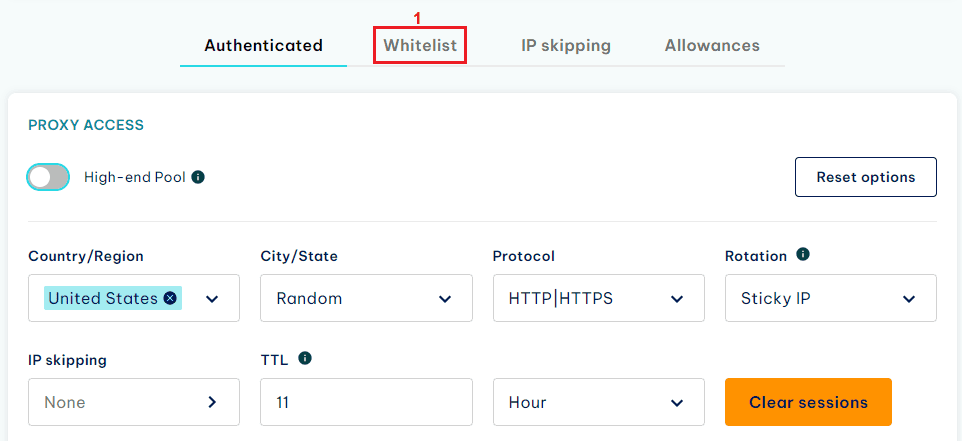
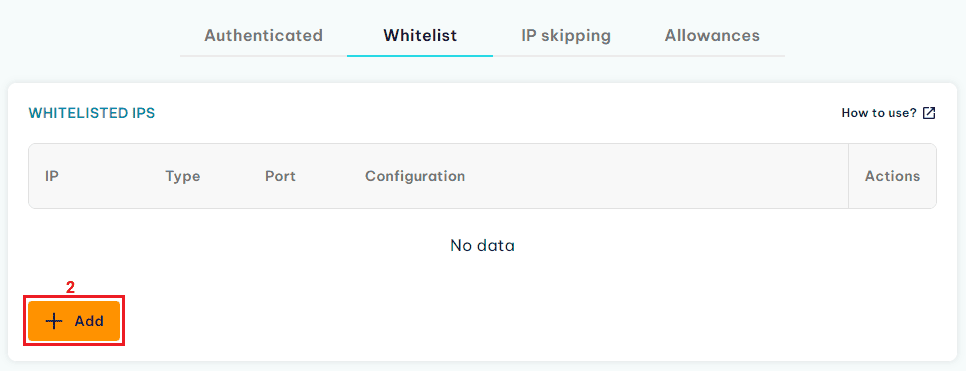
2. Scroll down a bit and click the + Add (2) button.
3. Visit our IP Lookup page to find out your IP address (3) .
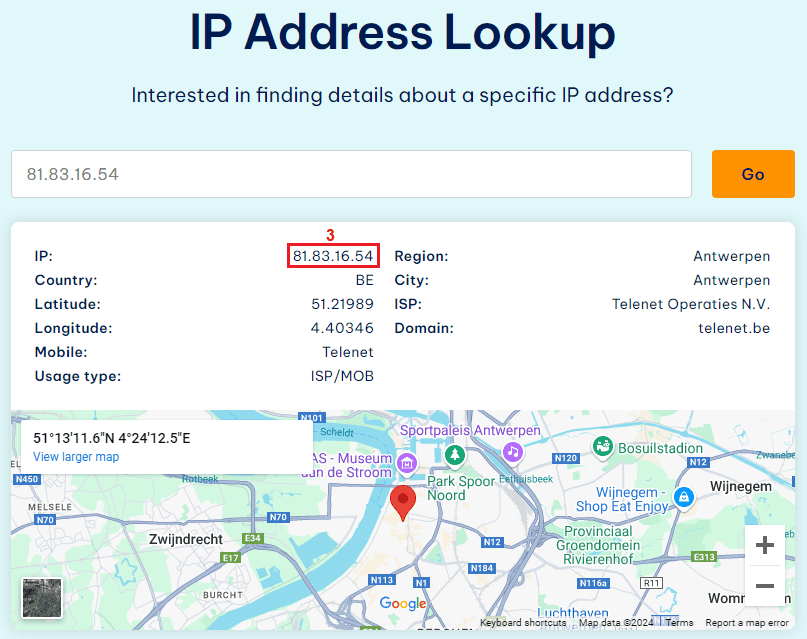
4. Copy that into the IP (4) field and keep the port as is – then click the Create (5) button.
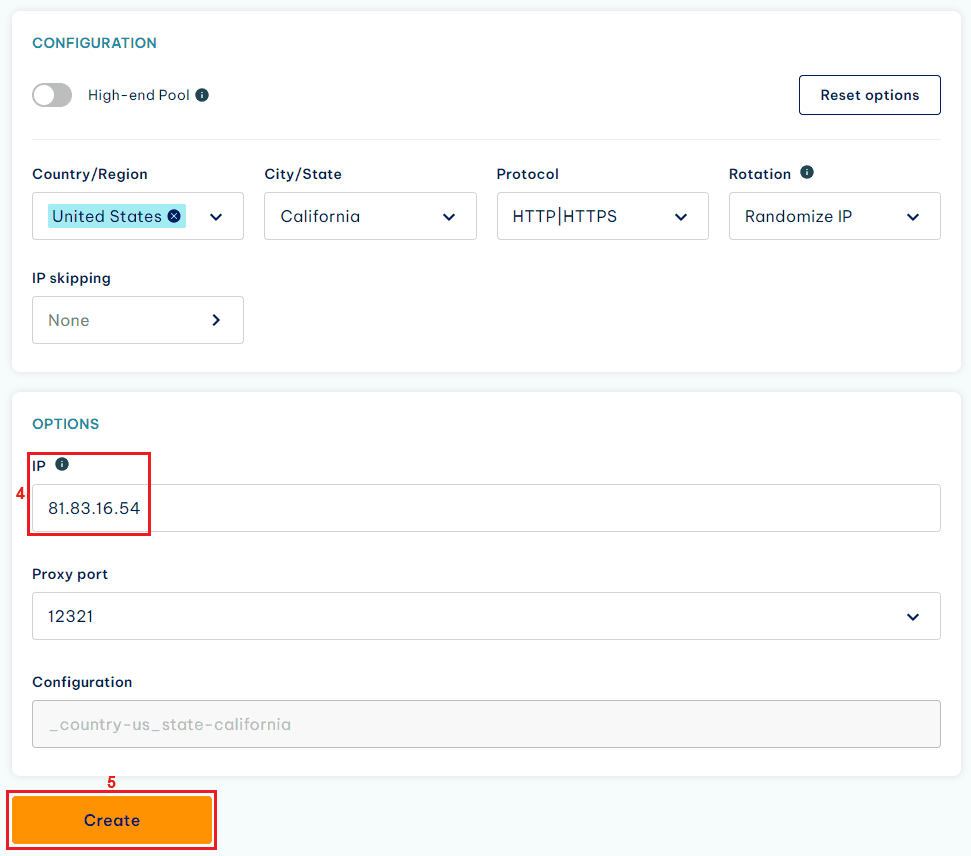
After that, you’ll need to make a few changes to your Python script:
import requests
proxy = "http://HOST:PORT"

# Proxy dictionary to be passed to requests
proxies = {
    "http": proxy,
    "https": proxy,
}

# Example URL to test the proxy
url = "http://httpbin.org/ip"

# Make a request using the proxy
response = requests.get(url, proxies=proxies)

# Print the response
print(response.json())
Instead of using proxy authentication with the username and password, you can simply copy and paste the IP and port (6) .
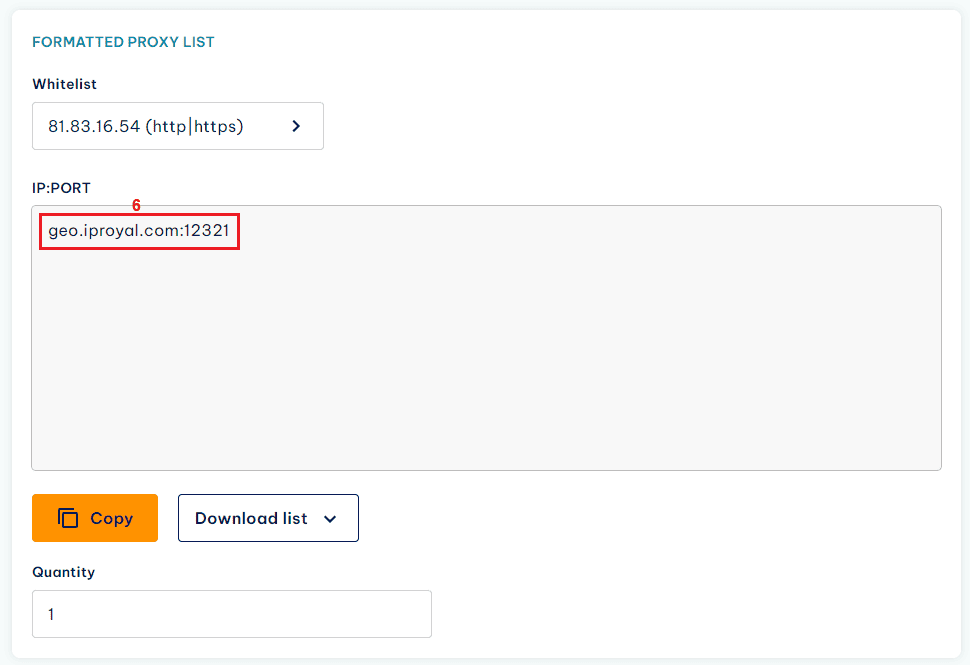
Whitelisting makes integrating proxy servers a bit quicker, however, the method does limit you through IP addresses.
On the other hand, such a proxy authentication method protects you from accidental leaks. If you use a username and password to authenticate and they get leaked, anyone can use your proxy servers.
So, it’s a bit better if you work with only a few machines and constantly post code in public repositories such as Github. That way, you’ll protect yourself from accidentally making your details public while being able to freely share your proxy server integration examples.
How to Rotate Proxies With Python Requests?
While we rotate proxies for you, other providers may not. Additionally, you may want to rotate proxies based on your own settings and preferences, so knowing how to do so may come in handy.
Adding rotation settings, if they don’t exist, is extremely important for web scraping projects. IP addresses get banned frequently when web scraping, so constantly changing them is a great way to avoid any issues.
import requests

# List of proxies provided by IPRoyal
proxies_list = [
    {"host": "geo.iproyal.com", "port": "12321", "username": "user1", "password": "pass1"},
    {"host": "geo.iproyal.com", "port": "12321", "username": "user2", "password": "pass2"},
    {"host": "geo.iproyal.com", "port": "12321", "username": "user3", "password": "pass3"},
    # Add more proxies as needed
]

def get_proxy_url(proxy):
    return f"http://{proxy['username']}:{proxy['password']}@{proxy['host']}:{proxy['port']}"


def make_request(url, proxies_list):
    for proxy in proxies_list:
        proxy_url = get_proxy_url(proxy)
        proxies = {
            "http": proxy_url,
            "https": proxy_url,
        }

        try:
            response = requests.get(url, proxies=proxies, timeout=10)
            response.raise_for_status()  # Raise an HTTPError for bad responses
            print(response.json())
        except requests.exceptions.RequestException as e:
            print(f"An error occurred with proxy {proxy['host']}:{proxy['port']}: {e}")

# Example URL to test the proxies
url = "http://httpbin.org/ip"

# Make requests using different proxies
make_request(url, proxies_list)
While the code snippet looks much more complicated, we’ve only changed a few things. Instead of using a single URL for our proxy servers, we now have a list, which is then combined in the second function.
With the list in hand, we create a “for” loop that goes through each proxy server in turn when making a GET request to an URL. We also added some slight error handling so we know what’s going on (for example, if a proxy server is down and unable to make a connection).
Finally, since the code got slightly more complicated, most of the actions are now nested under functions for better readability and modularity.

Troubleshooting Python Requests With Proxies
There are plenty of errors you can run into when using a proxy with Python Requests. Fortunately, most of them are pretty straightforward and easy to deal with.
First, it’s best if you, as we did above, implement some error handling when running a proxy with Python Requests. Even the best providers have their proxies shut down every once in a while, so knowing whether it’s websites or proxies you’re having issues with will save a lot of headache.
Another issue you’ll run into frequently is various blocks and bans, especially when web scraping. No matter how well you integrate a proxy with Python Requests, it’ll get banned or limited over a long enough period of time.
So, you’ll need to implement rotation. But outside of that you can also reduce the amount of requests you send to a website or use various other techniques (such as getting cookies, etc.) to minimize the chance of a ban.
In the end, listing out all of the potential issues when web scraping or using proxies is nearly impossible. We highly recommend reading any provider’s quick-start guides , documentation , FAQ , and any other source – most of them have troubleshooting information readily available.


