How to Use Scrapy and Splash for Web Scraping Dynamic Websites
Tutorials

Eugenijus Denisov
Key Takeaways
-
Scrapy is an excellent tool, but when it comes to JavaScript-heavy websites, it needs a little support. That's where Splash proves invaluable.
-
When using Scrapy Splash, don’t forget to customize your request headers. Some JS sites won’t respond properly without them.
-
Setting up Scrapy Splash requires middleware setup, but once it's done, you can scrape even the most complex JS-powered sites.
The internet often complicates things, especially when hiding data behind JavaScript and AJAX calls. It’s when web scraping an HTML page becomes a challenge. You check the source: nothing useful. Even the rendered page view reveals little.
Just layers of JavaScript executing in the background. That’s when most people either abandon the task or copy-paste some outdated Stack Overflow thread that never worked to begin with.
Thankfully, Scrapy and Splash offer a more effective approach. Scrapy provides the structure, while Splash gives you the patience websites now demand.
The process is rarely “plug and play.” You probably won’t get it perfect on the first run. You’ll miss elements and hit blank pages. But eventually, you’ll start seeing how data behaves and how to extract it on your terms.
What is Scrapy Splash and Why Use It?
Scrapy is an HTTP-based web crawler that runs non-blocking, asynchronous requests. It comes packed with middleware, spiders, and parsers that handle much of the heavy lifting. However, it falls short when JavaScript gets in the way. That’s because Scrapy doesn’t render content - it reads what was present in the initial response.
If a website loads its data through JavaScript after the initial page response, Scrapy doesn’t wait. It moves on, even though the actual content hasn’t arrived yet.
So, while it’s highly effective for static pages, dynamic ones leave it guessing.
That’s where Splash, a headless browser and a solid web scraping API, comes in. It loads pages like a real browser would, waits for JavaScript to finish doing its job, and then exposes the fully rendered page for extraction.
Beyond rendering, Splash offers control. You can block unnecessary assets, inject custom scripts, manage wait times, or even use Lua scripting for complex interactions. When combined, Scrapy and Splash make web scraping modern websites easy.
Setting Up Scrapy Splash
Integrating Scrapy and Splash isn’t complicated, but skipping steps or rushing through it can quickly lead to errors. Here’s a straightforward way to install Scrapy Splash.
Installing Docker

Before you can run Splash, you’ll need Docker. That’s because Splash, the headless browser, runs inside a container.
If you’re unfamiliar with containerization, it’s essentially running software in a self-contained environment, without cluttering your system or worrying about dependency conflicts. Docker makes this process simple and repeatable.
Windows
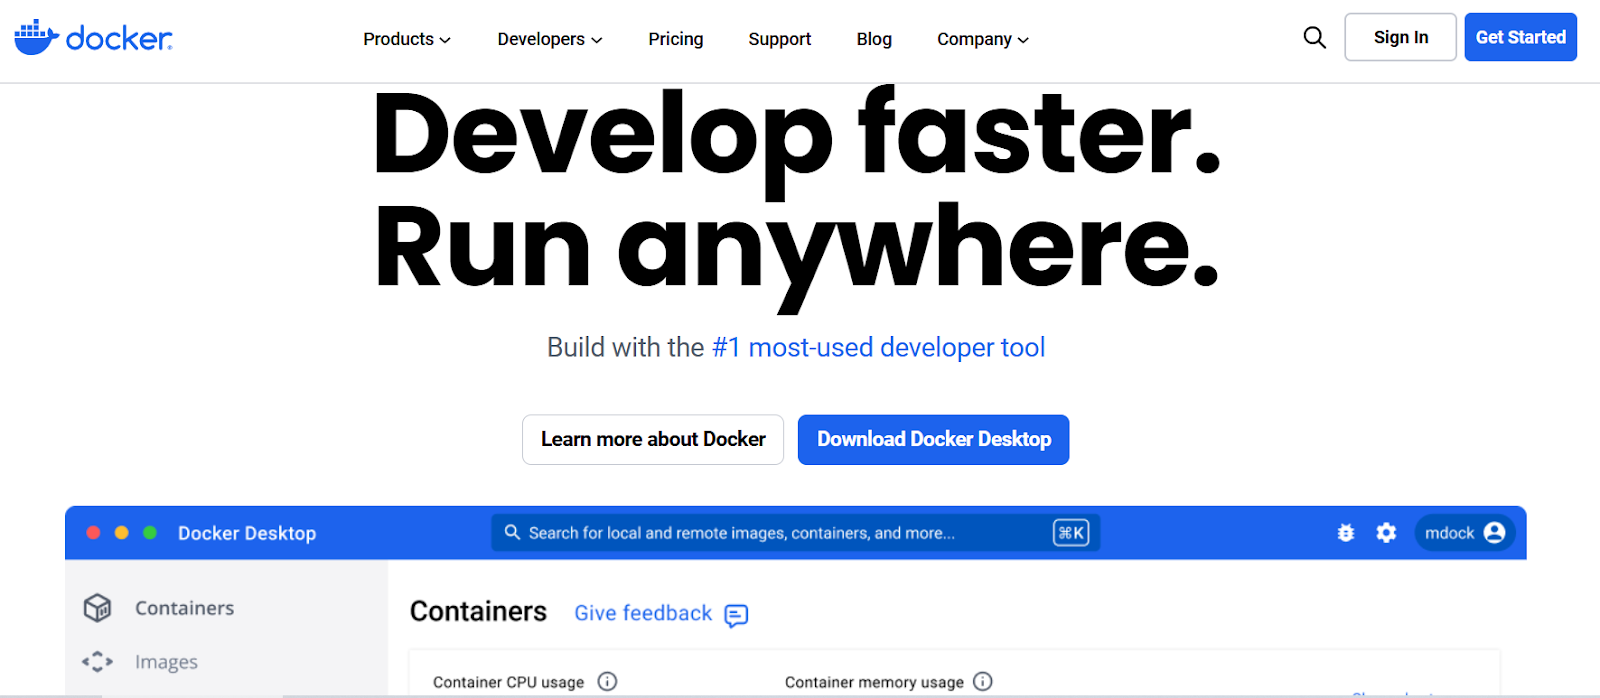
Visit Docker Desktop for Windows and download the installer.
Once it’s installed, make sure WSL 2 is enabled. It’s required for Docker to run correctly on Windows.
macOS
Visit Docker Desktop for Mac , download the installer, and follow the setup prompts.
It’s a straightforward install - you only have to drag, drop, and launch.
Linux
Here, the installation steps vary depending on your distribution. For Ubuntu, you can use:
sudo apt update
sudo apt install docker.io
sudo systemctl start docker
sudo systemctl enable docker
Make sure your user has permission to run Docker commands without sudo, or you’ll be typing it often.
To verify the installation, run:
docker --version
If you see a version number, Docker is ready.
Installing Scrapy & Setting Up a Project
Scrapy runs on Python, so make sure you have Python 3.6+ installed. Once that’s confirmed, open your terminal in any IDE and run:
pip install scrapy
This will install Scrapy and its core dependencies.
Consider installing it in a virtual environment. While optional, it’s recommended for keeping your environment clean and reproducible.
In your terminal, navigate to the folder where you want your scraper to live. Then create a new Scrapy project by running:
scrapy startproject myproject
Replace myproject with a relevant name. This command generates a clean folder structure with all the boilerplate set up, including:
- A
spiders/folder where your scraping logic goes items.pyfor defining structured datamiddlewares.py, pipelines.pyfor advanced customizationsettings.pywhere you’ll integrate Splash soon
Then, move into your new project folder:
cd myproject
You now have a fully functional Scrapy project, ready for Splash integration.
Configuring Scrapy to Use Splash
Now that you’ve got both Scrapy and Splash installed, it’s time to connect them. This configuration step happens in settings.py , the control center of your Scrapy project.
First, install the scrapy-splash package, which connects both.
pip install scrapy-splash
Now open your project’s settings.py file. You’ll need to add and customize a few things to make Splash work smoothly:
1. Add the Splash server URL
If you're running Splash locally with Docker, the default Splash server URL is:
SPLASH_URL = 'http://localhost:8050'
2. Enable Splash-specific middlewares
Scrapy processes requests through middleware layers. To make Splash part of the pipeline, add the following:
DOWNLOADER_MIDDLEWARES = {
    'scrapy_splash.SplashCookiesMiddleware': 723,
    'scrapy_splash.SplashMiddleware': 725,
    'scrapy.downloadermiddlewares.httpcompression.HttpCompressionMiddleware': 810,
}
3. Update your Spider middlewares
This helps handle duplicate filtering with Splash.
SPIDER_MIDDLEWARES = {
    'scrapy_splash.SplashDeduplicateArgsMiddleware': 100,
}
4. Set the Splash-aware duplicate file and cache storage
These two lines tell Scrapy how to properly cache and identify requests when JavaScript rendering capabilities are involved:
DUPEFILTER_CLASS = 'scrapy_splash.SplashAwareDupeFilter'
HTTPCACHE_STORAGE = 'scrapy_splash.SplashAwareFSCacheStorage'
Without these settings, Scrapy can’t communicate with the headless browser, and you won’t be able to access the rendered content.
The middleware layers allow requests to be routed through Splash, handle cookies, compress responses, and prevent duplicate requests from being wrongly filtered out.
Once everything is in place, Scrapy is officially Splash-aware. You’re ready to start writing spiders that can execute JavaScript code easily.
Writing a Scrapy Splash Spider
With Splash, the headless browser, ready to go, you can load pages the way real browsers do - with JavaScript and everything else. This unlocks access to dynamic websites that typically block traditional scrapers.
Understanding Scrapy Spider Components
Every Scrapy spider includes a few core components that control how it navigates websites and extracts data.
First up is start_urls. It’s a simple list of web addresses where your spider begins its crawl. You provide Scrapy with these URLs, and it starts sending requests out.
Once those pages respond, the Scrapy spider hands control to the parse method.
The parse function is your data extractor, your page interpreter. It examines the response, extracts the data you want, and decides whether to follow more links or not.
And finally, items are the structured containers where you store the data you’ve extracted. They’re packages of information ready for exporting or further processing.
You define what an item looks like based on your goals - titles, dates, prices, whatever you need - and the spider populates them as it scrapes.
Together, start_urls, parse, and items form the spider’s core, turning unstructured web pages into organized data.
How Scrapy Handles Requests & Responses
Scrapy’s core strength lies in how it manages requests and responses.
Generally, when your spider starts, Scrapy issues HTTP requests to every URL in the start_urls list. This means your spider can handle dozens (or hundreds) of pages simultaneously without bottlenecks.
When a server replies, Scrapy captures that response and routes it to your spider’s parse method. It runs the request, grabs the response, and passes it to your code for processing.
Your parse method then examines that response, pulling out the data or detecting new links to follow next.
What makes this process efficient is that Scrapy keeps it asynchronous. It’s always busy sending, receiving, and parsing without waiting for one step to finish before starting the next. It’s efficient, which is why Scrapy can quickly crawl entire sites.
Creating a Scrapy Splash Spider
Now that the groundwork is in place, let’s build a Scrapy spider that communicates with Splash and scrapes a JavaScript-rendered site.
We’ll target a commonly used test site: quotes.toscrape.com/js/ , which relies on JavaScript to load content.
Step 1: Set Up Your Spider File
Start by creating a new spider inside your Scrapy project’s spiders folder - for example, quotes_splash.py. Inside this file, you’ll import the necessary libraries:
import scrapy
from scrapy_splash import SplashRequest
Step 2: Define Your Spider Class
Give your spider a name and point it to the dynamic URL:
class QuotesSplashSpider(scrapy.Spider):
    name = 'quotes_splash'
    allowed_domains = ['quotes.toscrape.com']
    start_urls = ['http://quotes.toscrape.com/js/']
Now, instead of using Scrapy's default start_requests, you’ll override it to use Splash:
   def start_requests(self):
        for url in self.start_urls:
            yield SplashRequest(url, self.parse, args={'wait': 1})
The wait argument instructs Splash to wait while the JavaScript finishes rendering.
Step 3: Parsing the Rendered Response
Your parse method will handle the fully rendered HTML received from Splash. Use Scrapy selectors to extract the data you want, like quotes and authors.
  def parse(self, response):
        quotes = response.css('div.quote')
        for quote in quotes:
            yield {
                'text': quote.css('span.text::text').get(),
                'author': quote.css('small.author::text').get(),
                'tags': quote.css('div.tags a.tag::text').getall()
            }
Once Splash renders the page, Scrapy’s selectors can accurately extract structured content.
Step 4: Follow Pagination (Optional)
Want to scrape every quote on every page? The site paginates dynamically, so you’ll need to instruct Splash to load the next page too. Add this snippet at the end of your parse method:
   next_page = response.css('li.next a::attr(href)').get()
        if next_page:
            next_page_url = response.urljoin(next_page)
            yield SplashRequest(next_page_url, self.parse, args={'wait': 1})
This instructs your spider to follow ‘Next’ links: Splash renders the new page, Scrapy extracts the data and repeats the process.
- You override
start_requeststo send requests via Splash (not plain Scrapy). - Splash renders the JavaScript, delivering the full HTML after scripts have executed.
- Your parse method uses standard Scrapy selectors (css or xpath) to extract the rendered content.
- The
wait parameterensures you’re scraping once all dynamic content has fully loaded.
This type of spider easily handles JavaScript-heavy pages. It pulls data that regular Scrapy would miss. Besides, it’s clean and surprisingly straightforward once you understand the Splash integration.
Adding Splash Requests for JavaScript-Rendered Pages
If response.css() returns an empty shell on JavaScript-heavy sites, it’s time to use Splash. This is where we abandon the standard Scrapy requests and bring in SplashRequest.
Standard requests don’t wait for JavaScript to load, so we have to use SplashRequest. It just grabs the initial HTML and moves on. That means any content loaded dynamically - like quotes, product listings, or reviews - won’t be in the response body at all.
SplashRequest, however, renders the entire page, executes JavaScript, and gives you the complete HTML after everything has loaded.
The Syntax
Here’s how you replace a standard request:
from scrapy_splash import SplashRequest
def start_requests(self):
    yield SplashRequest(
        url='http://quotes.toscrape.com/js/',
        callback=self.parse,
        args={'wait': 1}
    )
Let’s break it down:
urlis your target.callbackis the method that processes the rendered HTML.args={'wait': 1}gives the JS a second to load. You can adjust the value depending on the time needed for the content to appear.
Handling JavaScript-Rendered Content
Once SplashRequest is in place, the response you get is no longer a stripped-down version of the page. It’s the fully-rendered HTML after JavaScript has populated the DOM. That means your selectors finally work as they should:
def parse(self, response):
    for quote in response.css("div.quote"):
        yield {
            'text': quote.css("span.text::text").get(),
            'author': quote.css("small.author::text").get(),
            'tags': quote.css("div.tags a.tag::text").getall(),
        }
Even pagination becomes accessible once Splash has rendered the page:
next_page = response.css("li.next a::attr(href)").get()
if next_page:
    yield SplashRequest(
        url=response.urljoin(next_page),
        callback=self.parse,
        args={'wait': 1}
    )
Implementing Pagination in Scrapy Splash
When you're dealing with dynamic websites powered by JavaScript, pagination doesn’t always appear in the initial HTML response. Often, the ‘Next’ button or URL is only available after the JavaScript finishes loading. That’s where Splash becomes essential.
Scraping Multiple Pages Dynamically
To scrape multiple pages, you loop through them by detecting the ‘Next’ link and queuing it with another SplashRequest. It’s the same approach you’d use in standard Scrapy, except here Splash ensures the ‘Next’ link is visible when the spider processes it.
Let’s walk through it. Here’s how you start scraping:
def start_requests(self):
    yield SplashRequest(
        url='http://quotes.toscrape.com/js/',
        callback=self.parse,
        args={'wait': 1}
    )
Now, in your parse method, you extract the data and queue up the next page:
def parse(self, response):
    for quote in response.css("div.quote"):
        yield {
            'text': quote.css("span.text::text").get(),
            'author': quote.css("small.author::text").get(),
            'tags': quote.css("div.tags a.tag::text").getall(),
        }
    next_page = response.css("li.next a::attr(href)").get()
    if next_page:
        yield SplashRequest(
            url=response.urljoin(next_page),
            callback=self.parse,
            args={'wait': 1}
        )
Handling JavaScript-Powered Pagination
JavaScript-heavy sites sometimes load new content using buttons or infinite scroll instead of traditional links.
If that’s the case, and the ’Next’ button triggers JavaScript actions (instead of linking to a new URL), you’ll need to simulate that behavior using Splash Lua scripts. However, for sites like quotes.toscrape.com/js/ , this setup works perfectly.
That’s really all it takes. Splash helps Scrapy see what’s actually rendered, so pagination works as expected, and your spider becomes a proper crawler.
Handling Splash Responses & Parsing Data
When you use SplashRequest, you’re instructing Splash to open a browser, render the JavaScript, wait (if you specify), and then return the fully-loaded HTML back to Scrapy. That’s what makes Splash different from regular Scrapy requests.
Now what you’re parsing isn’t the original raw HTML. It's, in fact, the actual post-JavaScript DOM, similar to what you’d see in your browser’s ‘Inspect Element’ panel. So if you're trying to scrape content that only appears after JavaScript runs, this is what unlocks it.
Extracting Content From SplashResponse Efficiently
Once the Splash-rendered page is returned, you’re working with a SplashResponse object, which is just a subclass of HtmlResponse. So all your usual .css(), .xpath(), and .re() methods still apply.
Here are a few tips to keep things running smoothly:
- Wait wisely. Don’t overuse
args={'wait': X}with large values. Most sites render JS within 1-2 seconds. Keeping the wait time low keeps your spider fast. - Double-check selectors. After rendering, elements might shift in the DOM. Use your browser’s developer tools to test your CSS or XPath selectors against the rendered DOM.
- Use
.get()and.getall()intelligently:.get()returns the first match;.getall()returns everything. Don’t waste time parsing if you know exactly what you need. - Avoid unnecessary data: Splash headless browser can return full HTML, images, HAR files, or screenshots. But unless you explicitly need those, don’t request them. Stick to the basics (
html=1)for lean performance.
Is Scrapy Still Relevant for Web Scraping?
Yes. Scrapy’s been around for over a decade, and in tech years, that sounds ancient. The thing is, tools don’t become obsolete just because they’ve matured. They become irrelevant when they stop delivering.
Scrapy still delivers at scale, with speed, and with an ecosystem built for serious web scraping.
Why Scrapy Isn’t Outdated
While newer scraping tools emerge constantly, most are either overkill for simple jobs or so high-level that they become limiting. Scrapy sits in that rare sweet spot: it’s flexible and battle-tested.
Here’s what you get:
- Asynchronous, non-blocking requests out of the box.
- Fine-grained control over every step of the crawl.
- First-class support for Scrapy Splash middlewares, proxies, retries, and throttling.
- Clean separation between scraping logic and data handling.
Compare that to Selenium, which spins up a whole browser just to scrape a single page. Multiply that by a few hundred URLs, and you’re facing a major performance bottleneck.
Scrapy vs Selenium and When Scrapy Wins
Selenium, without a doubt, has its place. If you need to deal with CAPTCHAs or simulate click-heavy sessions, it’s the tool for the job.
But for large-scale web scraping, where the goal is to collect data (not mimic a human), Scrapy is significantly faster and lighter. With Splash or Playwright integration, it can still handle JavaScript when needed, without sacrificing performance.
When to Choose Scrapy
Go with Scrapy when:
- You’re scraping thousands (or millions) of pages
- You want to run distributed crawls across multiple servers
- You need speed and precise control over requests
- You’re building a long-term scraping pipeline or product
Conclusion
There’s a subtle satisfaction in watching something complex finally work the way you intended. That’s what happens when Scrapy and Splash click. You stop chasing data around a browser and start pulling exactly what you need - not with hacks, but with control.
And when you’ve done it once, the second time feels like routine. That’s the whole point. The setup might take effort, but the reward is repeatability.
At this point, the only question is what else you can apply this to? Because now that you know how to extract real data from real websites with constraints, you’re equipped to build anything.

