Anti-detect browsers have become quite popular in recent years thanks to their ease of use and versatility. After all, managing an array of accounts across different platforms from a single device wouldn’t be possible without them. Today, they’re the go-to option for marketers, e-commerce managers, website testers, and others.
The reason behind their popularity is simple. These browsers offer advanced customization, allowing users to change every single piece of information shared. Operating system, browser agents, settings, cookies, extensions, and more - you can tweak it all for a completely unique browser fingerprint.
Today, we’ll talk about BitBrowser, its key features, and using it with IPRoyal proxies.
What Is BitBrowser?
Like all other anti-detect browsers, BitBrowser focuses on privacy and security. What sets it apart is some unique anti-detection and anti-fingerprinting features. All of these features combined ensure each browser window you open works independently from the rest.
Here’s what you need to know:
- Flexible profile management
With support for different platforms and the ability to export files, you can share individual or group profiles seamlessly. The streamlined profile creation and customization process allows tailoring specific settings for different platforms.
- Excellent automation options
Many users will appreciate RPA-based manual browsing simulation, as it enables automation (even on multiple accounts) with a single click. This feature is especially valuable for automating social media tasks, like adding friends and interacting with the content.
- User-friendly dashboard
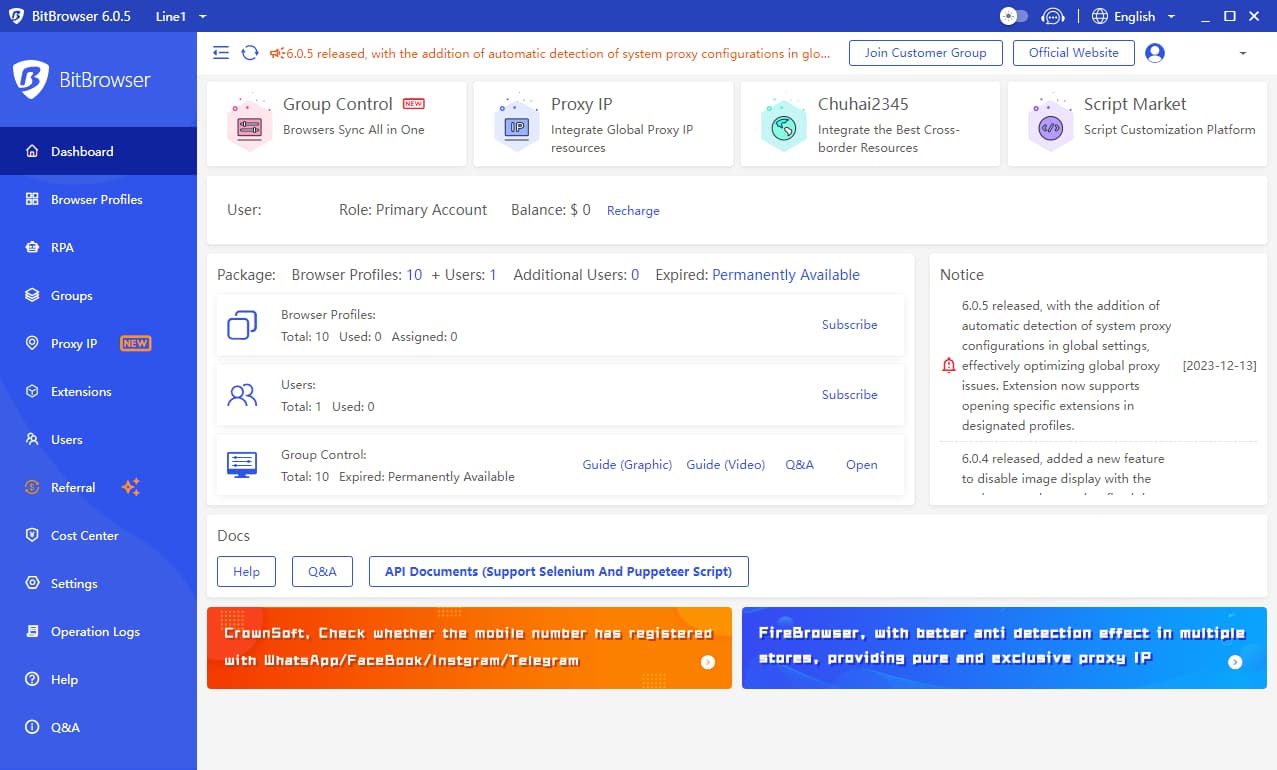
Packages, notifications, profiles, users, groups, proxies, extensions - everything is easily accessible from the dashboard. The quick-access menu offers links to every bit of information you may need, streamlining navigation and management.
- Easy proxy integration
Finally, BitBrowser takes proxy management one step further than most other similar solutions by providing recommendations (either HTTP or SOCKS5, depending on specific scenarios). It can also fill proxy credentials automatically, test each proxy thoroughly before you deploy it, and match settings to the IP’s location.
Why Use IPRoyal as Your BitBrowser Proxy Provider?
As always, browser fingerprinting is only as reliable as the proxies you use for your profiles. To ensure your multi-accounting efforts work without issues, you need authentic residential proxies you can rely on.
IPRoyal offers one of the best solutions for multi-clienting. Each proxy in our Residential pool comes from a real user and a real device with a residential internet connection. In other words, every proxy you assign to your BitBrowser profiles will make your activity look as genuine as possible.
With Residential proxies, our clients get:
- Access to over 32 million genuine proxies in 195 countries
- Precise geo-targeting options (country, state, and city level)
- Zero contracts and obligations with pay-as-you-go pricing
- Non-expiring traffic for maximum flexibility
- HTTP/HTTPS and SOCKS5 support
- Excellent value for money and high bulk discounts
Setting Up a BitBrowser Proxy With IPRoyal
For visual learners, watch this video:
To get started with BitBrowser, get the appropriate version from the Download page. Once you run it for the first time, create an account.
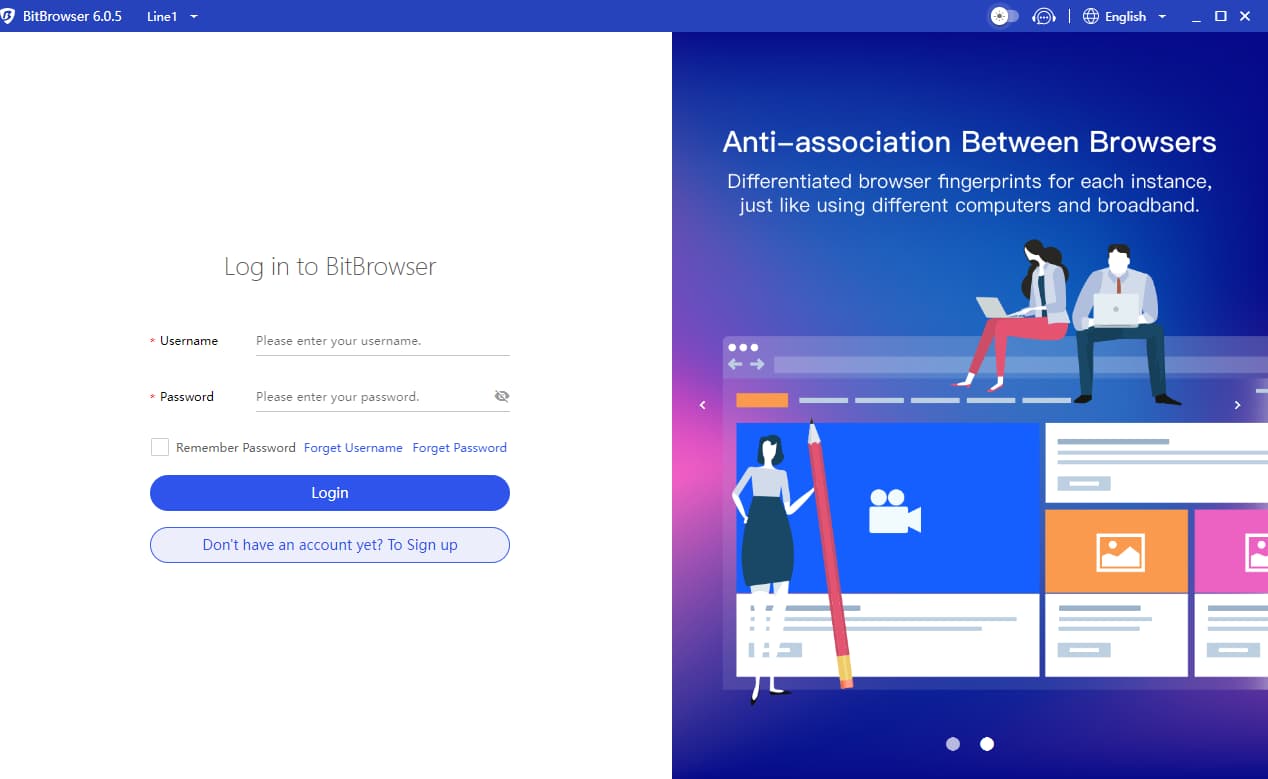
After you log in, you’re ready to start using BitBrowser with their free plan (limited to 1 user and 10 browser profiles).
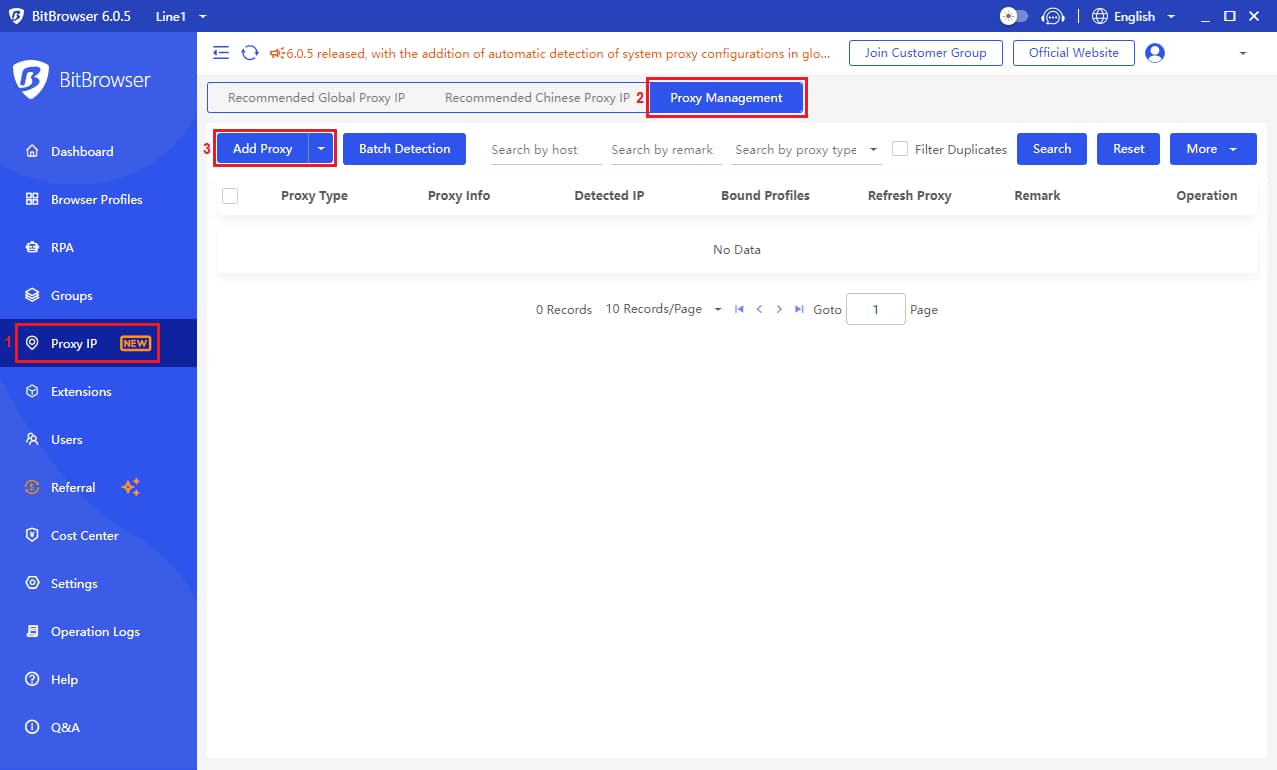
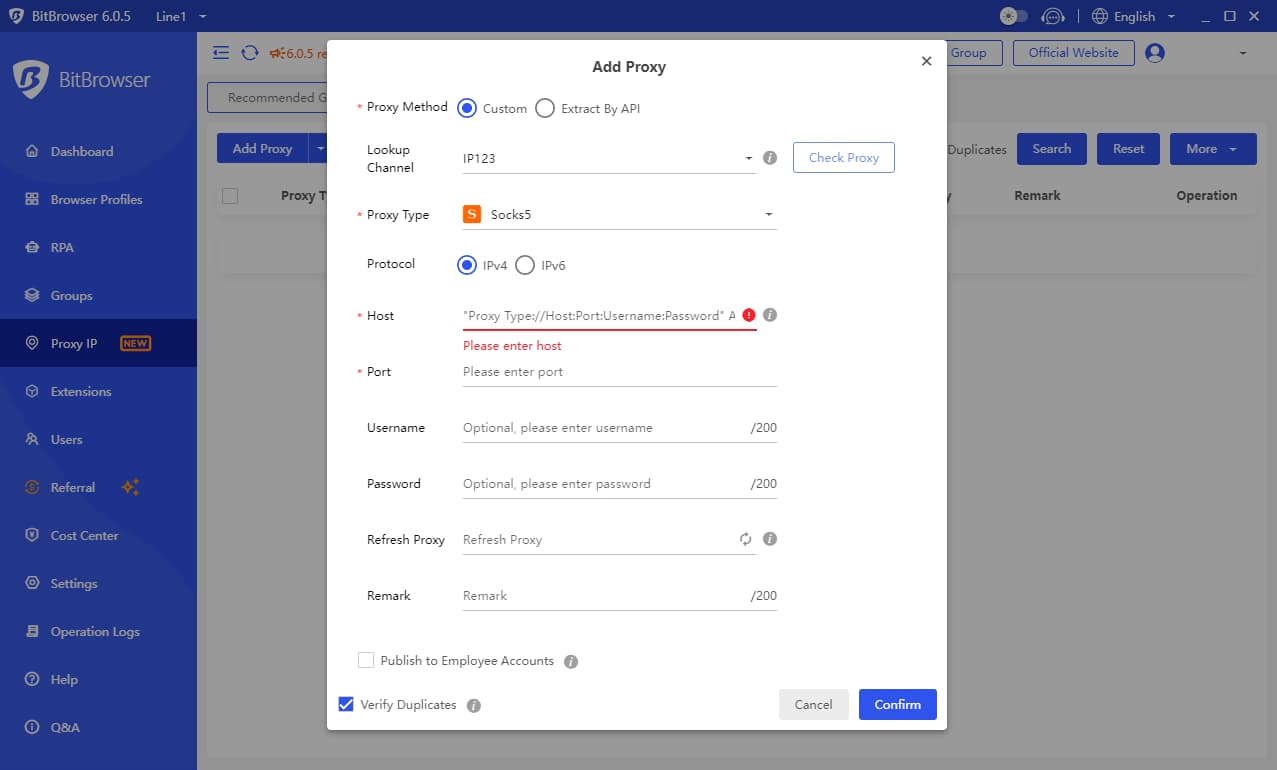
To set up your proxies, select Proxy IP (1) from the quick-access menu. Click on Proxy Management (2) and then the Add Proxy (3) button.
You’ll see a new window that allows you to enter your proxy credentials.
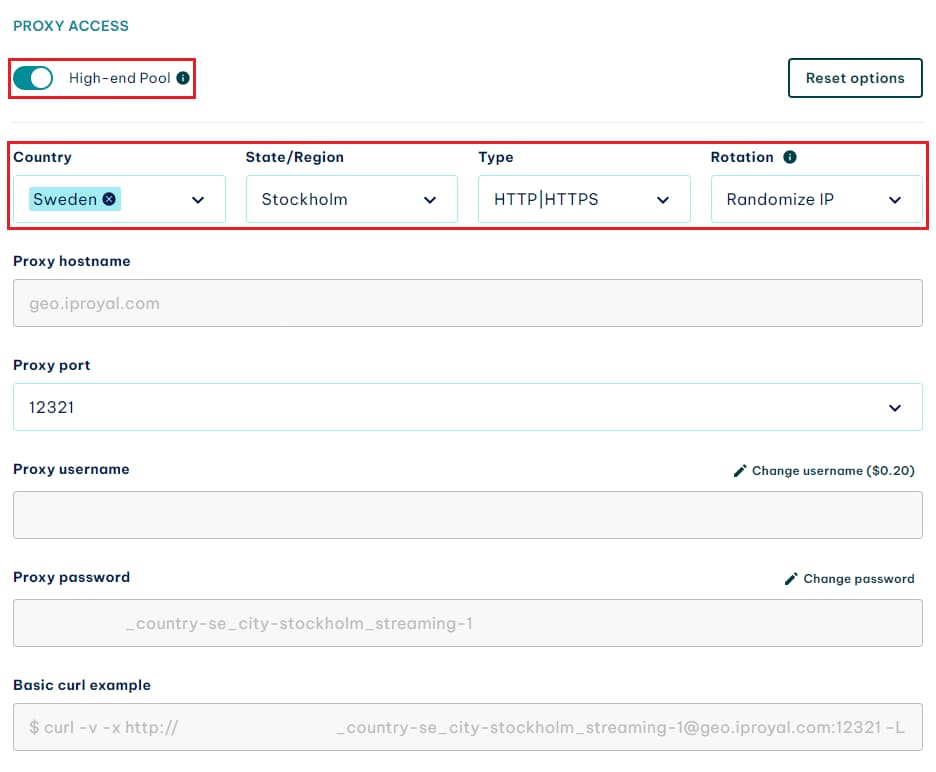
Now, it’s time to visit the IPRoyal dashboard and configure your proxies. We’ll use high-end IPs from Stockholm, Sweden, with IP rotation on each request using HTTP/HTTPS protocol.
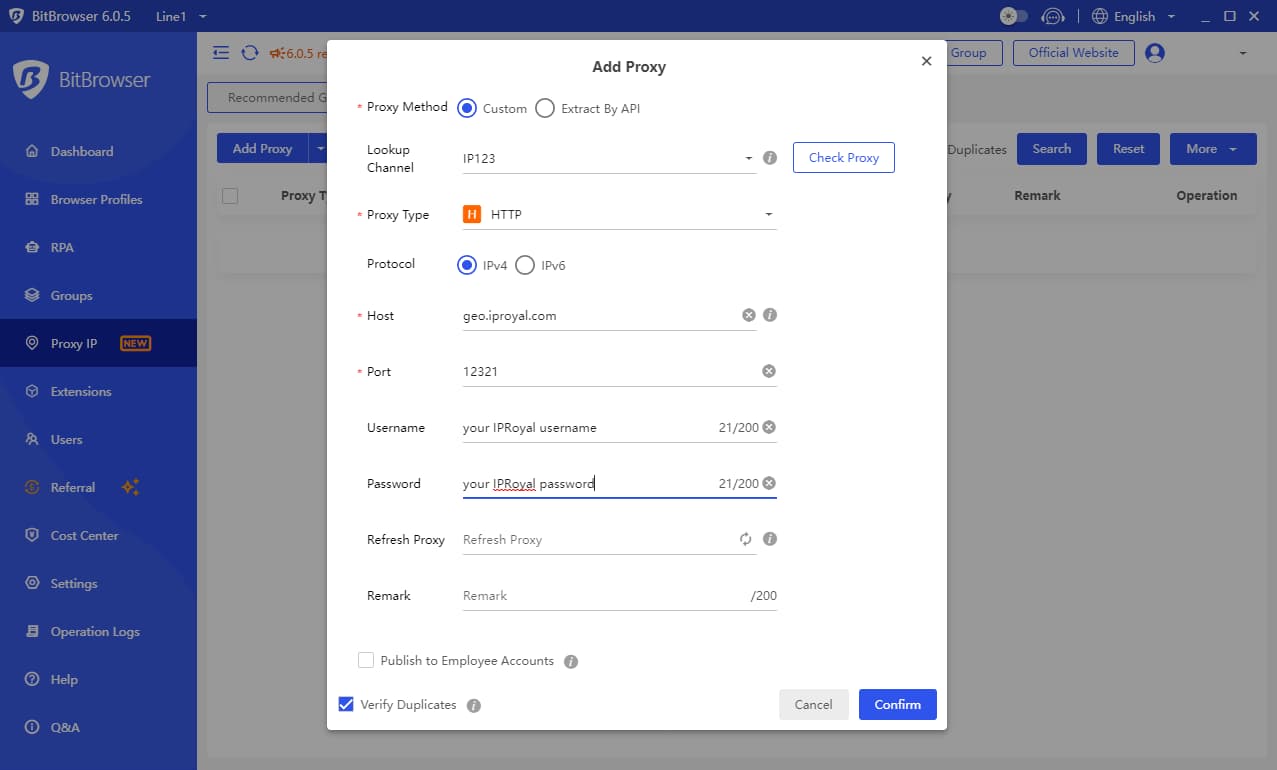
Copy your credentials from the IPRoyal dashboard over to BitBrowser as follows. Don’t forget to select the correct proxy type.
You can click the Check Proxy button to verify your proxy works correctly and get some additional information.
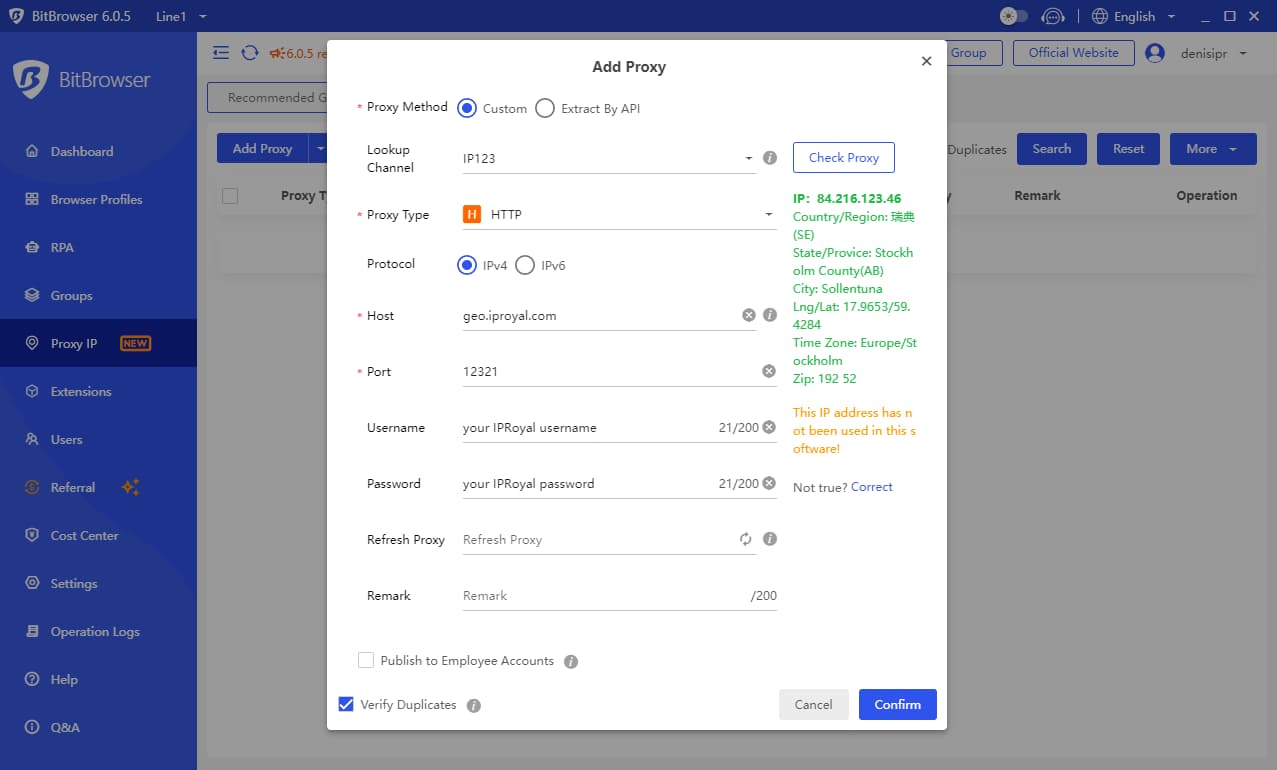
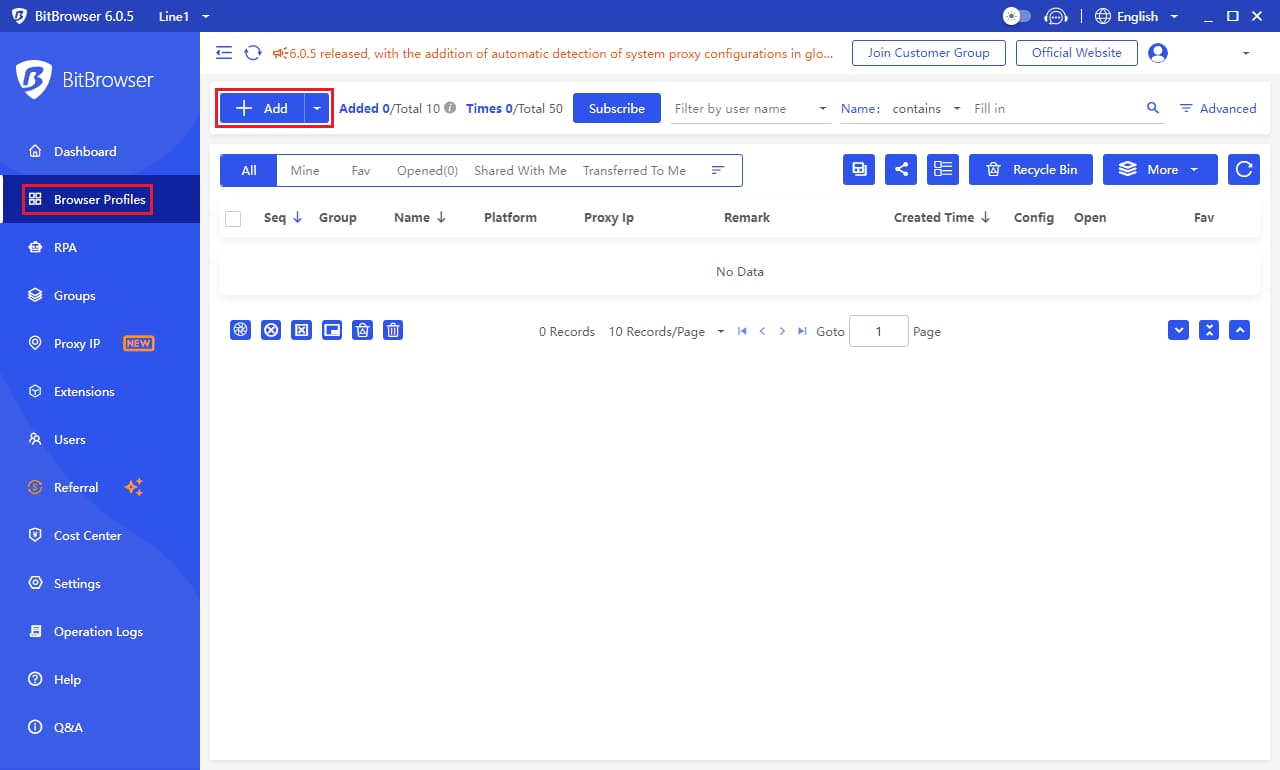
Finally, click Confirm to save your proxy settings. Now, it’s time to create a browser profile. Select Browser Profiles from the quick-access menu and click the Add button.
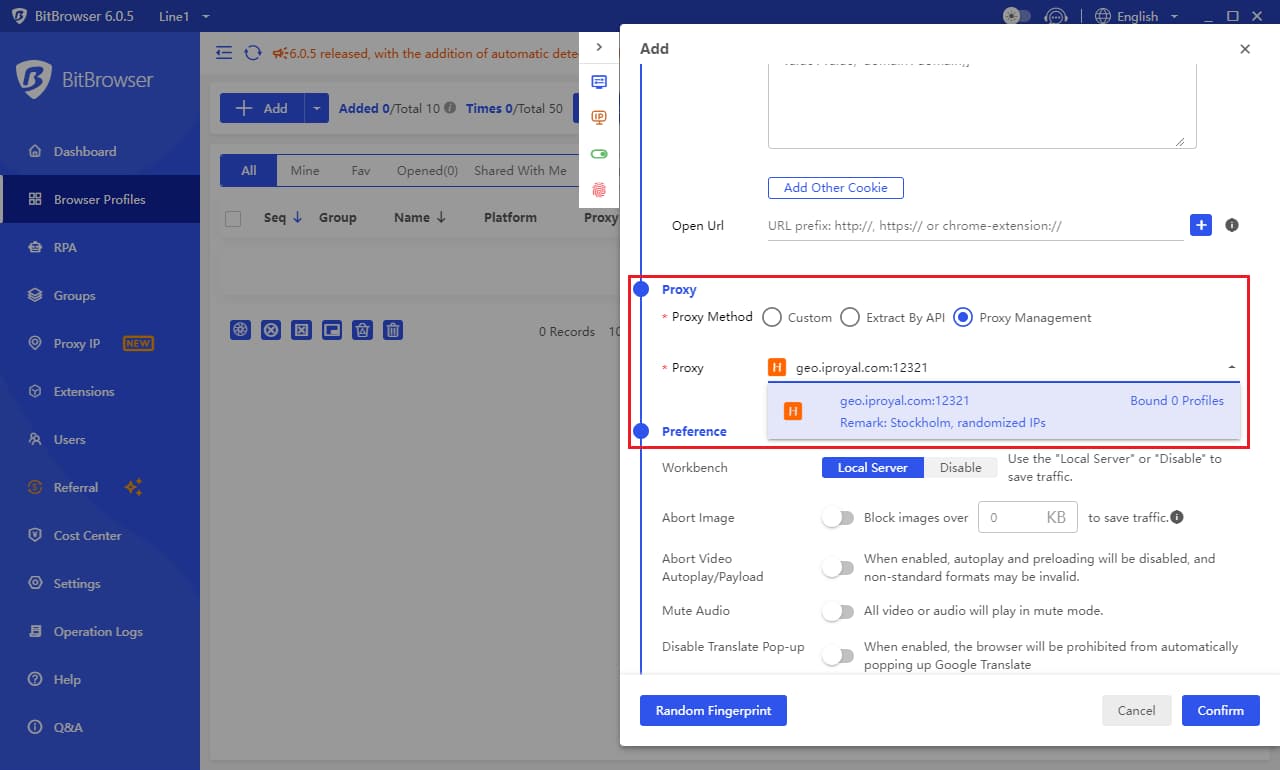
Scroll down to the Proxy section. Select Proxy Management and choose your saved proxy settings.
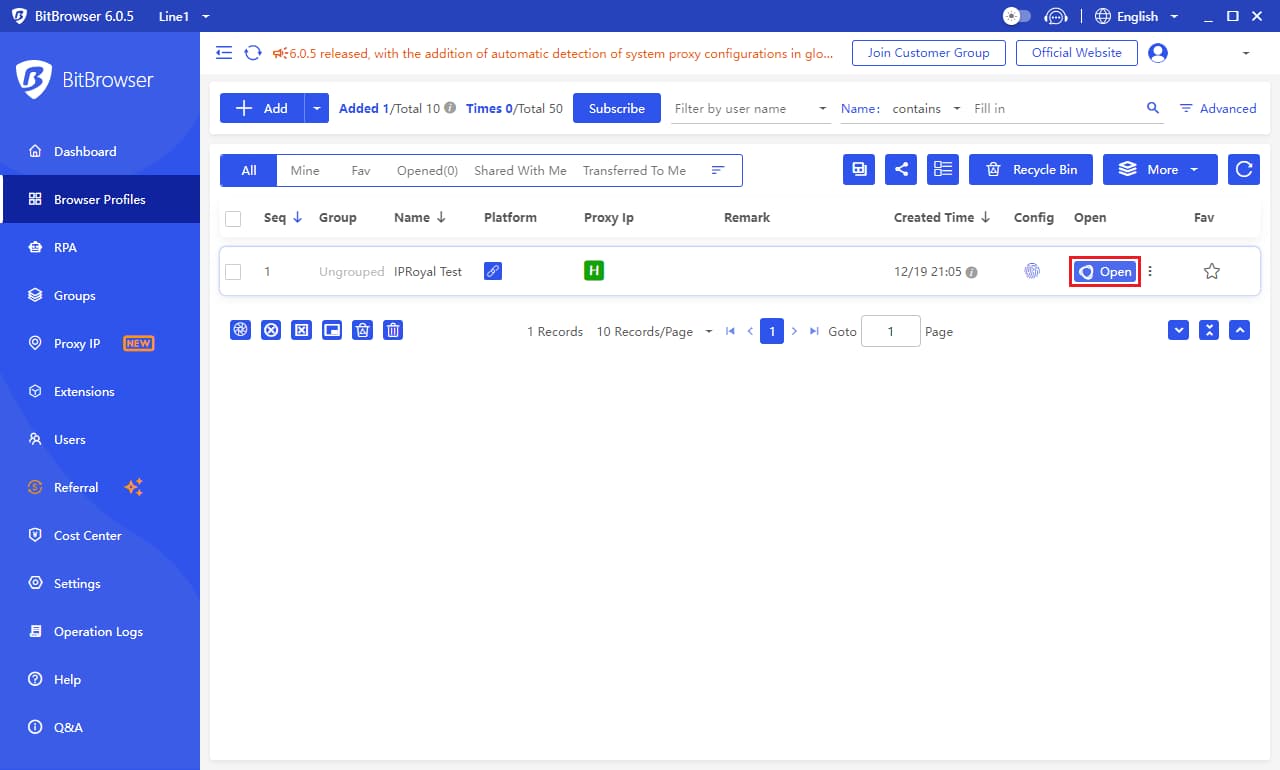
Click Confirm when done. Your profile will be saved, and you’ll return to the BitBrowser main window. Click the Open button to open a browser window using your newly created profile.
A new browser window will open, showing details about your current IP address and the associated location, time zone, ZIP code, and language. You’ll also be able to see additional information about your browser profile.
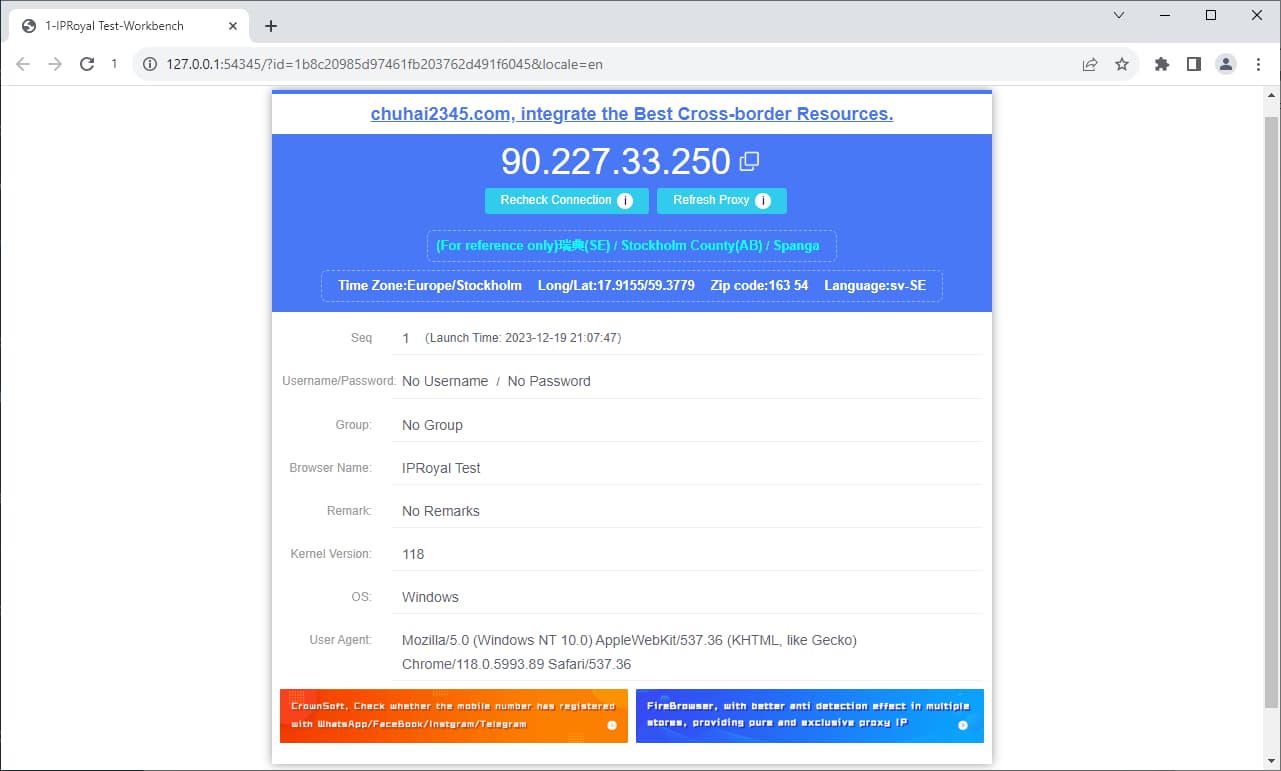
Congratulations, your private browser is ready to use!
Final Thoughts
BitBrowser’s customization options are quite impressive. It offers features we haven’t seen anywhere else, like informing you if you used a specific IP address with the software previously. On top of that, the free version has no time limits. Instead, you’re limited to one user and 10 different profiles, which is more than enough to test everything BitBrowser has to offer.
