'/%3e%3cellipse%20opacity='0.34'%20cx='327.5'%20cy='339'%20rx='264.5'%20ry='264'%20fill='url(%23paint1_linear_12724_35442)'/%3e%3cdefs%3e%3clinearGradient%20id='paint0_linear_12724_35442'%20x1='327'%20y1='-2.524e-06'%20x2='327'%20y2='389.286'%20gradientUnits='userSpaceOnUse'%3e%3cstop%20stop-color='%2327D9E5'/%3e%3cstop%20offset='0.927406'%20stop-color='%23004047'%20stop-opacity='0'/%3e%3c/linearGradient%3e%3clinearGradient%20id='paint1_linear_12724_35442'%20x1='328.02'%20y1='74.7771'%20x2='328.02'%20y2='395.312'%20gradientUnits='userSpaceOnUse'%3e%3cstop%20stop-color='%2327D9E5'/%3e%3cstop%20offset='0.927406'%20stop-color='%23004047'%20stop-opacity='0'/%3e%3c/linearGradient%3e%3c/defs%3e%3c/svg%3e)

Web scraping is easier when you have the right tools for it. But even with a good setup, websites can still block you if you’re not careful. To make your scraping more efficient, you may want to use proxies with your Helium Scraper.
What is Helium Scraper
Helium Scraper is a visual web scraping tool that allows you to collect data without needing to write any code. You can click elements in a browser window to select them and then run scraping tasks to extract the data that you need.
It allows you to:
- Use point-and-click selectors to target web elements.
- Handle pages that require scrolling or clicking “Next” to load more items.
- Export data into CSV, Excel, XML, JSON, or SQLite.
- Build workflows that automate scraping tasks.
A Helium Scraper project might involve tracking prices, gathering reviews, or pulling listings from online directories. It’s a solid tool, especially for beginners or people with no coding experience.
Why Use Proxies With Helium Scraper
When scraping websites, your IP address can get flagged or blocked. It happens when you send too many requests coming from one source. Using proxies with Helium Scraper lets you change IPs at will, minimizing any related blocks.
Using proxies with Helium Scraper allows you to:
- Prevent bans by using rotating IP addresses.
- Cut down on CAPTCHAs and rate limits.
- Act like different users from different regions.
Proxies are especially helpful for geo-targeted scraping. For example, if you want to collect data from a site that shows different content in France than it does in the US, you’ll need to appear as if you’re browsing from France.
There are two main types of Helium Scraper proxies you should consider:
- Residential proxies. These come from physical household devices and are harder to detect, which makes them one of the best options for websites that block traffic from data centers.
- Datacenter proxies. These come from servers. They’re cheaper, faster, but are a lot easier to block.
Choose residential proxies when you’re scraping more complex sites or the ones that have strong anti-bot measures. Use datacenter proxies when speed matters more than stealth.

Step-by-Step Proxy Integration With Helium Scraper
Helium Scraper proxy integration is rather straightforward. Here’s how you can do it.
1. Install Helium Scraper
First, download the app from the official site. Once installed:
- Launch the app.
- Start a new Helium Scraper project.
- Choose a site you want to scrape and load it in the browser panel.
2. Access Proxy Settings in Helium Scraper
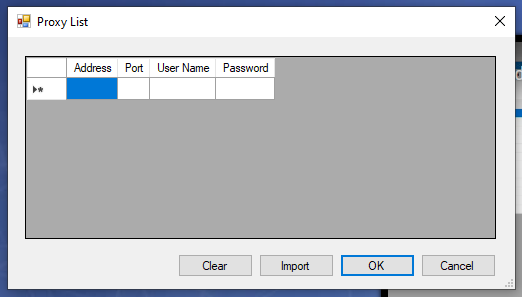
It doesn’t have a big “Add Proxy” button in its interface, so you’ll need to navigate via settings. You can open proxy settings in Helium like this:
1. Go to “File”.
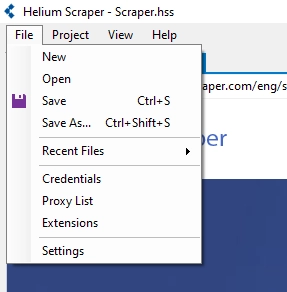
2. Select “Proxy List”.
You will find fields for entering your proxy IP, port, username, and password if needed. If you have a Helium Scraper proxy list, you can also load it here for rotation.
3. Once you finalize setting up your proxies, don’t forget to check if proxies are enabled in Helium. Follow these steps:
4. Go to “Project”.
5. Then “Settings”.
6. Scroll to find “Enable Proxies”.
7. Change to “True” if needed.
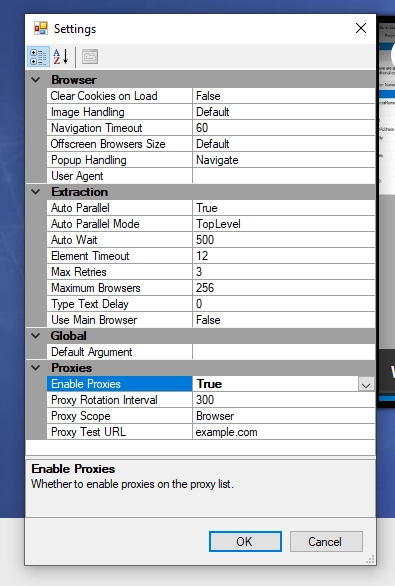
8. Click “OK” to save.
3. Testing a Single Proxy
To verify your Helium proxy integration, go to a website that shows IP addresses. Use Helium Scraper’s main browser to do it. If the IP has changed, you’re good to go.