'/%3e%3cellipse%20opacity='0.34'%20cx='327.5'%20cy='339'%20rx='264.5'%20ry='264'%20fill='url(%23paint1_linear_12724_35442)'/%3e%3cdefs%3e%3clinearGradient%20id='paint0_linear_12724_35442'%20x1='327'%20y1='-2.524e-06'%20x2='327'%20y2='389.286'%20gradientUnits='userSpaceOnUse'%3e%3cstop%20stop-color='%2327D9E5'/%3e%3cstop%20offset='0.927406'%20stop-color='%23004047'%20stop-opacity='0'/%3e%3c/linearGradient%3e%3clinearGradient%20id='paint1_linear_12724_35442'%20x1='328.02'%20y1='74.7771'%20x2='328.02'%20y2='395.312'%20gradientUnits='userSpaceOnUse'%3e%3cstop%20stop-color='%2327D9E5'/%3e%3cstop%20offset='0.927406'%20stop-color='%23004047'%20stop-opacity='0'/%3e%3c/linearGradient%3e%3c/defs%3e%3c/svg%3e)
Zapier lets you connect apps and automate tasks without writing any code. However, for use cases like scraping, you may need to change your IP often to avoid blocks.
To do that, you can use proxies. Integrating IPRoyal’s proxies with Zapier means that you’ll use ethically-sourced IPs that are built for scale and speed.
Why Use Proxies With Zapier?
Automation tools like Zapier are fast, but sometimes that’s not a good thing. Websites usually don’t like a lot of traffic coming from one place, and they start flagging or outright blocking access. To minimize the chances of that happening, you need proxies.
A proxy hides your real IP address, helping you stay private, reducing the amount of requests coming from a single IP, and letting you pick any location.
In short, with proxies, you get better privacy, additional security, more reliable scraping, and smoother workflows overall.
Understanding How Zapier Connects to Web Apps
Zapier works by linking apps together. It uses “Zaps”, which are like tiny robots that perform actions for you.
Each “Zap” has a trigger and an action. Sometimes it sends or pulls information using API keys; in other cases, it may simply perform an action in an app.
When data moves through these steps, that’s where you can add a proxy. You can add it indirectly, for example, by routing your requests through a custom webhook, external server, or middleware that uses the proxy when Zapier connects to a web app.
Step-by-Step: Setting Up a Proxy for Zapier
Before you start, make sure you have a Zapier account, a proxy, and your proxy login information (IP, port, username, password).
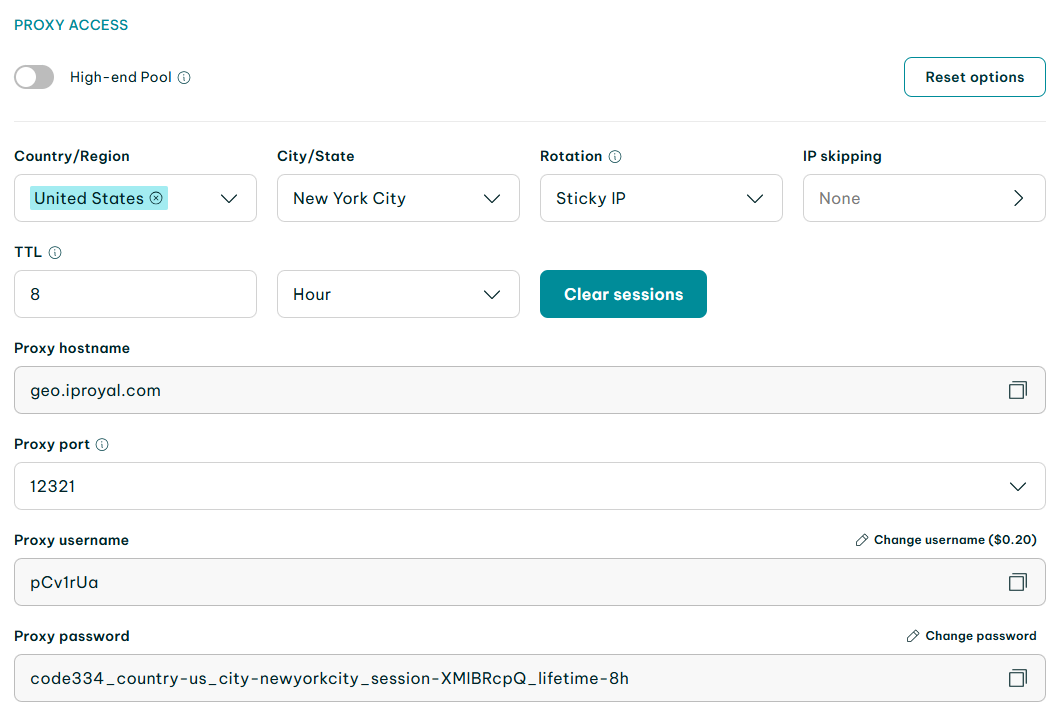
Step 1: Get Your Proxy Info From IPRoyal
- Log in to your IPRoyal dashboard.
- Copy the proxy hostname, proxy port, proxy username, and proxy password.
- Keep those next to you as you’ll need them soon.
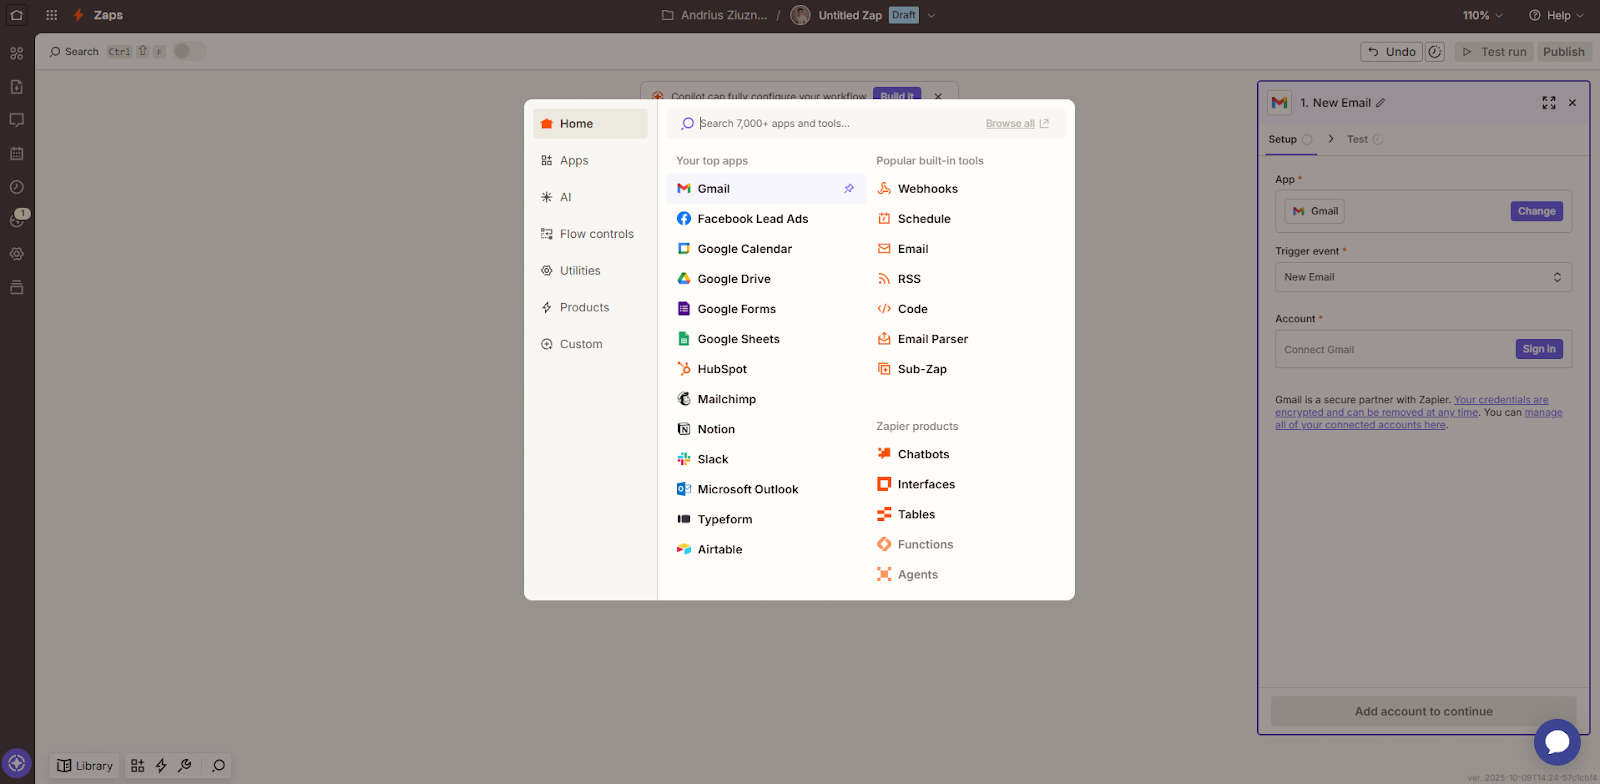
Step 2: Open Zapier and Create a Zap
- Log in to your account, click '+ Create', and select 'Zap'.
- Choose a trigger*. For example:
- Click on 'Trigger'.
- Select 'Gmail'.
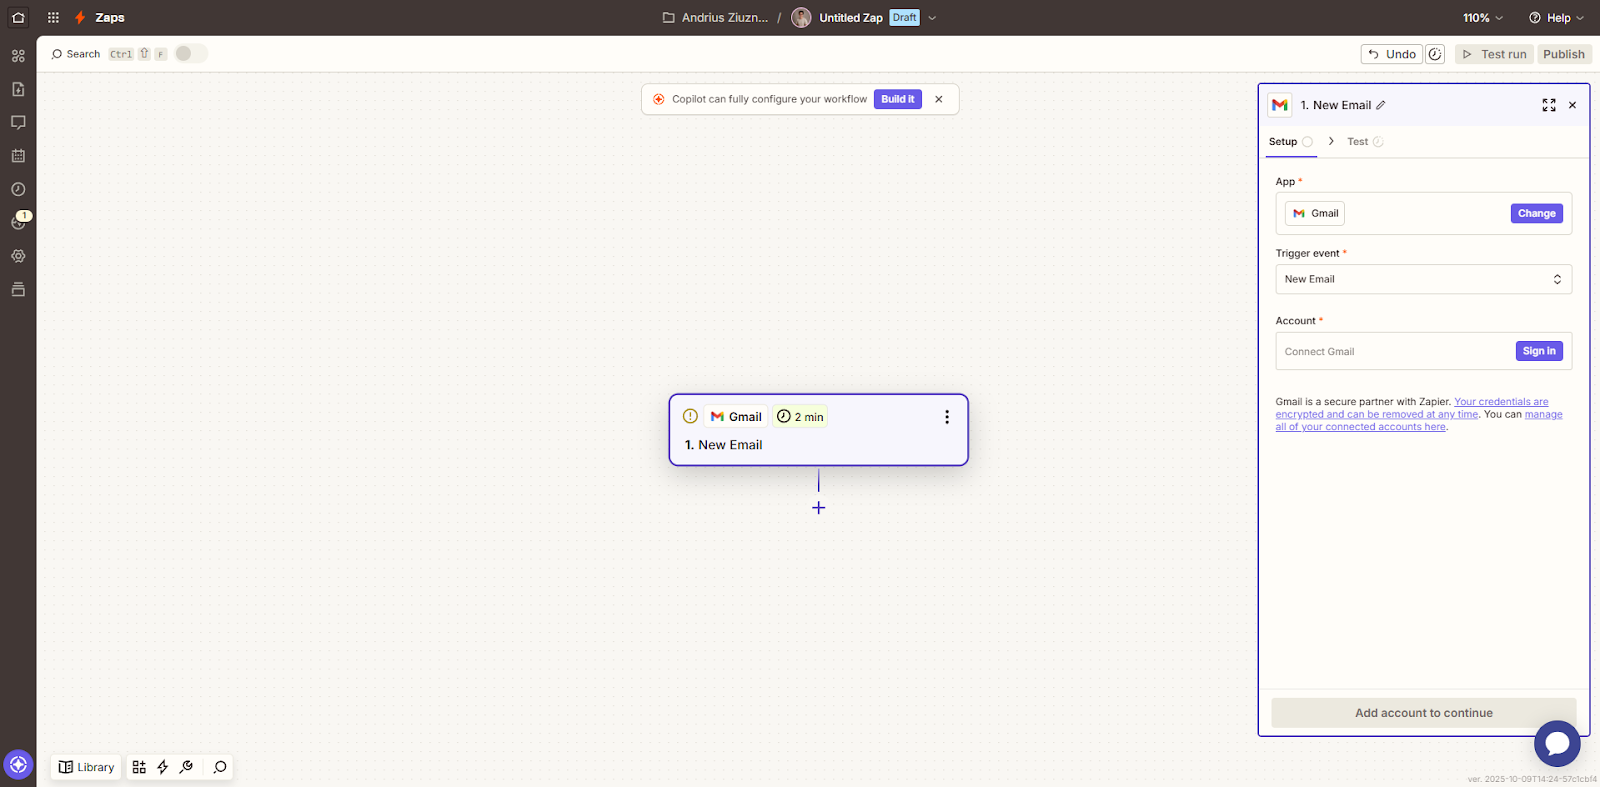
- On the right-hand side, click the 'Trigger event' dropdown.
- Choose 'New Email'.
- Connect your Gmail account.
*The trigger can be anything you want it to be, the 'New Email' trigger is just used as an example.
Step 3: Add a “Webhooks” Action
- After your trigger is ready, there’s a next step already added called 'Action'. If it’s not added, click the '+' symbol.
- Click on 'Action' and choose 'Webhooks'.
- On the right-hand side, click the 'Action event' dropdown.
- Select 'Custom Request' and click 'Continue'.
- Pick your method (usually GET or POST).
- Paste the URL or endpoint you want to reach in the 'URL' field.
- Leave 'Data Pass-Through' as 'False', unless your server expects to receive the same body as Zapier gets from the trigger step.
- If you’re using GET, leave the 'Data' field blank. If you’re using POST, enter your payload data in JSON format.
- Leave 'Unflatten' as a 'Yes' to keep the nested data structured right.
- You can leave 'Basic Auth' blank, unless the endpoint uses HTTP Basic Authentication.

Step 4: Add Residential Proxies
- Click the '+' button and select 'Residential Proxies' in the app selection.
- Choose 'Get Proxies' as your action event.
- Under 'Account', click 'Sign in' and enter your API key.
From there, follow the instructions, and you should be able to set up a residential proxy directly in Zapier.
Alternative Proxy Step: Use an API Gateway
If the integrated Zapier’s proxy method doesn’t work as intended, a workaround is to use an API gateway server (like a small script hosted somewhere) that connects through your proxy.
Here’s how you can do it:
- Make a server (or use a cheap cloud function on Replit, Vercel, or Glitch).
- Your server script makes requests using IPRoyal proxies.
- In Zapier, send the webhook to your server URL, not the final API.
This way, your server handles the proxy operations behind the scenes. It acts as a middleman between Zapier requests and the final endpoint.
Best Practices for Secure Automation
- Use rotating residential proxies. They switch IPs often and keep your requests looking natural.
- Skip free or public proxies. They’re slow, risky, and could result in you losing data or getting blocked.
- Check logs. Look at what’s working and what’s not. Some services may hit rate limits if you send too much too fast.
- Verify API keys. If your API keys are incorrect, you’ll encounter connectivity issues.

Why Use IPRoyal Proxies With Zapier
IPRoyal’s proxies will help you minimize the chances of getting blocked while conducting large-scale scraping projects. All of our proxy servers are ethically sourced, which makes them more reliable and trustworthy.
You’ll easily find all your credential information in the dashboard, where you can also track the usage and number of your proxy servers. If anything comes up, our 24/7 support will be ready to help you anytime.