Configuring a proxy server profile can be difficult, especially if you are not tech-savvy. Imagine a situation where you're working with multiple social media accounts, each with its own set of proxy servers. Will you manually change the proxy details every time you switch between accounts? We don't have to tell you that this is inefficient and impractical.
Proxy SwitchyOmega (now ZeroOmega) is an easy-to-use Chrome and Firefox browser extension that allows you to manage proxy settings efficiently. In this guide, you'll learn how Proxy Switchy works and how to configure this tool on your device.
For visual learners, watch this video:
How Does SwitchyOmega Work?
Proxy SwitchyOmega works using a simple yet powerful premise. Instead of modifying your browser network settings whenever you need to switch to an alternate address, the extension allows you to create different browser profiles using multiple proxies.
That way, you can just switch between different proxies with a few clicks every time you need to use a different network.
Here are some of the key features of the Proxy SwitchyOmega (now ZeroOmega) extension:
- Profile creation
You can create multiple profiles, each with specific proxy configurations like HTTP, HTTPS, or SOCKS5 proxies. Each proxy profile has different settings, such as the server address, port number, and authentication details.
- Rule-based switching
You can also define rules that determine which proxy profile should be used on your preferred browser. For instance, you can configure a specific proxy setting to be applied when visiting specific URLs and domains.
- Quick switching
Proxy SwitchyOmega also allows you to quickly switch between any proxy profile directly from the menu on your browser.
- Integrated authentication
The Proxy SwitchyOmega extension supports both username/password authentication and IP whitelisting, ensuring the profiles you create are only accessible to authorized users.
Despite being completely free and open-source, Proxy SwitchyOmega came about as a replacement for other similar tools. Think of it as the modern version of SwitchySharp, FoxyProxy, and ProxySwitchy.
How to Set Up SwitchyOmega in Less Than a Minute
Ready to improve your proxy experience? Here is how to configure the SwitchyOmega extension:
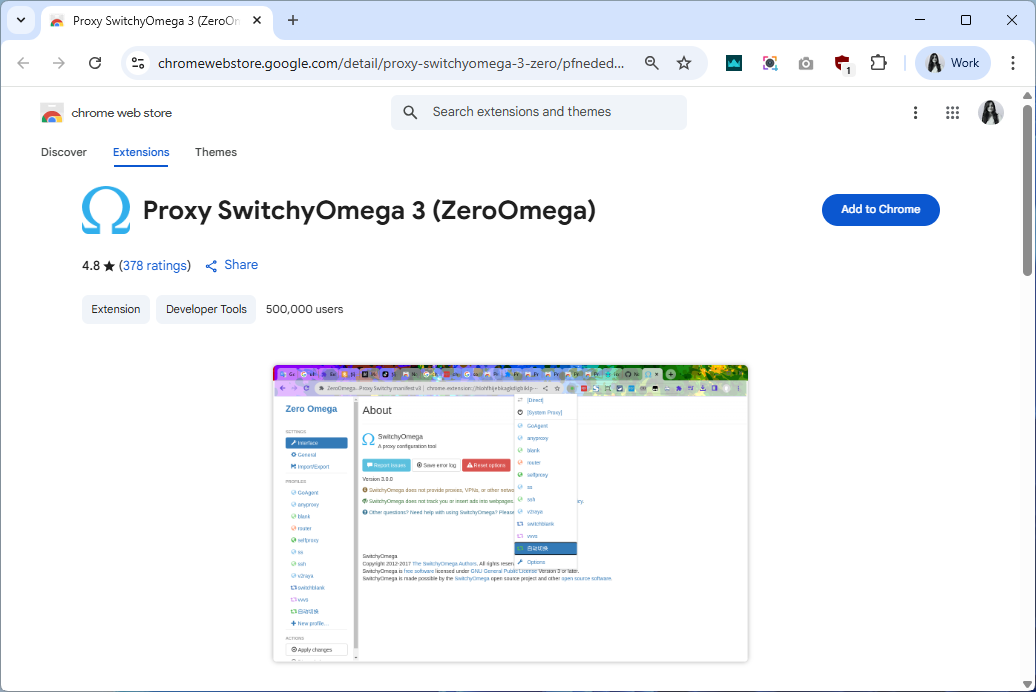
Step 1: Download and install SwitchyOmega (now ZeroOmega) from the Chrome Web Store or Firefox Add-ons, depending on your preferred browser.
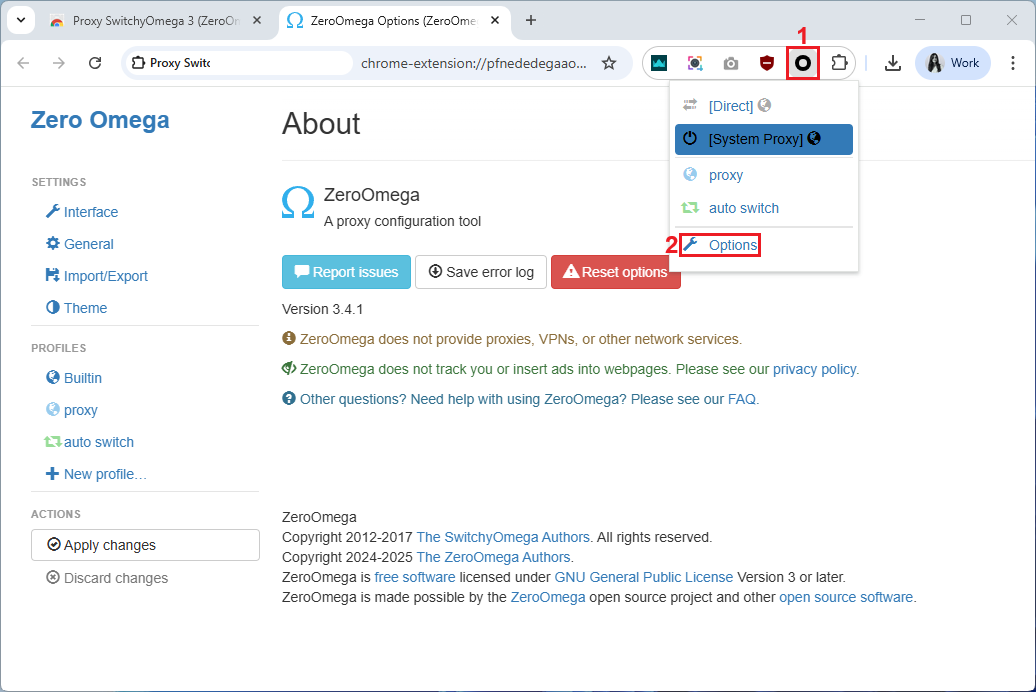
Step 2: Once installed, click the SwitchyOmega icon (1) in your browser’s extension bar and select Options (2) to access the configuration page.
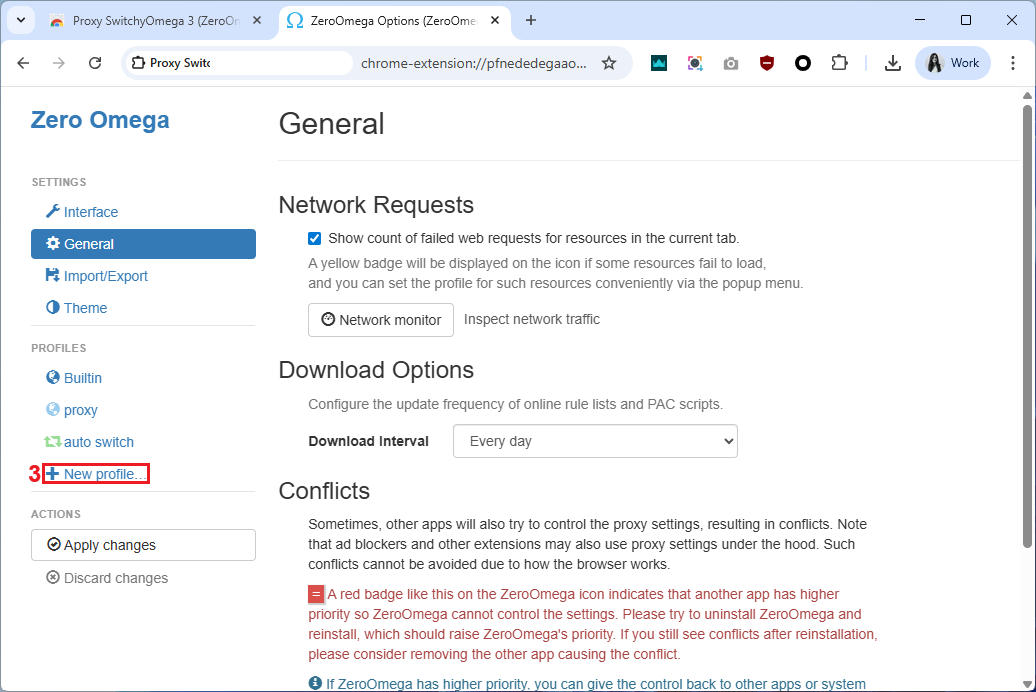
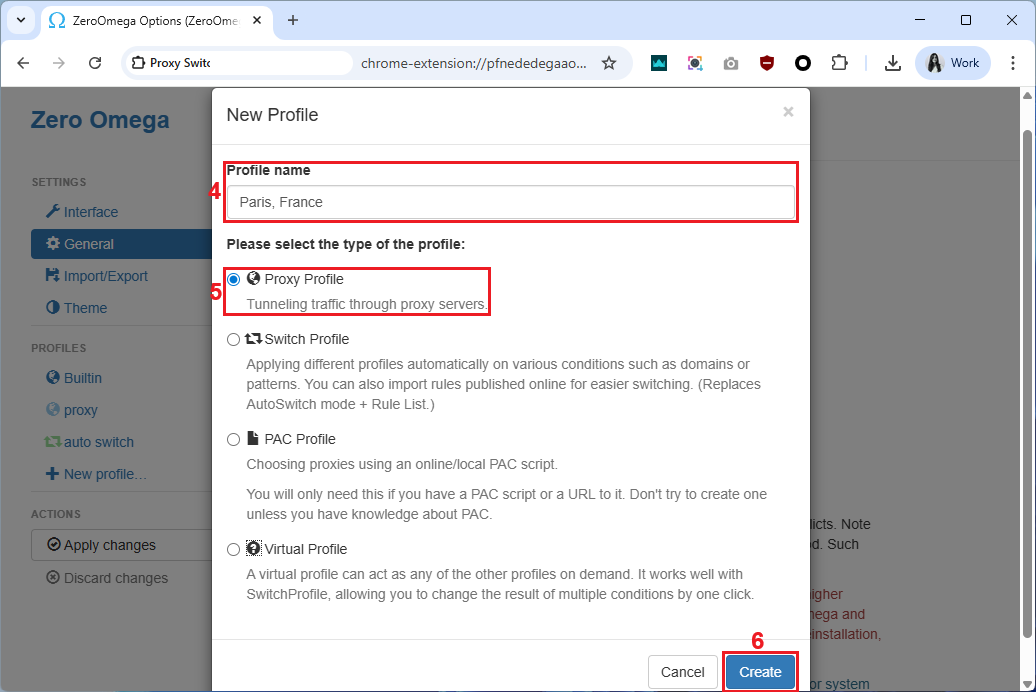
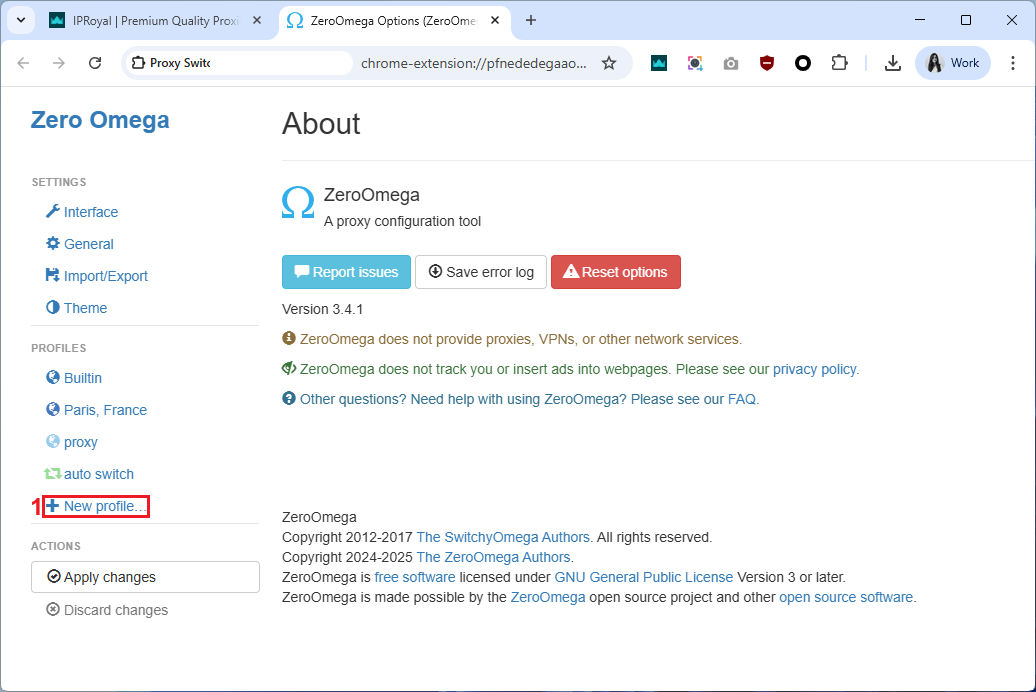
Step 3: On the Options page, click New Profile button (3) in the sidebar.
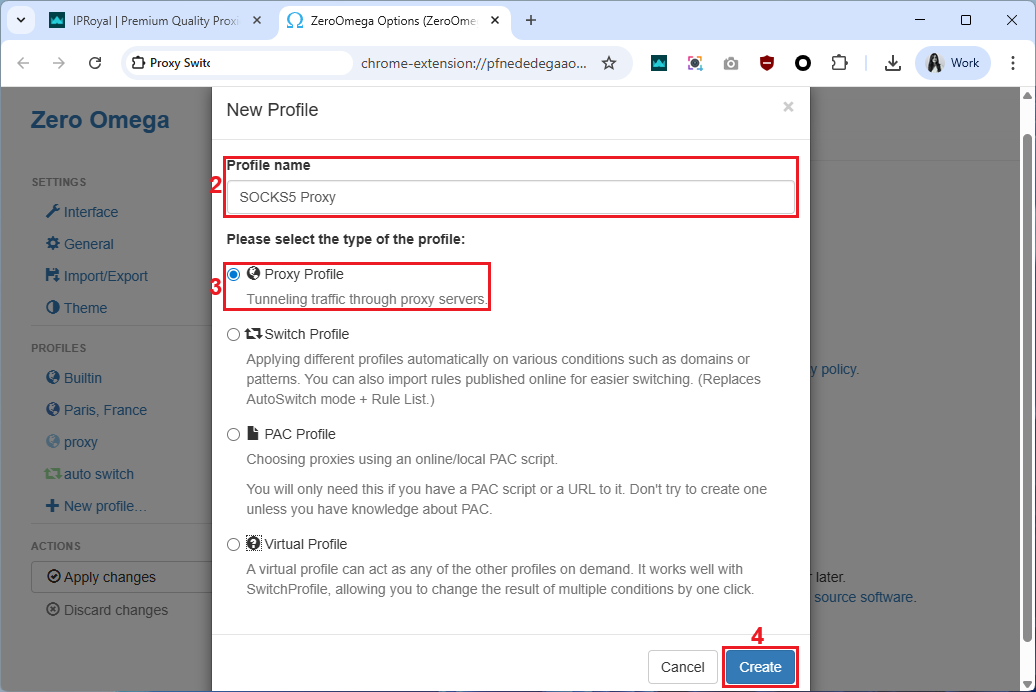
Step 4: Enter the profile name (4) and select the type of profile (5). We want to add a proxy, so we’ll use Proxy Profile (5). Click the Create (6) button.
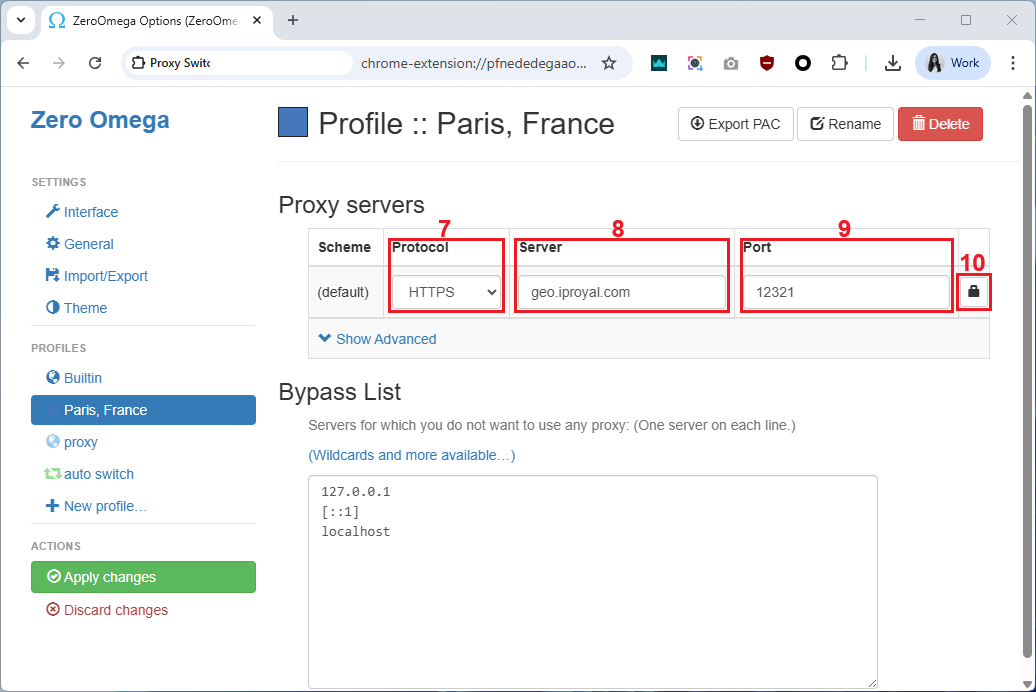
Step 5: On the newly created profile, enter the proxy details, including the protocol (7), server (8), and port (9). If your proxy requires authentication, click the lock icon (10).
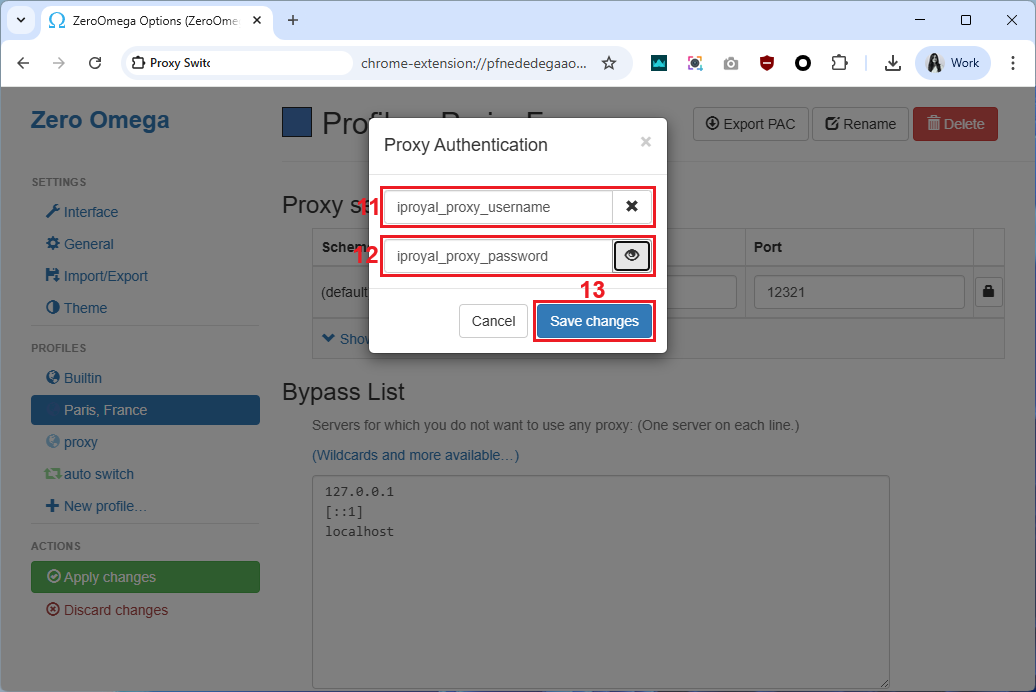
Step 6: Add your proxy username (11) and password (12) in the appropriate fields and click the Save changes (13) button.
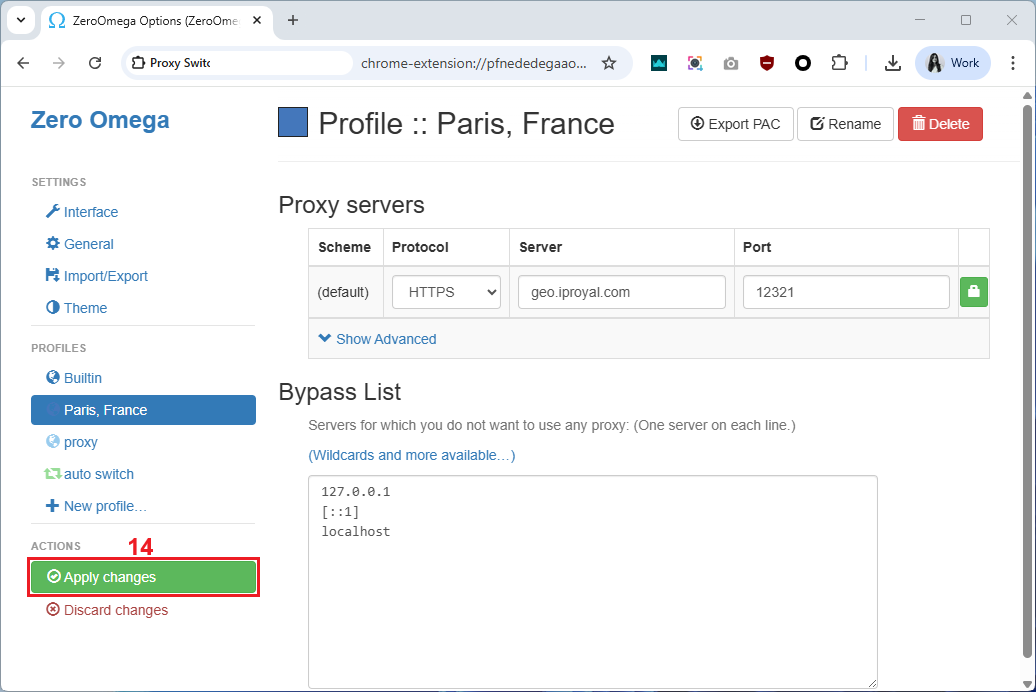
Step 7: Click Apply Changes (14) to save your profile.
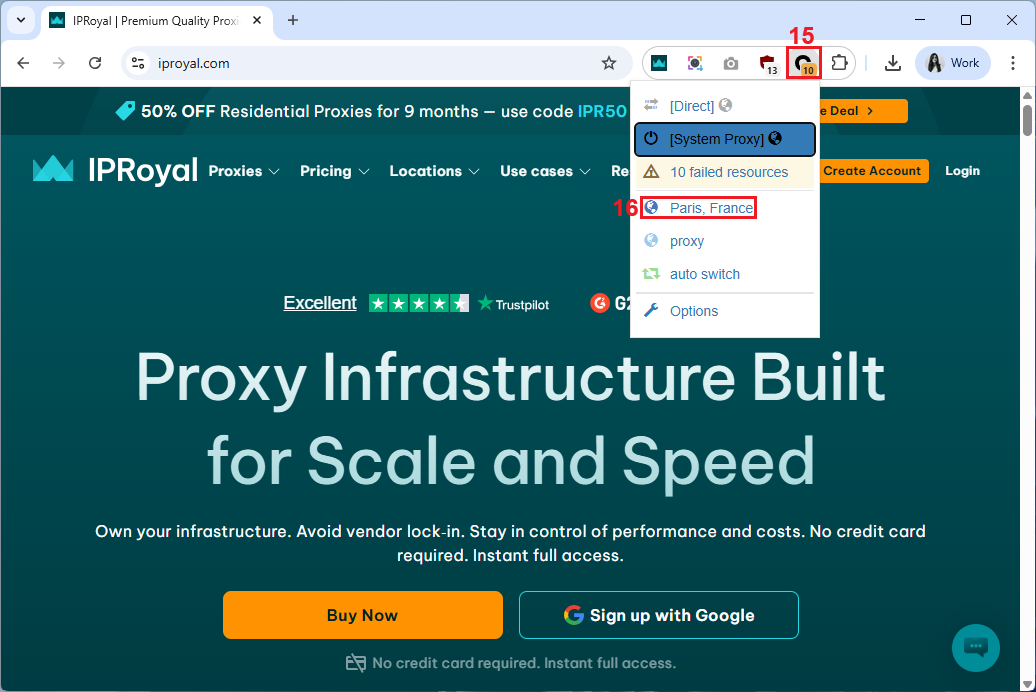
Step 8: To start using your proxy, click the Proxy SwitchyOmega icon (15) and select the profile you created (16) from the list.
However, sometimes things don’t work like they’re supposed to. If you encounter a roadblock, here are some methods you can try:
- Proxy connection issues. Double-check your proxy configuration (wrong IP, port, or protocol can fail to make the connection).
- Authentication fails. Try re-entering your credentials, as some proxies reset tokens after some time.
- Internet issues. Try switching back to “Direct” mode in Proxy SwitchyOmega to see if it’s the proxy that’s causing the issues.
- The browser still uses the old IP. Clear your browser cache or try going to incognito mode.
If problems continue, test your proxy server on a different browser or device. Sometimes the proxy can be the culprit, not the tool.
SOCKS5 Proxy Configuration
SOCKS5 works a bit differently than HTTP(S). It handles all kinds of traffic, not just web pages. It’s a better option for P2P, FTP, SMTP, and other protocols.
Here’s how you can add SOCKS5 proxy configuration in Proxy SwitchyOmega (now Zero Omega):
1. Open the Proxy SwitchyOmega main extension page and click ‘New profile’ (1).
2. Enter the profile name (2), choose the profile type (3), and click the ‘Create’ button (4).
3. Under ‘Protocol’, pick SOCKS5 (5), enter your proxy server IP (6) and port (7), and click ‘Apply changes’ (8) to save your profile.
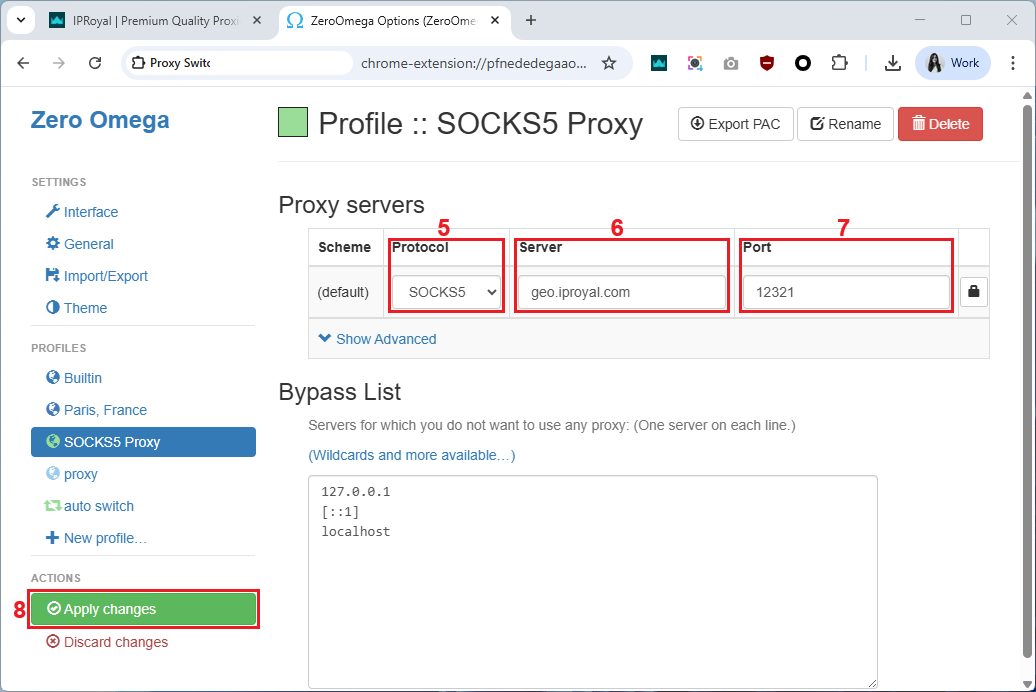
Chrome doesn’t natively support SOCKS5 proxy authentication, so you can’t add a proxy username and password. To circumvent this limitation, use IP whitelisting.
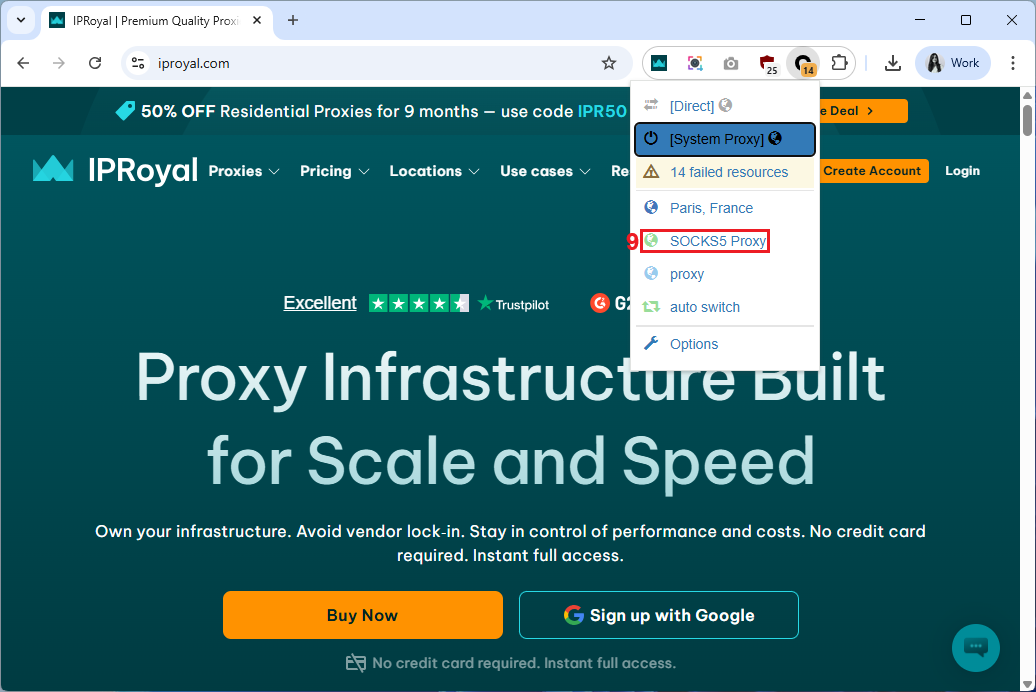
4. Pick this profile (9) in the extension to start using your SOCKS5 connection.]
SOCKS5 vs HTTP(S)
SOCKS5 handles all traffic types and it’s better for P2P, FTP, SMTP, RTSP, and other protocols. On the other hand, HTTP(S) works only with websites and it’s great for normal browsing in general.
For example, if you want to access geo-restricted content, use P2P traffic, or direct socket connections, you’d be better off using SOCKS5.
Final Thoughts
Although it's a great manager, it's important to note that Proxy SwitchyOmega (now ZeroOmega) does not provide proxies. As always, you must ensure you're using top-quality proxies regardless of your needs.
You're better off steering clear of free proxies because these tend to be unreliable and inefficient. Switch to our to enjoy reliable, fast, consistent speeds and performance, no matter the use case.