Mozilla Firefox Proxy Add-on Quick-Start Guide

This guide will introduce you to the IPRoyal Mozilla Firefox Proxy Add-on. It’s a free, 100% secure browser add-on that enables you to switch between all your proxy profiles seamlessly. We will cover its key advantages, features, installation, and usage.
Advantages of Using the Mozilla Firefox Proxy Add-on
Here are the key advantages of our Proxy Add-on:
- All-in-one proxy management
Create different profiles for different proxies and switch between them as needed. You can create as many profiles as needed for different types of proxies, locations, and more.
- One-click proxy changing
Switch between your proxy profiles with a single click. Surf the web without compromising your privacy and without changing system settings each time you need a new IP.
- Easy profile customization
Create a profile for a single proxy, or use different proxies for specific traffic types - HTTP, HTTPS, and FTP. You can also use a fallback proxy to ensure uninterrupted internet access at all times.
- High compatibility
Use any type of proxy from any provider. If you’re an IPRoyal client, you can whitelist your IP address in the dashboard and not worry about usernames and passwords.
How to Install the Mozilla Firefox Proxy Manager
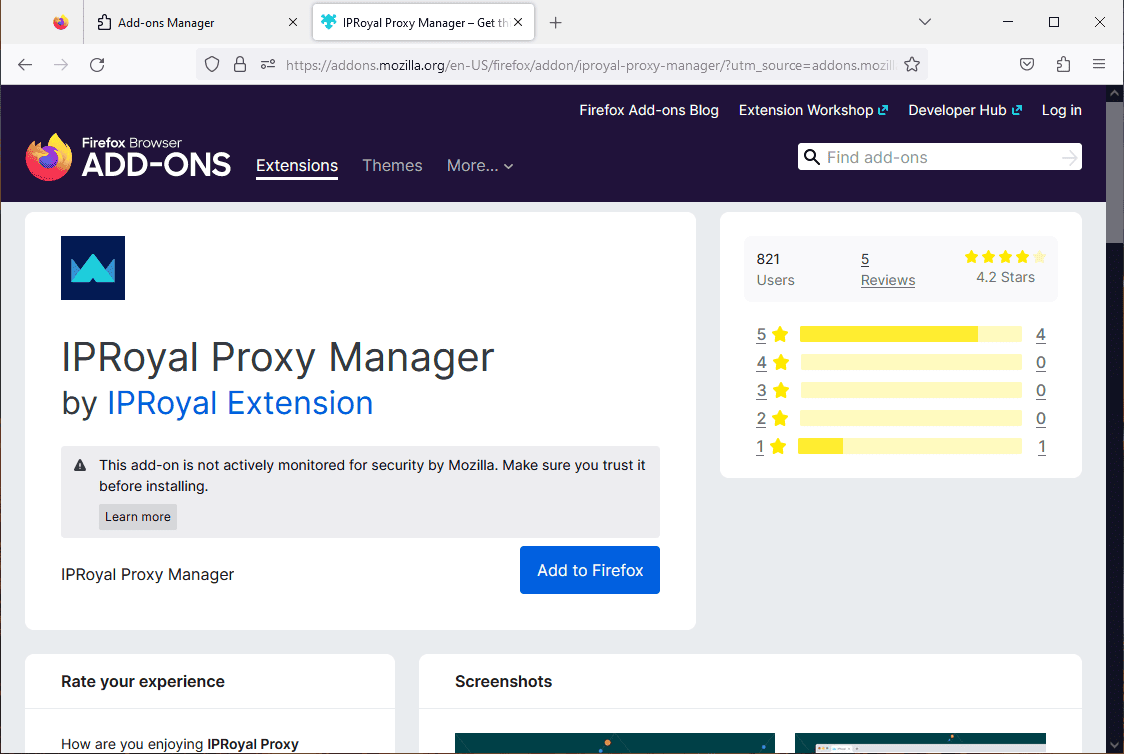
The Proxy Manager extension is available on the Firefox Add-ons page. To add it to your browser, simply click the Add to Firefox button.
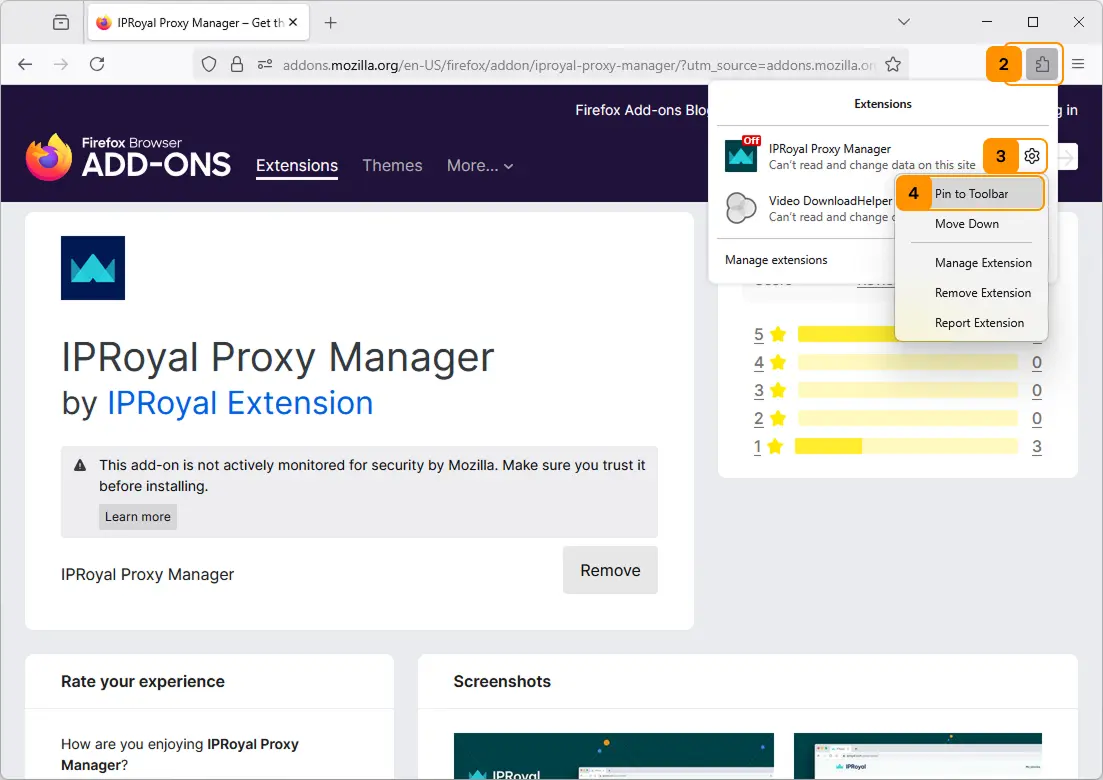
Once you do, make sure the extension is pinned so you can access it easily. Click the extensions menu icon (2), then the wheel icon (3) next to the IPRoyal Proxy Add-on extension, and select ‘Pin to Toolbar’ (4) for easy access.
Setting Up Proxy Profiles
To start using the Mozilla Firefox Proxy Add-on, you need to create a profile first. The add-on supports all IPRoyal products, HTTP/HTTPS and SOCKS5 protocols, as well as free proxies and proxies from other providers.
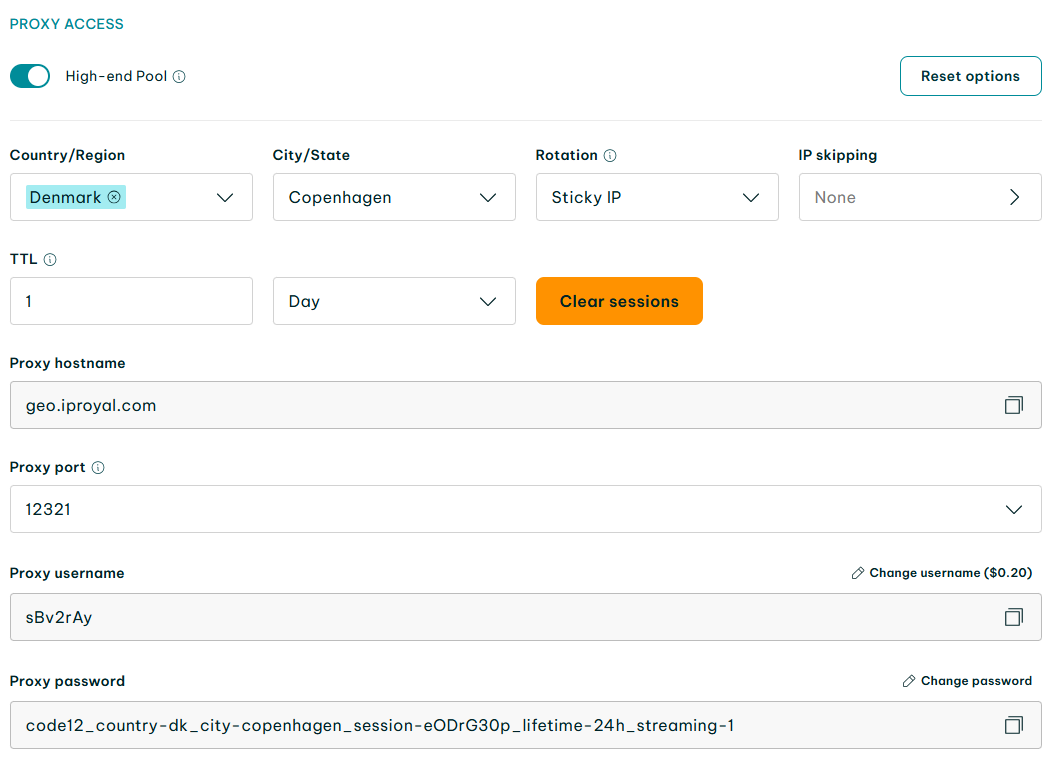
1. Let’s say we want to create a profile that uses high-end Residential Proxies from Copenhagen, Denmark, with sticky sessions that last one day. We’ll configure our proxies in the IProyal dashboard accordingly.
2. Go back to Firefox, click the IPRoyal icon (1) in the toolbar, and then click the wheel icon (2).
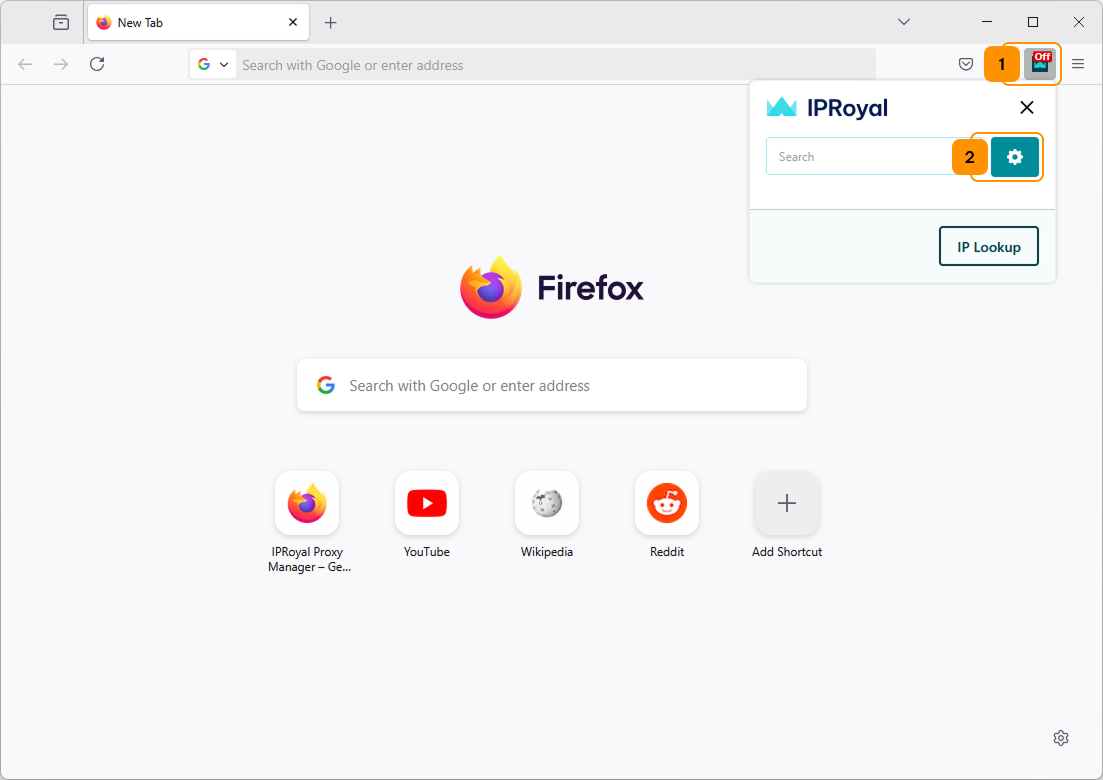
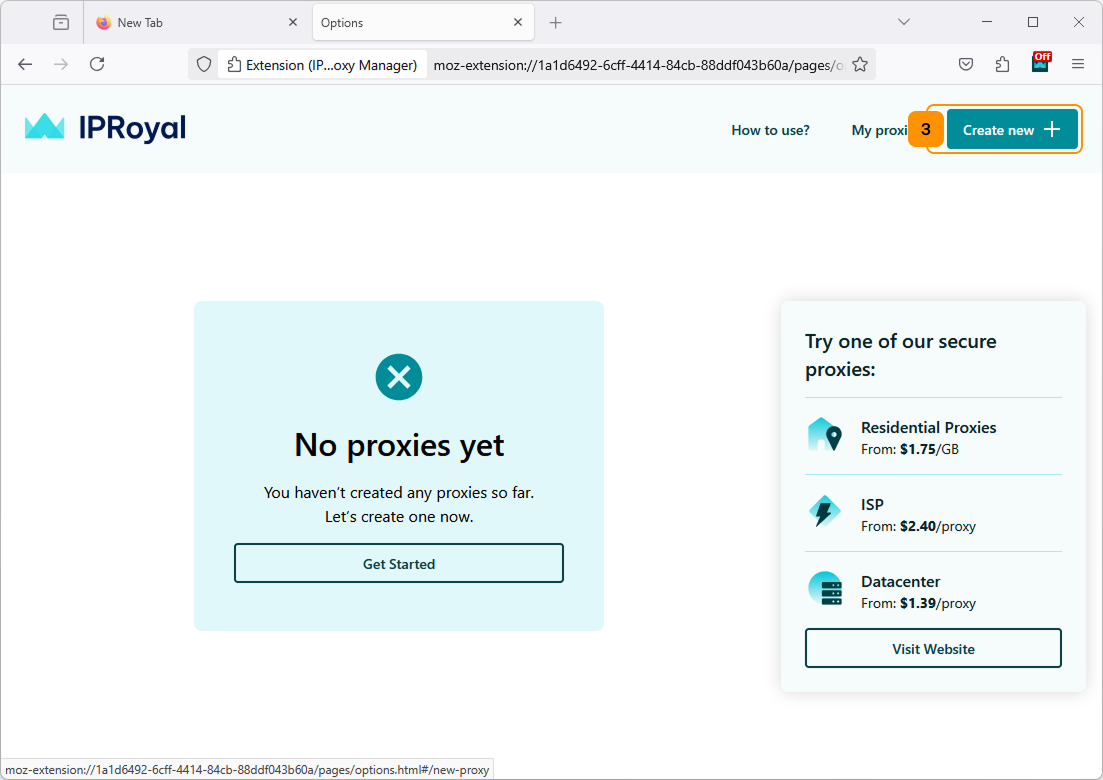
3. Click the ‘Create new’ button (3).
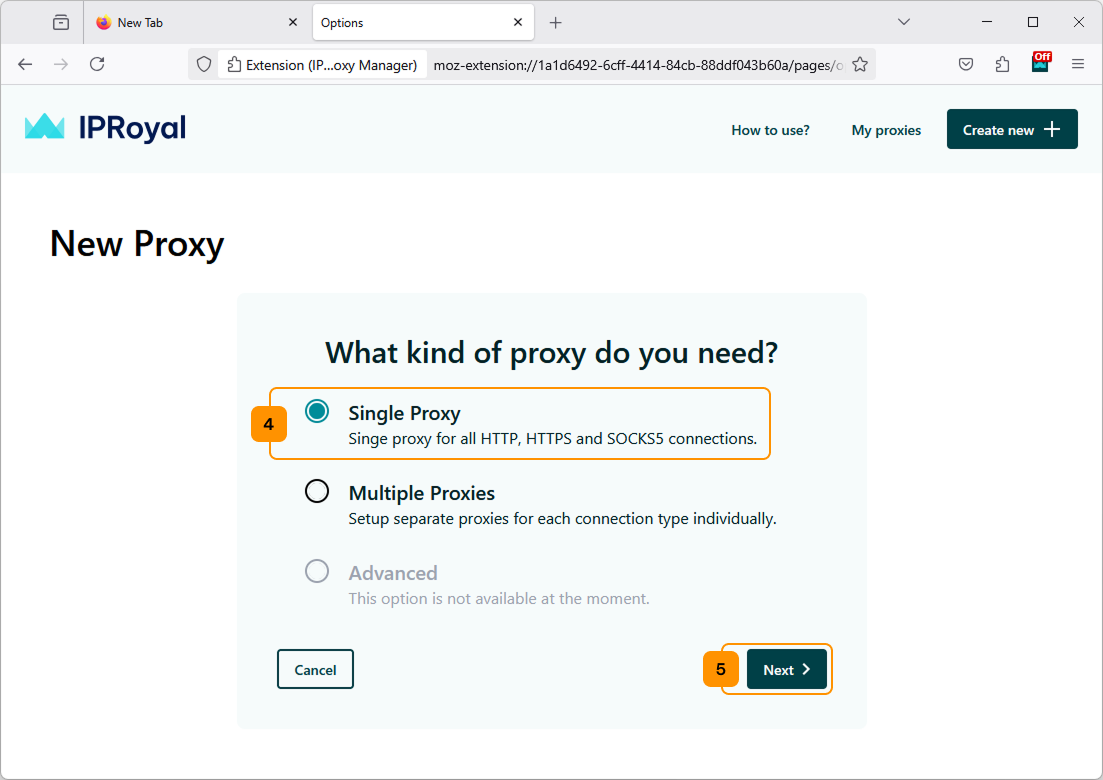
4. The ‘New Proxy’ page will open. We’ll select ‘Single Proxy’ (4) and click ‘Next’ (5).
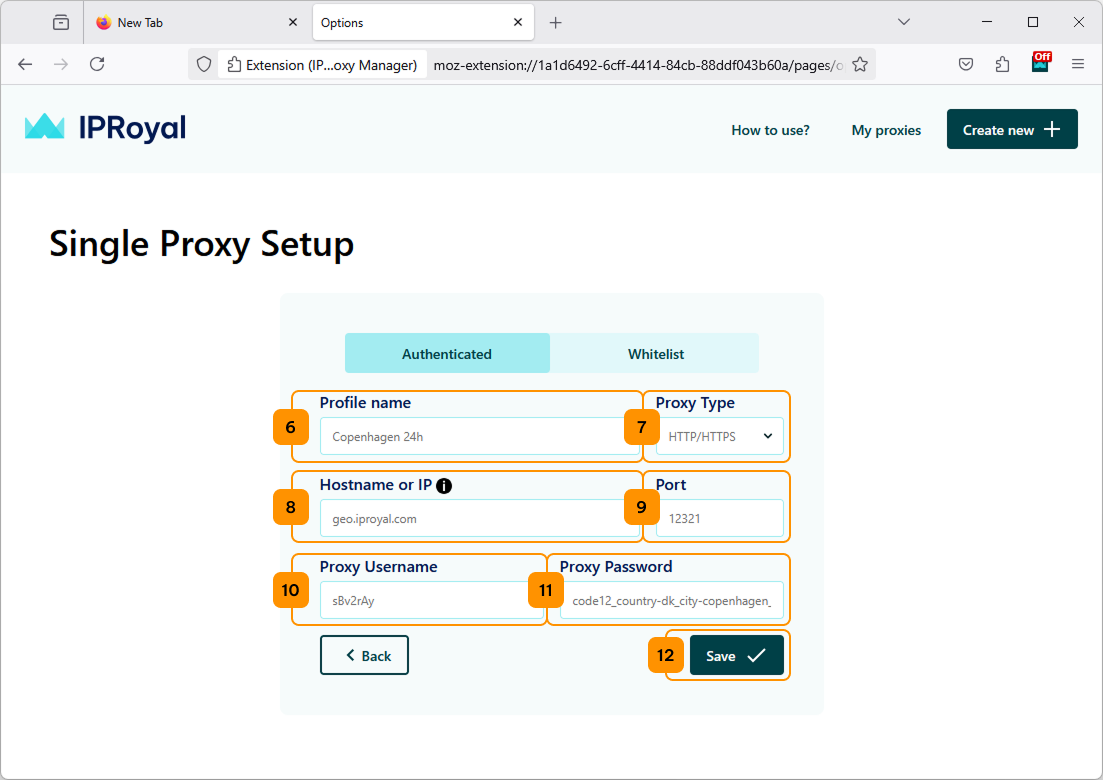
5. Here, we must enter a name for our profile (6). We also need to enter the proxy type (7), proxy hostname (8), port (9), username (10), and password (11) from the IPRoyal dashboard. Once you’re done, click the ‘Save’ (12) button.
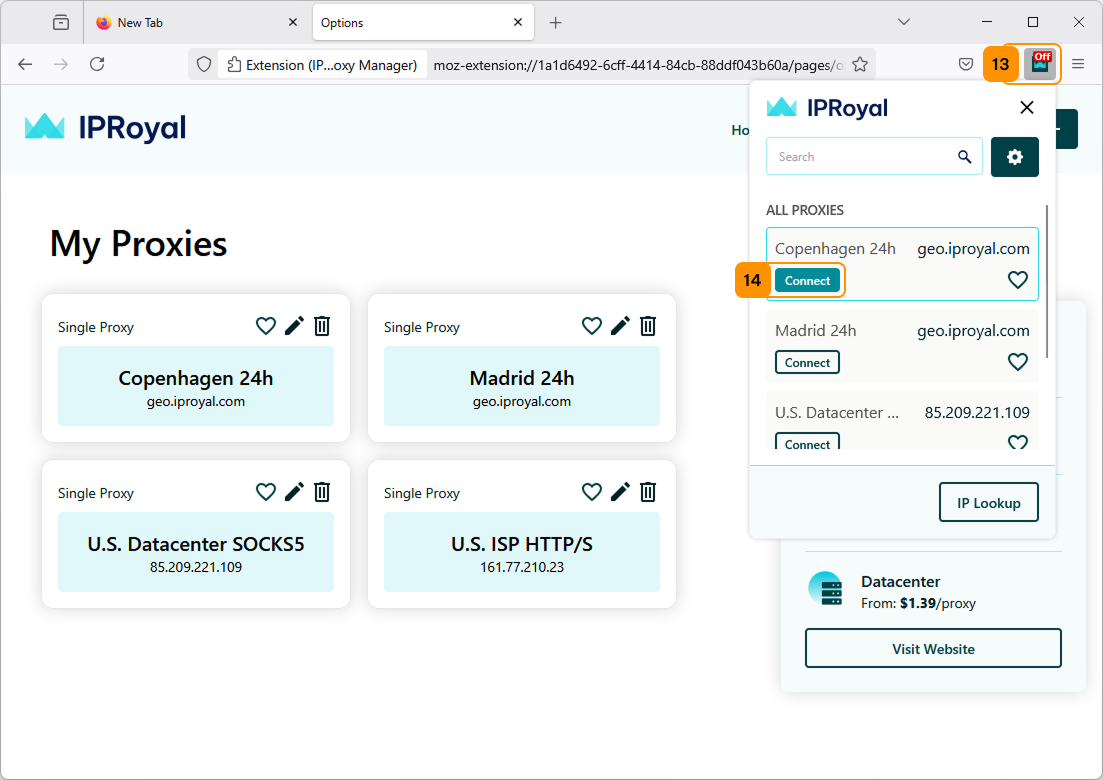
6. Your new profile will be saved in the ‘My Proxies’ section. You can activate it by clicking the extension icon (13) and clicking the ‘Connect’ button (14) next to it.
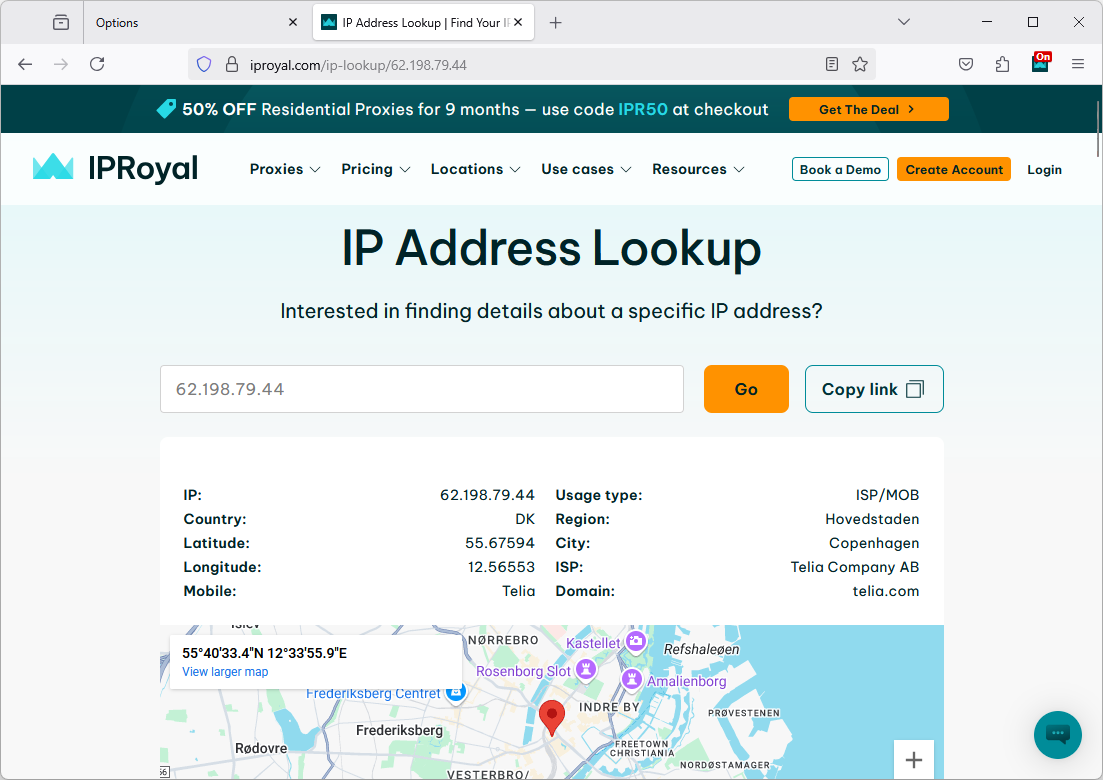
7. To make sure your proxy is working correctly, you can visit the IPRoyal IP Lookup page or a similar website to check your current IP address and its location.
Congratulations, you’re ready to go!
Note
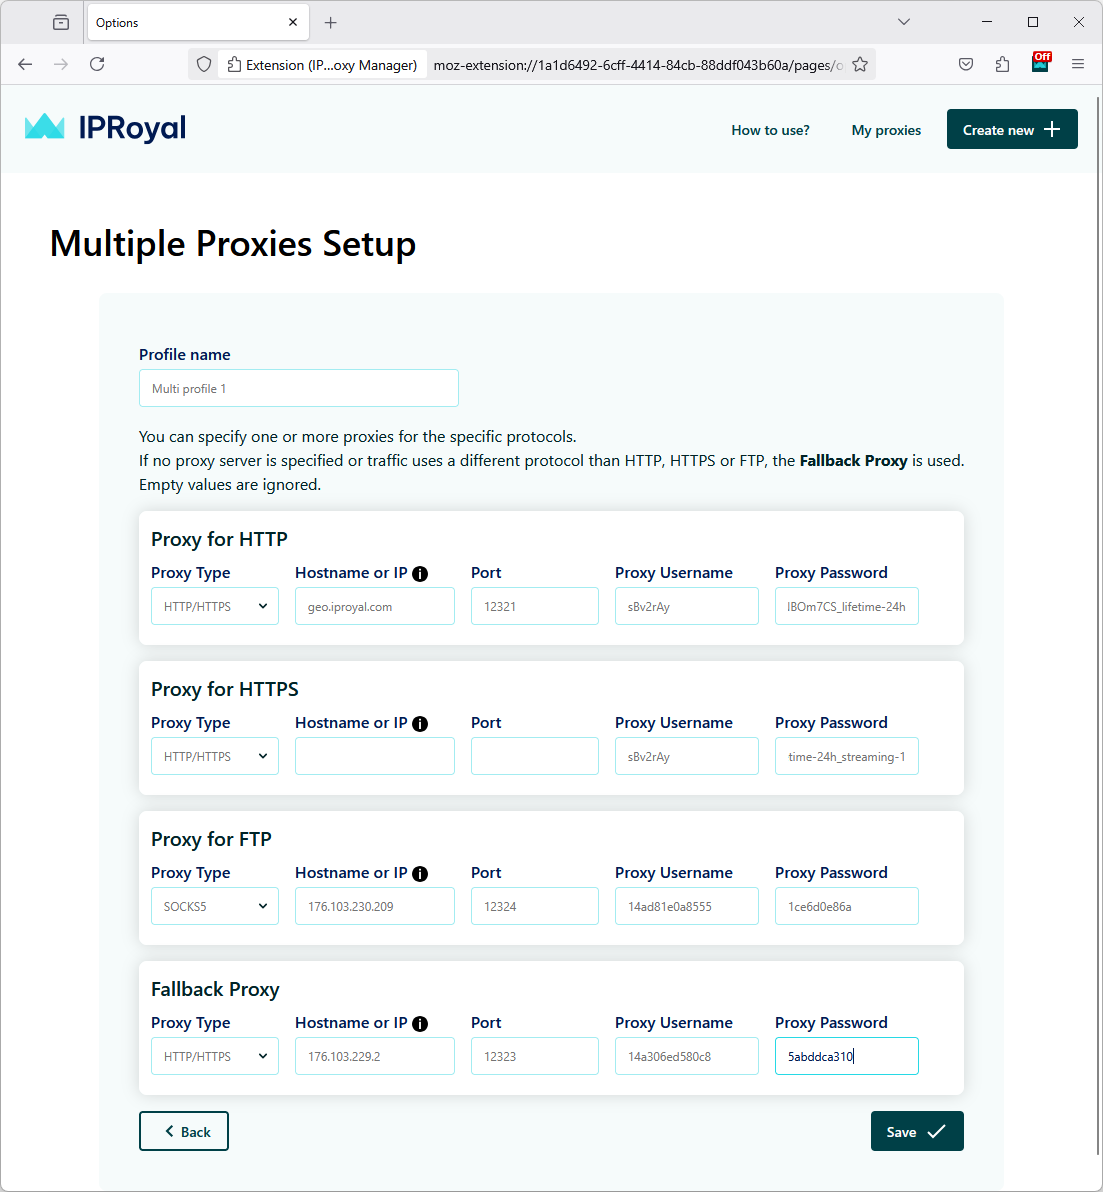
The process is the same for creating multiple proxy profiles. Select the proxy type, enter the credentials for each protocol, and click ‘Save’ once you’re done. The extension will use the set proxies accordingly when you choose that profile.