Sending POST Requests With Python


Vilius Dumcius
Last updated -
In This Article
When scraping a website, it’s common to use GET requests—requests that ask for a certain resource, which you can later parse to get the information you want.
But there’s another common type of request that can sometimes be useful when doing web scraping—POST requests. They enable you to submit information to a server and (optionally) receive some kind of response.
This article will teach you what POST requests are, how to make them using the Requests library in Python, and how you can use them in web scraping.
What Are POST Requests?
When contacting a server, a client can use one of many different HTTP methods in their request.
The most common method is GET, which instructs the server to send the contents of a resource in a particular location. But there are many other methods one can use. For example, POST , which signifies that some kind of data is sent from the client to a server.
A common use case for POST requests in web development is forms. After the user has filled in a form on a website, the browser sends a POST request to the server with all the data the user has filled in.
It’s commonly used for forms where the data is sensitive, such as login forms. This is because POST requests don’t send form data in the URL as GET requests do, but put it in the message body.
If you’re scraping a website, you can bypass these forms by sending POST requests with an HTTP client library like Requests . Developers usually use a headless browser tool like Selenium to log into websites, but a simpler tool like Requests can do the job without the complexity and overhead associated with running a full-fledged browser.
How to Make a POST Request in Python?
In this tutorial, you’ll learn how to use POST requests to log into a page using the Requests library. As an example, you’ll log into the Quotes to Scrape app, which is a test app for people who want to practice their web scraping skills.
This tutorial assumes that you’ve already used the Requests library for web scraping. If you haven’t used the Requests library before, it’s recommended to first check out our Python Requests guide , which contains all the basics to get you started.
Setup
For this tutorial, you’ll need to have two Python libraries installed: Requests and Beautiful Soup .
You can install them with the following commands:
pip install requests
pip install bs4
Then create a new Python file called post.py, open it in your favorite code editor, and import both libraries.
import requests
from bs4 import BeautifulSoup
Sending a POST Request
To create a POST request, you can use the requests.post() method.
It takes two arguments:
- The website you want to send the request to.
- A data argument containing a dictionary of key-value pairs that you want to send to that website.
As an example, try sending some data to the DummyJSON mock API . While it’s not a website, it’s a server that can receive POST requests and respond to them.
import requests
from bs4 import BeautifulSoup


r = requests.post("https://dummyjson.com/products/add", data = {
    "title": "Headphones"
})

print(r.json())
The following request will send a new product for the product API of DummyJSON containing only a title.
The API should accept it and respond with the newly created product.
{'id': 101, 'title': 'Headphones'}Now, let’s see how you can extend this code to help you in web scraping.
Starting a Session
By default, requests made by the library are one-shot: you send a request, receive a response, and that’s the end of it. To stay logged in to the website, you’ll need to make use of the Session Objects feature in Requests.
Sessions enable preserving state (e.g., cookies) across different requests just like a regular browser would do.
Create a new session using the following method:
session = requests.Session()

Now you can call request methods like post on the session object.

# without session

r = requests.post("http://quotes.toscrape.com", data = {})

# with session

r = session.post("http://quotes.toscrape.com/login", data = {})
All the requests done within a single session will share state between them, which means that the website will recognize you once you log in.
Logging in With Requests
To fill out the form, you need to find out the right names of the form parameters.
If you go to the Quotes to Scrape login page and inspect the HTML of the login form, you will see that the input fields have the following HTML elements:
<div class="form-group col-xs-3"> <label for="username">Username</label> <input type="text" class="form-control" id="username" name="username"> </div>

<div class="form-group col-xs-3"> <label for="username">Password</label> <input type="password" class="form-control" id="password" name="password"> </div>
What should interest you is the id attribute of an input field. This is the name of the element that you will use in the POST request.
In the data dictionary for the POST request, put the IDs of the elements you want to enter as keys and the values that you want to send as the values of their respective keys.
session = requests.Session()

r = session.post("http://quotes.toscrape.com/login", data={
    "username": "MyCoolUsername",
    "password": "mypassw0rd"
})
To try out if the code succeeded, you can check whether the page contains a Logout button now.
soup = BeautifulSoup(r.content, "html.parser")
logout_button = soup.find_all("a", string="Logout")
print(logout_button)
Adding a Proxy
When making HTTP requests, there are situations where it may be advantageous to use a proxy to conceal your IP address. This practice is particularly valuable in web scraping, where the owner of the site might not be stoked to have you browsing the site and getting info for free.
Proxies function as intermediaries between your request and its destination, altering the original IP address of the request to that of the proxy. As a result, the server cannot determine that the requester is actually you, providing anonymity and masking your true identity.
While using a proxy to log into one account repeatedly wouldn’t really mask anything, you might, for example, create a multitude of accounts, which could be accessed through a multitude of proxy IPs using a service like IPRoyal Residential Proxies .
To the administrator, it would look like natural user activity.
Here’s how you can add a proxy to your POST requests.
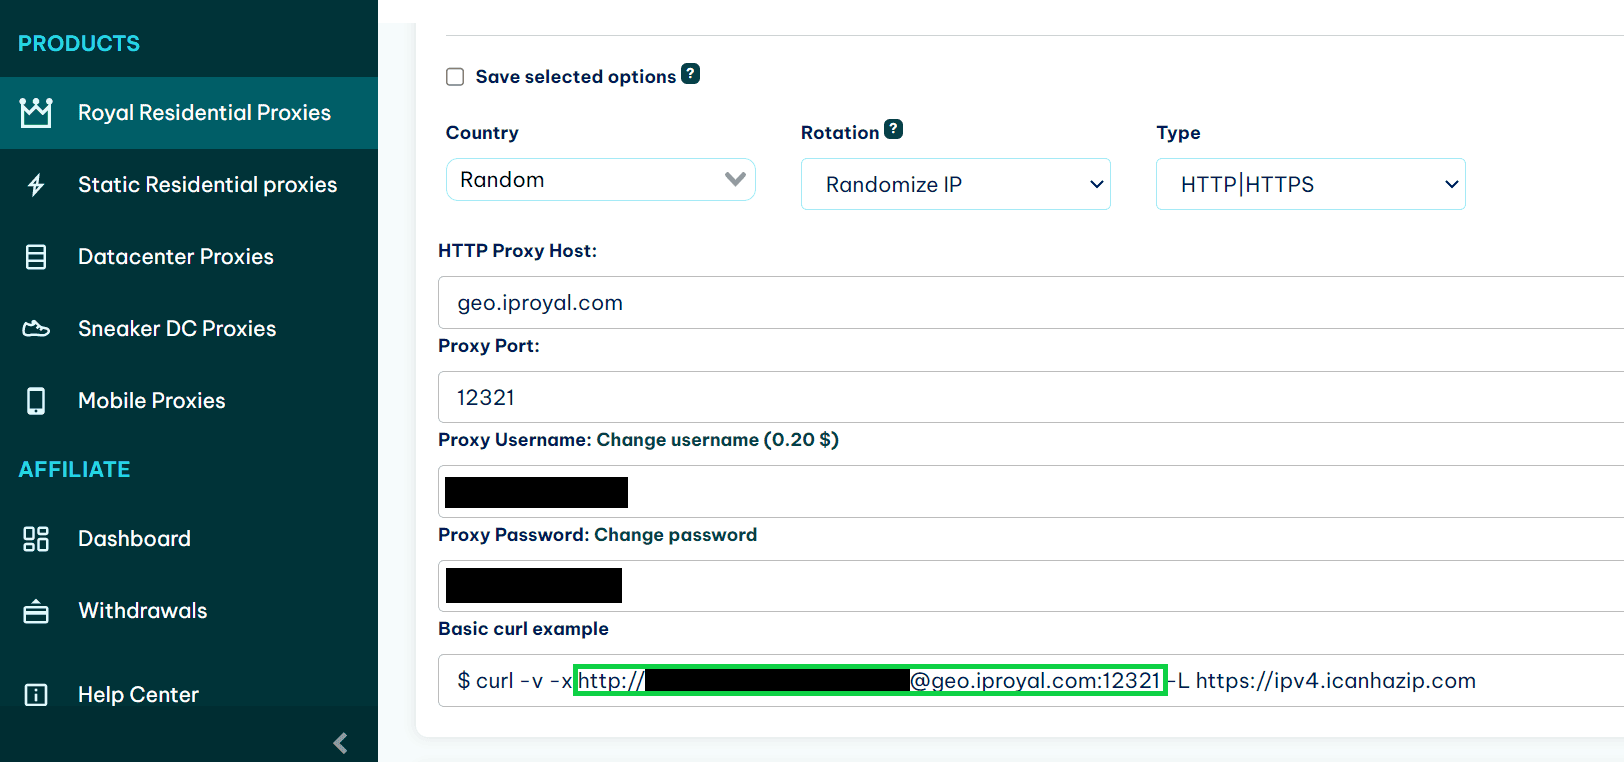
First, you need to find the link of the proxy. With IPRoyal, you have access to this information right on the dashboard.

Then, add the proxy link to the proxies property of the sessions object.
session.proxies = {
   "http": "link-to-proxy",
   "https": "link-to-proxy",
}
Now any request you make in the session will use this proxy, and your IP will be properly concealed.
Here’s the full code:
import requests
from bs4 import BeautifulSoup


session = requests.Session()

session.proxies = {
   "http": "link-to-proxy",
   "https": "link-to-proxy",
}


r = session.post("http://quotes.toscrape.com/login", data={
    "username": "MyCoolUsername",
    "password": "mypassw0rd"
})

soup = BeautifulSoup(r.content, "html.parser")
logout_button = soup.find_all("a", string="Logout")
print(logout_button)
Conclusion
In this tutorial, you learned what POST requests are and how you can use them to fill out forms while scraping the web. Using POST requests is a nice alternative to using a headless browser like Selenium or Playwright because it reduces the complexity and overhead of the web scraping process. You don’t need to run a whole browser just to log into a page.
If you want to learn more about what the Requests library can and cannot do, you can read our guide on python requests module .
FAQ
Can you use POST requests for all forms?
No, you can only use POST requests for forms that have the POST type, which is possible to check for in HTML. Other common forms, like the search form, usually have the GET type, meaning you can use a regular GET request by building an URL using the arguments you want to use for the form.
Do I need to use Sessions to send POST requests?
No, Session Objects just enable you to store state between different requests that you make. If the POST request you make doesn’t require that (such as when calling an API), you can skip this part.
Can proxies help me evade detection when using Requests?
Yes, proxies will hide the IP address from where the request originates. But you do need to be careful not to let the administrator identify you via another path, such as the profile you’re using.

Author
Vilius Dumcius
Product Owner
With six years of programming experience, Vilius specializes in full-stack web development with PHP (Laravel), MySQL, Docker, Vue.js, and Typescript. Managing a skilled team at IPRoyal for years, he excels in overseeing diverse web projects and custom solutions. Vilius plays a critical role in managing proxy-related tasks for the company, serving as the lead programmer involved in every aspect of the business. Outside of his professional duties, Vilius channels his passion for personal and professional growth, balancing his tech expertise with a commitment to continuous improvement.
Learn More About Vilius Dumcius


