Python Discord API Guide: Build & Deploy Your First Bot Quickly
Python

Marijus Narbutas
Key Takeaways
-
You can build a Discord bot using Python and the discord.py library by creating a bot application on the Discord Developer Portal, generating a token, and writing basic event-handling code.
-
Slash commands provide a modern way to interact with bots and can be implemented using discord.app_commands for better usability and server integration.
-
To keep your bot online 24/7, you can deploy it using services like Replit, UptimeRobot, or VPS hosting, making sure to handle errors and use .env files for token security.
Whether it’s poor customization, slow responses, or simply not knowing where to start, building the right bot feels overwhelming, especially when dealing with your Discord token.
But here’s the good news: with Discord API, you can build fast, powerful bots exactly the way you want and according to your server’s needs.
This guide will give you the no-fluff blueprint, from setup to deployment, and everything you wish you knew from the start.
Introduction to Discord and Bots
Discord started as a voice chat platform for gamers, but today, it has grown into a global communication hub for communities, creators, developers, and businesses. With over 150 million active users and more than 19 million active servers, Discord has now become a thriving ecosystem. But to manage and enhance those increasing interactions at scale, Discord bots have become essential.
Bots are automated programs that run on a server and perform specific tasks within Discord. These can range from moderating chat and playing music to delivering real-time updates, running games, logging activity, or integrating with external apps like GitHub, Trello, or YouTube.
Bots act like members of your server - but smarter, faster, and always online (if built right). Python is the most commonly used language to create, develop, and manage Discord bots.
Python’s simple syntax, massive library support, and robust Discord API wrapper (such as discord.py ) make it one of the most powerful choices for bot development. It’s great for beginners yet powerful enough for complex bots used in professional and enterprise-grade servers.
Setting Up the Development Environment
Before you can bring your Discord bot to life, you need to set up a clean, functional development environment. Whether you’re a complete beginner or just new to Discord bot development, this setup will ensure you start on solid ground.
1. Install Python (3.8+ Recommended)
First, make sure Python is installed on your system. Discord bots use asynchronous programming, and Python 3.8 or higher handles this efficiently.
- Download Python from python.org/downloads
- During installation, check the box that says “Add Python to PATH”
- To verify the install, open your terminal or command prompt and run:
python --version
2. Install a Code Editor (VS Code Recommended)
You can write your code in any text editor, but Visual Studio Code (VS Code) offers rich features like syntax highlighting, extensions, Git integration, and debugging tools.
- Download from code.visualstudio.com
- Install the Python extension for enhanced support.
3. Create a Virtual Environment (Optional but Best Practice)
A virtual environment keeps your dependencies isolated, so your bot doesn't conflict with other Python projects. To create one, use the code below:
python -m venv bot-env
source bot-env/bin/activate  # macOS/Linux
bot-env\Scripts\activate     # Windows
4. Install the Discord API Library
The most popular wrapper for Discord’s API in Python is discord.py. Though it was briefly discontinued, it’s now maintained under community forks, such as py-cord or nextcord. To install discord.py, run:
pip install -U discord.py
5. Set Up a Discord Bot Application
To set up the Discord bot application:
- Turn on Developer Mode in your Discord settings.
- Go to the Discord Developer Portal.
- Click on ‘Applications’, then ‘New Application’, and give your bot a name.
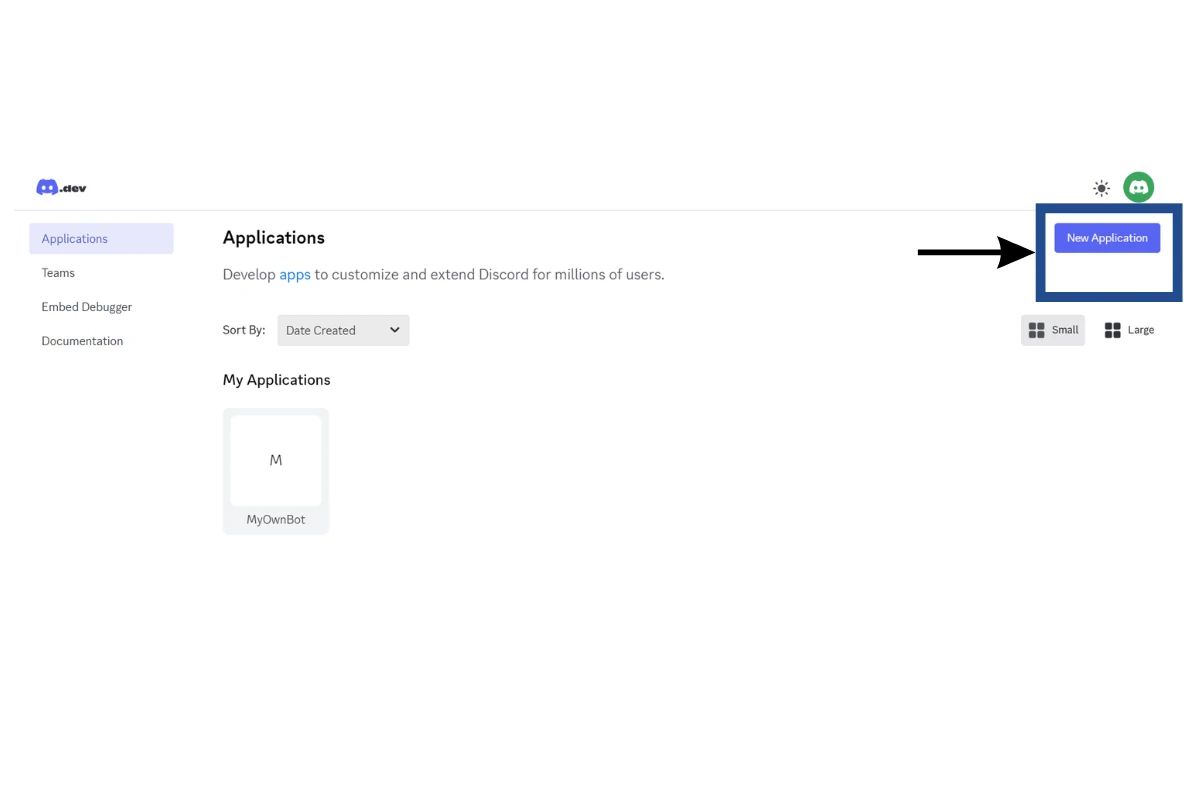
- Set up your bot's name, description, and icon under ‘General Information’.
- Once your bot is created, you'll see the bot profile with an option:
‘Token’ → Click the ‘Reset Token’ button.
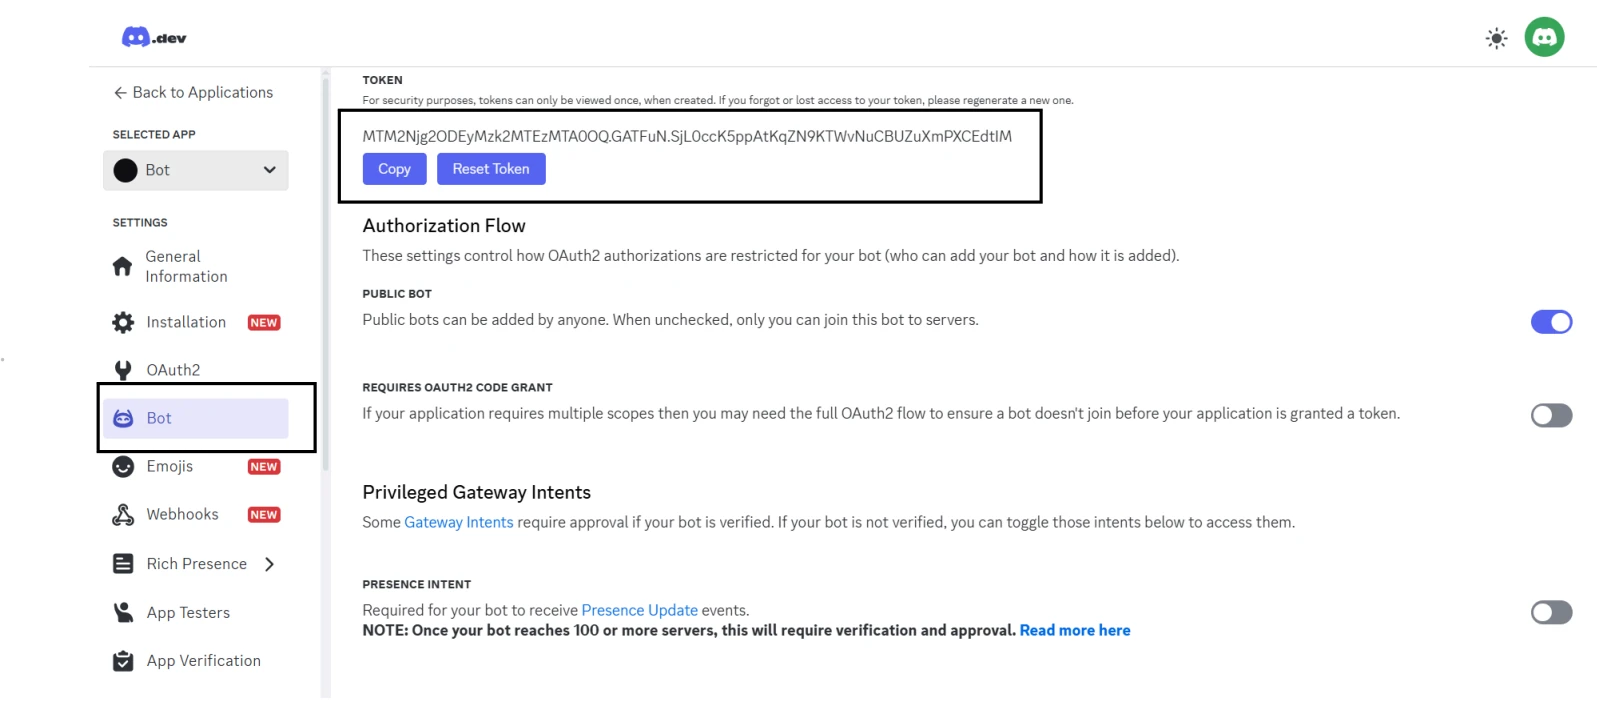
- After clicking ‘Reset Token’, Discord will ask you to confirm (and possibly enter your 2FA code).
- Then, it will generate and display the bot token.
NOTE: Copy it immediately — this is your only chance to see it. Save it securely in a .env file or password manager. If you lose it, just click Reset Token again to generate a new one.
6. Invite Your Bot to a Server
Now, go to the OAuth2 and open the URL Generator. After that, select ’bot’ as the scope and assign necessary permissions (e.g., ‘Send Messages’, ‘Read Message History’, ‘Manage Roles’, etc.)
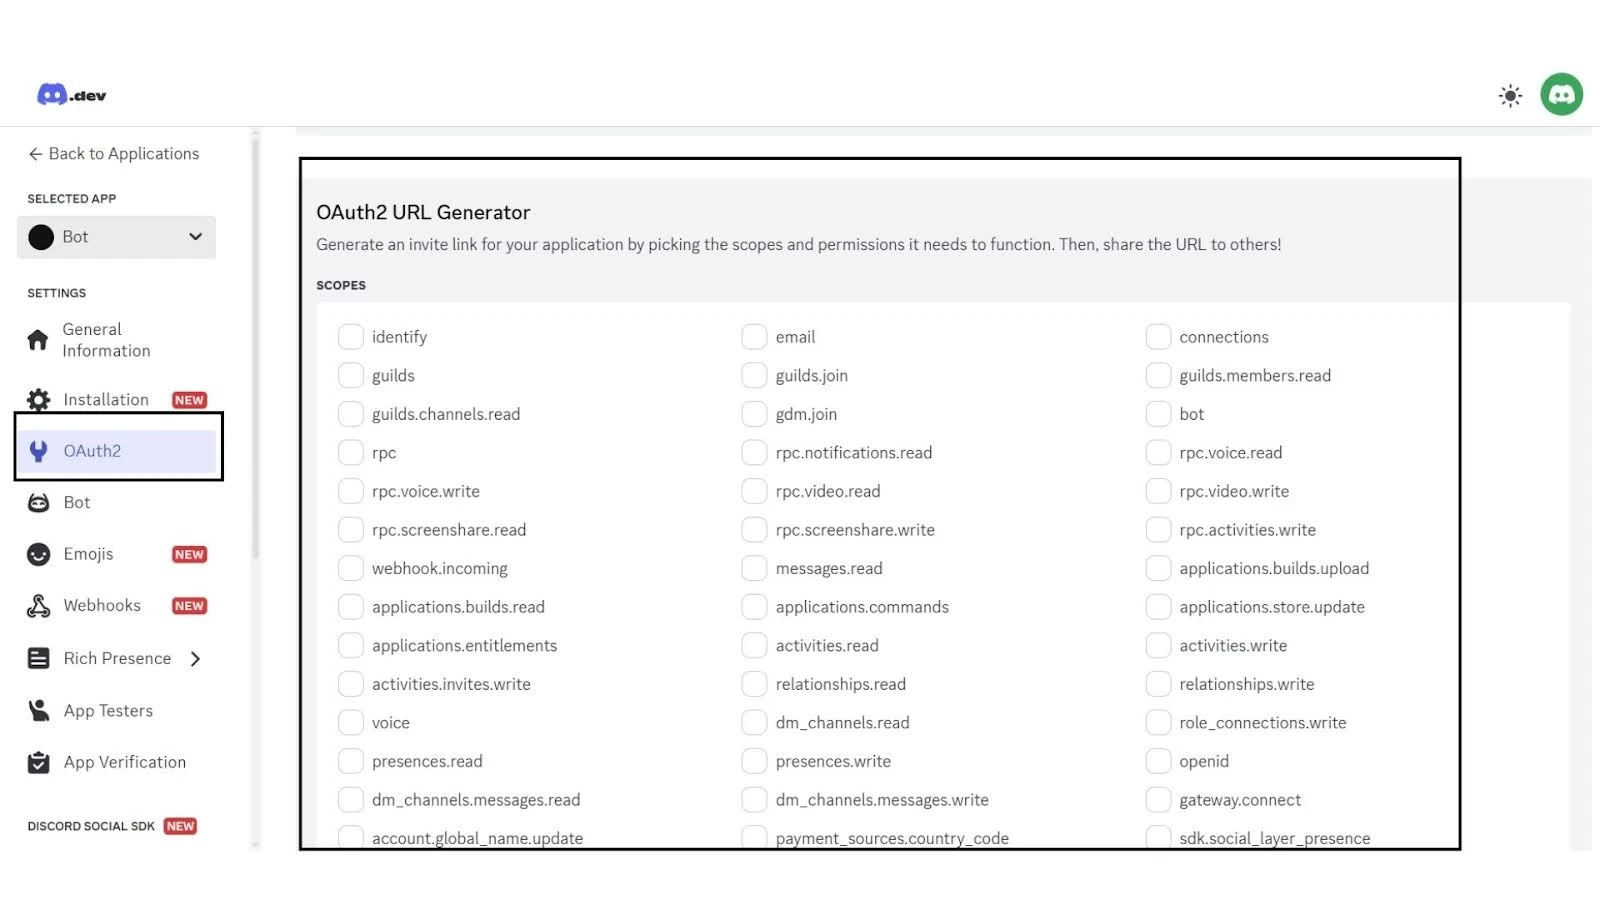
Copy the generated link, open it in your browser, and add your bot to a Discord server where you have admin rights.

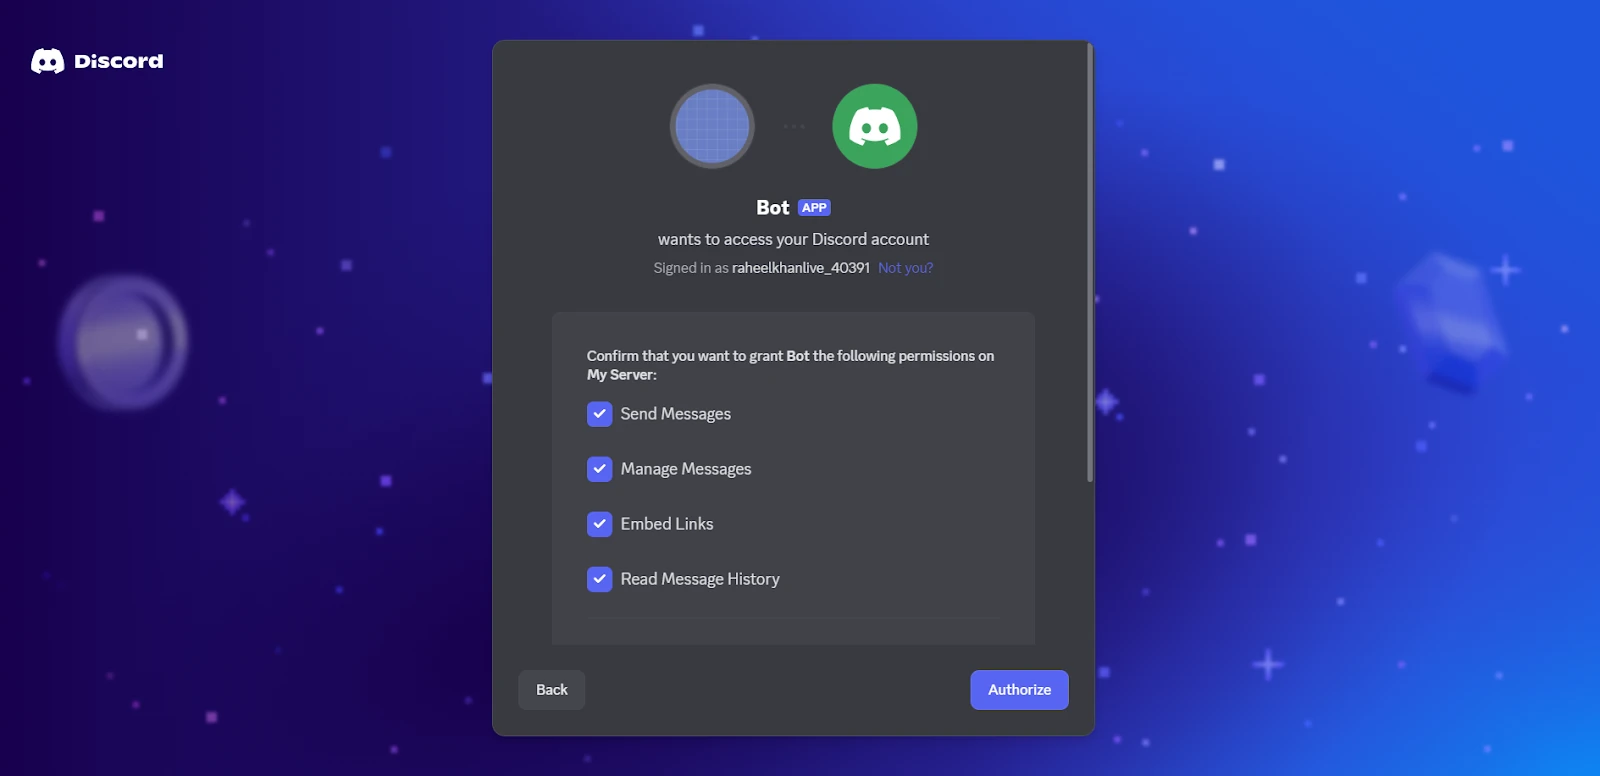
Add the Bot to Your Discord Server
- Paste the Invite URL (you got from OAuth2 URL Generator) into your browser.
- You'll see a Discord page that says: ‘Add to Server’ - choose a server where you have Admin or Manage Server permission.
- Click ‘Continue’, then ‘Authorize’.
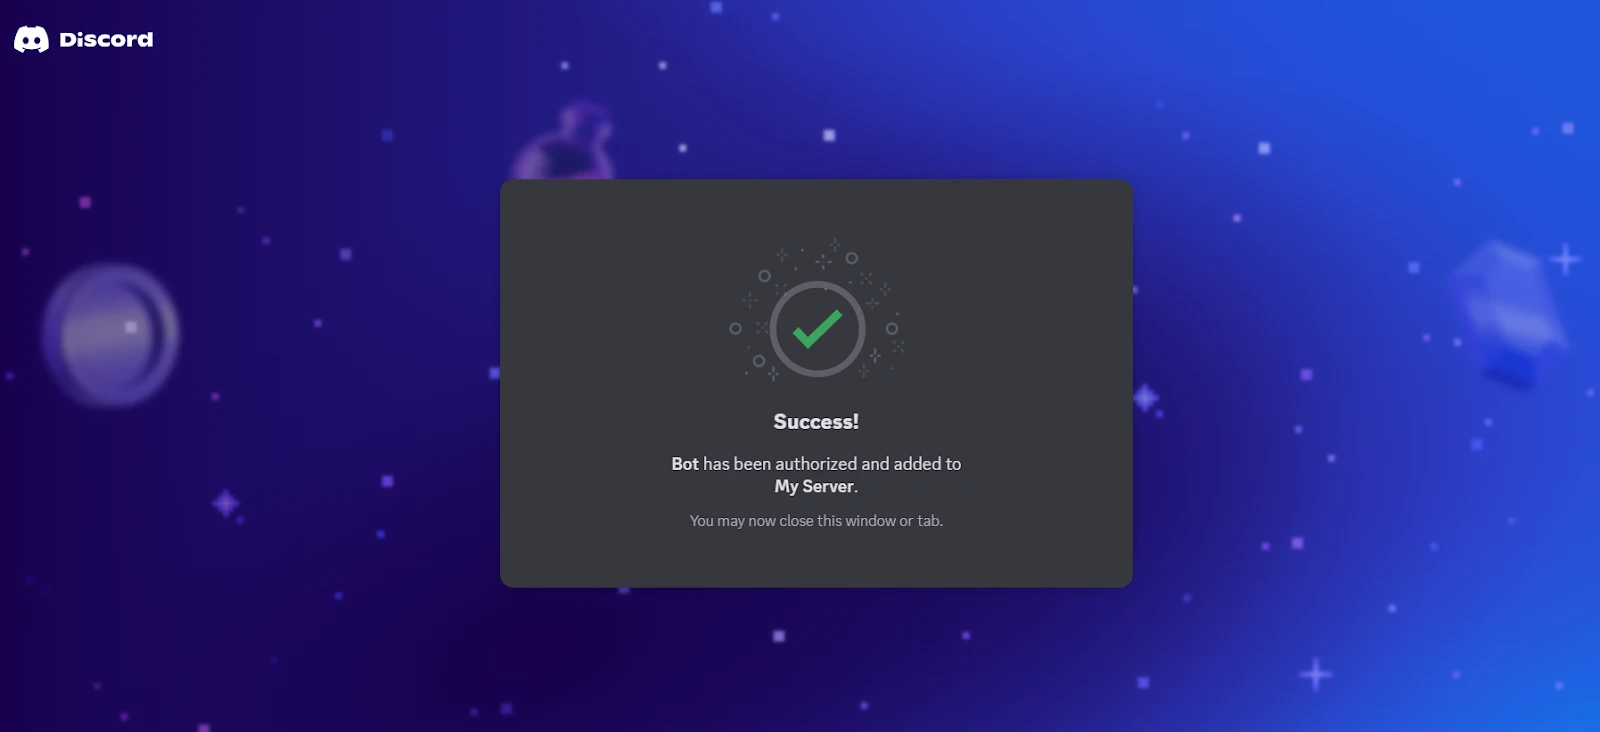
Your bot is now added to the server, but it will show as offline until you run the code.
Building Your First Discord Bot in Python
Now that your environment is ready, it’s time to write your first bot script. This simple bot will log in and reply to a basic command — just enough to prove everything works and get you started with real interaction.
1. Create a Python File and Write the Basic Code
Open your code editor and create a new Python file named bot.py.
Now, use the Python code from below to create your first bot using discord.py:
import discord
from discord.ext import commands

intents = discord.Intents.default()
intents.message_content = True  # Required to read user messages

bot = commands.Bot(command_prefix='!', intents=intents)

@bot.event
async def on_ready():
    print(f'✅ Bot is online as {bot.user}')

@bot.command()
async def hello(ctx):
    await ctx.send('👋 Hello! I\'m your first Discord bot.')

bot.run('YOUR_BOT_TOKEN')
Replace 'YOUR BOT TOKEN' with the real bot Discord token that we got while creating the overall environment.
2. Run Your Bot
In your terminal, activate your virtual environment if needed, and then run:
python bot.py
You should see the bot come online on your server — and when you type !hello, it’ll respond!
3. Test It in Discord Account
Go to the server where you added the bot and type:
!hello
You’ll get a friendly response:
"Hello! I’m your first Discord bot."
Congratulations — you just created your first working Discord bot!
Python Discord API Overview
The Discord API is the backbone that allows developers to create powerful, interactive bots and applications that integrate seamlessly with Discord's ecosystem. It enables you to programmatically interact with servers, channels, users, messages, and much more.
The Discord API is a RESTful interface combined with WebSocket support that allows developers to build applications that can perform automated actions and respond to events in real-time.
It's used for everything from sending messages to managing roles and listening to user interactions.
The key features of the Discord API include:
- Sending, receiving, and deleting messages in text channels and DMs.
- Manage servers, roles, channels, and permissions.
- React to user inputs like slash commands, mentions, or emoji reactions.
- Track events such as message deletions, user join/leave events, or status changes.
- Interact with voice channels (through additional libraries like discord.py[voice] or Lavalink).
Choosing a Python API Wrapper
One of the most important decisions you'll make while building a bot is choosing a Python API wrapper for interacting with Discord's API.
A wrapper simplifies the process of handling requests, events, and responses by abstracting away the raw HTTP/WebSocket logic and giving you Pythonic tools and classes to work with.
Let’s explore what you need to consider and the top options available.
An API wrapper is essentially a library that translates raw API data into a more usable, human-friendly format. Instead of crafting HTTP requests and parsing JSON manually, wrappers provide Python classes, methods, and event loops to help you interact with Discord’s API quickly and cleanly.
For example, instead of manually POSTing a JSON payload to send a message, a wrapper lets you do something as simple as:
await channel.send("Hello, Discord!")
Top Python Wrapper for Discord Account
Here are the top Python Wrappers for Discord bot commands:
1. discord.py (Most Popular)
Pros of using this one are:
- Large community and extensive documentation
- Supports both text and voice functionalities
- Clean, Pythonic syntax using async/await
- Built-in support for slash commands and interactions
Best for: Beginners and intermediate developers who want a stable, easy-to-use tool.
pip install -U discord.py
2. Pycord
Pros include:
- Actively maintains and quickly implements new Discord features
- Full support for interactions, modals, buttons, and more
- Good for developers who want cutting-edge features sooner
Best for: Developers looking for more frequent updates.
pip install py-cord
3. Nextcord
This one is also the fork of discord.py, which is designed to add features faster than the original version. It offers full support for interactions and application commands and is best for smaller communities than Pycord or discord.py.
pip install -U nextcord
4. Hikari
A newer, non-blocking, high-performance library with a focus on scalability and strict typing. However, it has a steeper learning curve but is well-suited for large bots with complex architecture.
This wrapper is more modular and flexible compared to traditional wrappers.
pip install hikari
How to Choose the Right One
Ask yourself the following when choosing a wrapper:
| Criteria | Considerations |
|---|---|
| Community support | Is it widely used? Are there active forums or Discord servers? |
| Documentation | Is the API well-documented and beginner-friendly? |
| Feature set | Does it support interactions, buttons, modals, and voice? |
| Update frequency | Does the library implement new Discord features promptly? |
| Learning curve | Do you prefer a simple abstraction or full control and customization? |
| Project scale | Are you building a small, fun bot or a scalable, production-level application? |
Bot Connection and Events
Once you've chosen and installed your Discord API wrapper (like discord.py or Pycord), the next step is connecting your bot to a Discord server and making it do something.
This is where events come into play — they allow your bot to respond to real-time activity on a Discord account, such as users joining, sending messages, deleting messages, reacting to posts, and much more.
Let’s break down how to get your bot online and listen for events.
Step 1: Import the Library and Set Up the Bot
Start by importing your wrapper (e.g., discord.py) and creating an instance of your bot client.
import discord
from discord.ext import commands

intents = discord.Intents.default()
intents.message_content = True  # Required to read message content

bot = commands.Bot(command_prefix='!', intents=intents)
Why intents matter: Discord server introduced intents to give developers more control over the events they subscribe to. You need to explicitly enable them in both your code and the Discord Developer Portal.
Step 2: Write Your First Event — on_ready()
The on_ready() event triggers when the bot has successfully connected and is ready to interact.
@bot.event
async def on_ready():
    print(f'Logged in as {bot.user} (ID: {bot.user.id})')
    print('------')
This is a good place to do things like set bot presence (status) or run scheduled tasks.
Step 3: Responding to Messages — on_message()
The on_message() event runs every time someone sends a message in a server your bot has access to.
@bot.event
async def on_message(message):
    if message.author == bot.user:
        return

    if 'hello' in message.content.lower():
        await message.channel.send(f'Hi there, {message.author.name}!')

    await bot.process_commands(message)
Pro Tip: If you’re using command handling (commands.Bot), always include await bot.process_commands(message) at the end of your on_message() function so it doesn’t interfere with commands.
Step 4: Handling Reactions, Joins, and More
Here are a few more common events:
When a member joins a server:
@bot.event
async def on_member_join(member):
    channel = discord.utils.get(member.guild.text_channels, name='general')
    if channel:
        await channel.send(f"Welcome to the server, {member.mention}!")
When someone reacts to a message:
@bot.event
async def on_reaction_add(reaction, user):
    # ignore reactions from bots (including yourself)
    if user.bot:
        return

    # reaction.message is the original Message object
    await reaction.message.channel.send(
        f"{user.name} reacted with {reaction.emoji}"
    )
Handling bot errors:
@bot.event
async def on_command_error(ctx, error):
    await ctx.send(f"Oops! An error occurred: {str(error)}")
Note that you need the proper intents and settings enabled for some of these to work.
Step 5: Running Your Bot
To get your bot online, finish your script with:
bot.run('YOUR BOT TOKEN')
Make sure to replace 'YOUR BOT TOKEN' with your actual bot Discord token from the Discord Developer Portal. Never share this Discord token — it’s like a password for your bot.
Building Commands and Interactions
Commands are how users communicate directly with your bot, usually by typing a keyword prefixed with a symbol like "! or /". With Discord’s evolving API, there are two main types of commands you’ll want to master:
- Prefix Commands (e.g., !help)
- Slash Commands (e.g., /help)
Prefix Commands with discord.py
These are classic bot commands. You define a prefix (like !) and write functions that the bot will call when that command is typed.
@bot.command()
async def ping(ctx):
    await ctx.send("Pong! 🏓")
- ctx is the context — includes info like who called the command and in which channel.
- You can add arguments to make dynamic commands.
@bot.command()
async def greet(ctx, name: str):
    await ctx.send(f"Hello, {name}!")
Slash Commands with Discord API
Slash commands are more modern and natively supported in Discord’s UI. Users can discover these by typing / and seeing what your bot offers.
To implement them, you’ll want to use libraries like:
- discord-py-interactions
- nextcord
- py-cord (actively maintained fork of discord.py)
Example with py-cord:
from discord import app_commands

@bot.tree.command(name="hello")
async def hello_command(interaction: discord.Interaction):
    await interaction.response.send_message(f"Hi there, {interaction.user.name}!")
You’ll also need to sync the command tree when your bot starts:
@bot.event
async def on_ready():
    await bot.tree.sync()
    print(f'Logged in as {bot.user} (ID: {bot.user.id})')
Organizing Commands with Cogs (Optional, But Powerful)
Cogs help you split your bot into different modules for better maintainability:
class Utility(commands.Cog):
    @commands.command()
    async def ping(self, ctx):
        await ctx.send("Pong from utility cog!")

# Then add the cog
bot.add_cog(Utility(bot))
Adding Help and Feedback
Always make your bot user-friendly. Add a help command or error messages:
@bot.command()
async def help(ctx):
    await ctx.send("Here are my commands:\n!ping - check latency\n!greet [name] - greet someone")
And handle unknown commands gracefully:
@bot.event
async def on_command_error(ctx, error):
    if isinstance(error, commands.CommandNotFound):
        await ctx.send("That command doesn't exist. Try `!help`.")
As your bot grows, always:
- Validate user inputs
- Handle exceptions to prevent crashes
- Log commands for analytics/debugging
- Respect rate limits (avoid spamming responses)
How to Deploy the Discord Bot?
Building your Discord bot is just the first step — now it’s time to deploy it, so it can run 24/7 and serve users without interruptions. Here are the most popular ways to do it:
1. Running Locally (Not Recommended for Production)
This method is best for testing or development:
- Simply keep your terminal or IDE running the bot script.
- Requires your machine to stay on and connected to the internet.
- It can crash or disconnect if your system sleeps, reboots, or loses internet access.
2. Cloud Deployment (VPS or Dedicated Server)
A virtual private server (VPS) is the most reliable way to host your bot 24/7.
Popular VPS options:
- DigitalOcean
- Linode
- Vultr
- AWS EC2
- Hetzner
Steps:
- Set up your VPS (usually Ubuntu or Debian).
- Install Python and the necessary dependencies.
- Use scp or Git to upload your bot code.
- Run your bot using a process manager like PM2, screen, or tmux.
PM2 is great for keeping bots alive after crashes and reboots:
pm2 start bot.py --name "my-discord-bot"
3. Free Hosting (Great for Starters)
If you want a quick, low-maintenance solution, try these platforms:
- Replit: Ideal for beginners. The free plan allows always-on bots (with limitations).
- Railway.app: Deploy directly from GitHub with CI/CD pipelines.
- Glitch: Easy to use but limited in uptime unless boosted.
- Render: Free hosting with background workers.
Replit Setup Example:
- Create a new Python REPL.
- Upload your bot files and install libraries via poetry or pip.
- Use keep_alive.py to ping the bot (for always-on behavior).
- Use UptimeRobot to ping it every 5 minutes.
4. Using Docker for Scalable Deployment
If you’re familiar with containers, Docker offers a flexible deployment option.
Why Docker?
- Environment consistency
- Easy scaling
- Works well with CI/CD pipelines
Steps:
- Create a dockerfile that installs dependencies and runs the bot.
- Build your image: docker build -t my-bot.
- Run with Docker: docker run -d --name discord-bot my-bot
5. Hosting with GitHub + Railway or Heroku
For this one:
- Push your bot code to GitHub.
- Link GitHub to Railway or Heroku.
- Configure environment variables (like BOT DISCORD TOKEN) via the web UI.
- Deploy automatically when you push updates.
Testing and Debugging
Testing and debugging are essential for building a stable, reliable, and user-friendly Discord bot. So, here's what you need to know.
1. Use a Private Test Server
Before deploying your bot to a live or public server, always test it in a private Discord server where you can freely:
- Check commands
- Simulate user behavior
- Monitor logs without disruptions
2. Print Logs and Use Logging
Use Python’s built-in logging module instead of print() for better insight into what your bot is doing.
import logging

logging.basicConfig(level=logging.INFO)
You can then monitor when commands are used, when the bot connects, or when errors occur.
Example:
@bot.event
async def on_ready():
    logging.info(f"{bot.user} is connected and ready!")
3. Catch and Handle Errors Gracefully
Catching exceptions helps prevent your bot from crashing due to a single mistake.
@bot.command()
async def divide(ctx, a: int, b: int):
    try:
        result = a / b
        await ctx.send(f"Result: {result}")
    except ZeroDivisionError:
        await ctx.send("Error: Cannot divide by zero!")
Also, create a global error handler:
@bot.event
async def on_command_error(ctx, error):
    await ctx.send(f"Oops! An error occurred: {str(error)}")
4. Test Each Command Thoroughly
Go through different types of inputs and edge cases:
- Missing arguments (!add)
- Incorrect types (!add one two)
- Valid edge inputs (!divide 5 0)
5. Use a Linter and Formatter
Use tools like:
- flake8 or pylint for catching syntax issues and bad practices
- black or autopep8 for consistent formatting
This makes the code easier to read, debug, and maintain, especially in large bots.
6. Check Bot Permissions
One of the most common "bugs" is your bot not having the proper permissions for:
- Reading messages
- Sending messages
- Deleting messages
- Managing roles, kick/ban users, etc.
Double-check the role permissions both in the Discord Developer Portal and your server settings.
7. Use Try-Except Around API Calls
Discord API rate limits or errors can crash your bot if not handled properly.
try:
    await ctx.send("Hello")
except discord.Forbidden:
    logging.error("Bot lacks permission to send messages in this channel.")
8. Monitor Latency and Uptime
You can track:
- bot.latency to check your bot’s delay in response (in seconds)
- Use uptime monitors like UptimeRobot or a hosted dashboard for real-world performance tracking
@bot.command()
async def latency(ctx):
    await ctx.send(f"Pong! Latency is {round(bot.latency * 1000)} ms")
Level Up Your Bot Infrastructure with IPRoyal Proxies
With a solid understanding of the Discord API and a deployment-ready bot, you’re now equipped to start creating powerful, real-time experiences for your server or community.
Whether you're building moderation tools, automating workflows, or experimenting with new features, there's plenty of room to expand and optimize.
As your bot scales, using residential proxies can help manage multiple accounts, reduce the risk of IP bans, and access region-specific data more efficiently.
Keep experimenting, and you'll keep improving.
FAQ
Do I need to know advanced Python to build a Discord bot?
Not at all. Basic knowledge of Python syntax and functions is enough to start. As you go, you’ll naturally learn more about asynchronous code and Discord API functionality while building your bot step by step.
Is it free to create and run a Discord bot?
Yes, creating a Discord bot and using the Discord Developer Portal is completely free. Hosting can also be free using platforms like Replit or Glitch, though paid VPS services offer more reliability and performance.
How can I keep my bot online all the time?
You’ll need to deploy it on a VPS, cloud platform, or bot hosting service. This ensures 24/7 uptime without relying on your local machine, which could shut down or disconnect.
What are some cool features I can add to my bot?
Try auto-role assignment, custom welcome messages, moderation tools, music streaming, AI chat, server stats, reminders, or even games. The possibilities are endless with APIs and a bit of creativity.