'/%3e%3cellipse%20opacity='0.34'%20cx='327.5'%20cy='339'%20rx='264.5'%20ry='264'%20fill='url(%23paint1_linear_12724_35442)'/%3e%3cdefs%3e%3clinearGradient%20id='paint0_linear_12724_35442'%20x1='327'%20y1='-2.524e-06'%20x2='327'%20y2='389.286'%20gradientUnits='userSpaceOnUse'%3e%3cstop%20stop-color='%2327D9E5'/%3e%3cstop%20offset='0.927406'%20stop-color='%23004047'%20stop-opacity='0'/%3e%3c/linearGradient%3e%3clinearGradient%20id='paint1_linear_12724_35442'%20x1='328.02'%20y1='74.7771'%20x2='328.02'%20y2='395.312'%20gradientUnits='userSpaceOnUse'%3e%3cstop%20stop-color='%2327D9E5'/%3e%3cstop%20offset='0.927406'%20stop-color='%23004047'%20stop-opacity='0'/%3e%3c/linearGradient%3e%3c/defs%3e%3c/svg%3e)
Web Scraping with Scrapy in Python: A Step-by-Step Guide
PythonLearn how to build powerful web scrapers with Scrapy in Python. This step-by-step guide covers setup, spiders, pipelines, JS scraping, and data export.

Vilius Dumcius
Key Takeaways
-
Scrapy streamlines web scraping operations with built-in tools for crawling, parsing, and exporting data at scale.
-
It can handle static and dynamic pages, including JavaScript-heavy sites, with extensions like Splash.
-
Rotating headers, user agents, and proxies helps prevent blogs and ensures a reliable data collection process.
The web is overflowing with valuable data, but extracting it manually can be slow and tedious. This is where web scraping comes in, transforming complex websites into structured, actionable information with the help of tools like Scrapy.
Whether you’re a beginner or an experienced developer, you’ll learn how to set up Scrapy, build Scrapy Spider classes, follow links, download images, handle dynamic content, and tweak settings to avoid getting blocked. By the end of our guide, you’ll be equipped to launch your own web scraping project with Scrapy.
What Is Scrapy and Why Use It for Web Scraping?
Scrapy is a robust open-source web scraping framework written in Python. In simple terms, Scrapy provides the tools to gather data from websites by automating the process of retrieving pages and parsing their content.
It performs both web crawling (navigating through links) and web scraping (extracting specific information,) using components called “Spiders” to perform the task.
Web crawling is analogous to what search engine bots do: systematically browsing pages via links for indexing. In contrast, web scraping focuses on pulling specific content or datasets from pages.
Scrapy excels at both: its spiders act like web Spiders that traverse pages, while simultaneously acting as a scraper that parses and collects targeted data.
Why Use Scrapy?
Compared to writing a manual script with libraries like Requests + BeautifulSoup, Scrapy offers several advantages. First, it’s asynchronous and fast, as spiders can fetch many pages in parallel without extra effort, making large-scale web scraping efficient.
Second, Scrapy provides a project structure and built-in utilities (e.g., selectors, item pipelines, and Scrapy shell for testing) that simplify development.
Finally, Scrapy handles the heavy lifting of requests, retries, and data export. If you need to get data from multiple pages or websites reliably, the Scrapy framework is often a better choice than a quick one-off script.
In short, use Scrapy when your web scraping project demands scalability, speed, and robust features out of the box.
How to Use Scrapy in Python for Web Scraping
Let’s dive into using Scrapy for a real Scrapy project. We’ll start by installing Scrapy and setting up a new project. Then we’ll create a basic Spider to crawl a page and extract data, extend it to handle pagination, download images, deal with JavaScript, and finally save our data.
Along the way, we’ll also discuss how to add headers, manage cookies, and rotate user agents to avoid blocks.
Setting Up Your Environment and Installing Scrapy
Before you begin, make sure you have Python 3. Scrapy requires Python 3.9 or newer, so verify your Python version (using the python –version command).
Now, let’s install Scrapy. The easiest way is to use pip:
pip install scrapy
This command will install Scrapy and all its dependencies. Once the installation is complete, you can verify that Scrapy is available by running:
scrapy --version
If you encounter errors on Windows, consider installing Scrapy via Anaconda/conda, which pre-packages some dependencies, but for most cases, pip works fine.
With Scrapy installed, you’re ready to create a new Scrapy project. Navigate to a directory where you want to store your project and run the crawl command to start a project:
scrapy startproject myproject
This tells Scrapy to create a new project named ‘myproject’. It will generate a folder called ‘myproject’ (inside the current directory) with a basic project structure:
- scrapy.cfg – Project configuration file (tells Scrapy the project’s settings module).
- myproject/ – The project’s Python module, where your code lives.
- myproject/spiders/ – Directory for your spider definitions (your crawling scripts).
- myproject/items.py – Define item classes (structured data containers) if needed.
- myproject/pipelines.py – Define item pipelines (for post-processing scraped data).
- myproject/settings.py – Project settings (configure crawling behavior, pipelines, etc.).
- myproject/middlewares.py – For custom middleware (advanced usage).
When you open the project folder, you’ll see these Python files. This scaffold is what makes up a Scrapy web scraping project. You can now enter the project directory (cd myproject) to start building your spider.
Creating a Basic Scrapy Spider to Scrape One Page
In Scrapy, a Spider script is a Python class that defines how to crawl a website and what data to collect. Each spider lives in its own Python file in the ‘spiders’ folder. You can create one manually or use Scrapy’s generator.
Let’s use the built-in command to generate a new spider:
scrapy genspider example example.com
This crawl command will create a spider template named ‘example’ targeting the domain we included. Scrapy will add a file example.py in the ‘spiders’ directory with some starter code.
Open that file, and it should look like this (simplified for clarity):
import scrapy

class ExampleSpider(scrapy.Spider):
    name = "example"
    allowed_domains = ["example.com"]
    start_urls = ["http://example.com/"]

    def parse(self, response):
        # parsing logic will go here
        pass
Let’s understand this code.
- A Scrapy spider is defined as a subclass of scrapy.Spider. We give it a unique name (here ‘example’ ), which is how we’ll refer to this spider when running it.
- The allowed_domains helps restrict the crawl to specific domains (Scrapy will ignore requests to other domains if set).
- The start_urls list defines the starting point of the crawl. Here we put one URL (example.com) to begin with.
Scrapy will make an initial request to each URL in start_urls. When a response comes back, the spider’s parse method is called to handle that response.
The parse method is where we write Python code to extract data from the page and yield the results. We can use Scrapy’s powerful selectors to pick out elements from the HTML. Scrapy provides two flavors of selectors: CSS selector syntax and XPath.
CSS is often easier for beginners. For example, response.css('title::text').get() would grab the text inside the <title> tag of the page.
Let’s implement a simple parse method that extracts the page title and prints it:
def parse(self, response):
    title = response.css('title::text').get()
    print("Page title:", title)
Here we used a CSS selector 'title::text' to get the text content of the <title> element. We then simply print it to the console. In a real spider, instead of printing, you would typically yield the data as an item or dictionary, allowing Scrapy to handle it (log it, store it, or send it to pipelines).
For demonstration, printing is fine, but keep in mind printing in parse is just for debugging as Scrapy’s design expects you to yield scraped data. For example, we could use yield {“title”: title} to output an item.
At this point, we have a minimal spider that fetches one page and grabs the title. Let’s run it to see how Scrapy works. In the project folder, run the crawl command:
scrapy crawl example
This tells Scrapy to run the spider named “example”. You should see Scrapy’s log output in the terminal as it fetches the page, and eventually the line “Page title: Example Domain” (or whatever the title may be) is printed.
Congrats! You’ve built your first Scrapy Spider and successfully scraped data from a page!
Tip: During development, the Scrapy shell is incredibly handy for testing your selectors. Instead of running the whole spider, you can type scrapy shell URL to fetch a page and get an interactive prompt.
For example:
scrapy shell http://example.com
This command will download the page and drop you into a console where you can do things like response.status or try out response.css('title::text').get() to ensure your selectors work.
This helps refine your parsing logic before putting it into the spider code.
Scraping Multiple Pages Automatically
Our current Scrapy Spider handles one page, but what if we need to gather data from multiple pages (e.g., a list of products spread across pagination)? Scrapy makes it easy to follow links to the next page, or any links for that matter, creating a loop of crawling.
Suppose the site we’re scraping has a ‘Next’ button or link we need to click to get the next page of results. Typically, that ‘Next’ link is an <a> tag. We can extract its href attribute (the URL) in our parse method, then tell Scrapy to follow it.
For example, if the ‘Next’ button is something like:
<a class="next" href="/page/2">Next</a>
we can select it with a CSS selector and extract the URL:
next_page_url = response.css('a.next::attr(href)').get()
This grabs the value of the href attribute of the first <a> element with class “next”. If such an element is found, next_page_url will contain the link (which might be relative, e.g. “/page/2”). We can then create a new request for that URL.
The simplest way is to use response.follow() which is a convenient method Scrapy provides. response.follow takes a URL (absolute or relative) or a selector for an <a> element, and returns a new Request object. It automatically handles relative URLs, so you don’t need to join them manually.
Even better, if you pass a selector of an <a> element, response.follow will use that link’s href for you by default.
Let’s add this logic to our spider’s parse method:
def parse(self, response):
    # ... extract data from current page ...
    next_page = response.css('a.next::attr(href)').get()
    if next_page:
        # Schedule the next page for scraping
        yield response.follow(next_page, callback=self.parse)
With these lines, after extracting the current page’s data, the spider checks for a next page link. If next_page is not None, it yields a new request to that URL and ties it to the same parse method as callback.
Scrapy will enqueue this request and, when fetched, feed the response back into parse. This creates a loop where parse keeps getting called for each new page until no further ‘Next’ link is found.
In other words, the spider will keep web crawling page by page, extracting data on each, until it reaches the end. Scrapy handles the scheduling and prevents infinite loops (it won’t revisit the same URL by default).
Extracting and Downloading Images Using Scrapy Pipelines
Web scraping often isn’t just text. You might need to grab images (for example, product photos). Scrapy has you covered with its Images Pipeline, a built-in feature that can download images linked in your scraped data.
How do we use it? First, we need to tell our spider to capture image URLs from the page. Let’s say each item on the page has an image in an <img> tag with the source URL in the src attribute.
In our parse method, after extracting text data, we could do something like:
image_url = response.css('div.item img::attr(src)').get()
yield {
    "title": title,
    "image_urls": [image_url]
}
Here, we assume the page has a div.item enclosing an img. We extract the src of the first image inside it. The key part is we include a field ‘image_urls’ (the name is important) in the yielded item, containing a list of image URLs we want to download. Scrapy’s Images Pipeline looks for this special field by default.
However, just yielding image_urls is not enough; we must enable the pipeline in our Scrapy project settings and configure a download location. Open myproject/settings.py and add:
# Enable the Images Pipeline
ITEM_PIPELINES = {
    "scrapy.pipelines.images.ImagesPipeline": 1
}
# Specify a folder to store images
IMAGES_STORE = "images"
By adding Scrapy’s built-in ImagesPipeline to ITEM_PIPELINES with a priority (here 1), we activate it. We also set IMAGES_STORE to a path (relative or absolute) where images will be saved. In this case, an ‘images’ subfolder will be created in our project directory to hold downloads.
Now, when you run the spider, each yielded item with image_urls will trigger the pipeline to fetch those URLs. Scrapy will download the images and save them in IMAGES_STORE (with subdirectories for full images and thumbnails if any).
Note: To use the ImagesPipeline, you need to have the Pillow library installed (Scrapy uses it for image processing). If you installed Scrapy via pip, Pillow should have been installed automatically as a dependency. If not, just run:
pip install Pillow
to add it.
Scraping JavaScript Content Using Splash
By default, Scrapy’s downloader does not execute JavaScript, it only fetches the static HTML. If you try to scrape a JavaScript-heavy site with pure Scrapy, you might get empty results or missing data. So how do we handle such cases? Enter Splash.
Splash is a lightweight headless browser that can render pages (including running JavaScript) and return the resulting HTML to Scrapy. It’s commonly used with Scrapy via a middleware called scrapy-splash. Using Splash, your Scrapy web scraper can effectively see what a real browser would see, enabling you to scrape dynamic content.
To use Splash, install the scrapy-splash plugin:
pip install scrapy-splash
You’ll also need to have a Splash server running. The easiest way is using Docker. For example:
docker run -p 8050:8050 scrapinghub/splash
will run Splash on port 8050.
Next, configure Scrapy to use Splash. In your project’s settings.py, add the Splash components:
DOWNLOADER_MIDDLEWARES = {
    "scrapy_splash.SplashCookiesMiddleware": 723,
    "scrapy_splash.SplashMiddleware": 725,
    "scrapy.downloadermiddlewares.httpcompression.HttpCompressionMiddleware": 810,
}
SPIDER_MIDDLEWARES = {
    "scrapy_splash.SplashDeduplicateArgsMiddleware": 100,
}
DUPEFILTER_CLASS = "scrapy_splash.SplashAwareDupeFilter"
These settings insert Splash middleware at the right priorities and ensure Scrapy can communicate with Splash without filtering out duplicate requests incorrectly. You also need to tell Scrapy where Splash is running:
SPLASH_URL = "http://localhost:8050"
Now your Scrapy spider can make requests via Splash. Instead of the normal scrapy.Request, you’ll use SplashRequest from scrapy_splash.
Here’s an example of a spider that uses Splash:
import scrapy
from scrapy_splash import SplashRequest

class JSSpider(scrapy.Spider):
    name = "js_spider"
    start_urls = ["http://quotes.toscrape.com/js/"]  # This example site needs JS

    def start_requests(self):
        for url in self.start_urls:
            yield SplashRequest(url, self.parse, args={"wait": 1})

    def parse(self, response):
        # Now response is the rendered page HTML
        quotes = response.css("div.quote")
        for quote in quotes:
            yield {
                "text": quote.css("span.text::text").get(),
                "author": quote.css("small.author::text").get(),
            }
        # follow next page link, if present
        next_page = response.css("li.next a::attr(href)").get()
        if next_page:
            yield SplashRequest(response.urljoin(next_page), self.parse, args={"wait": 1})
In start_requests, we override the default behavior to yield a SplashRequest for each URL. The args={"wait": 1} tells Splash to wait 1 second for JS to load (you can adjust or add more args as needed, e.g., execute a custom script).
The response we get in parse is now the fully rendered HTML, so selectors like response.css('div.quote') work as if we were scraping a static site. We extract the quote text and author, yield them, and also follow the pagination using SplashRequest again for the next page.
Notice we used response.urljoin(next_page) because we had to convert a relative URL to absolute outside of response.follow (since we want to use SplashRequest specifically). The spider will continue until all JS-rendered pages are scraped.
Cleaning, Exporting, and Saving the Data
After your Scrapy project successfully crawls and collects data, you’ll want to save that data and perhaps clean it up. Scrapy provides multiple convenient ways to export your scraped data in popular formats like JSON, CSV, or XML. The simplest method is to use the crawl command with an output flag:
scrapy crawl example -O output.json
This will run the spider and write all scraped items to output.json in JSON Lines format (one JSON object per line). The -O flag overwrites any existing file, whereas -o would append to the file if it exists.
If you prefer CSV, you can do -o data.csv and Scrapy will infer the format from the file extension. There’s also support for XML and other formats via the feed export mechanism. This approach requires almost no code changes as it’s built into Scrapy’s command-line options.
Sometimes you might want more control over the data before saving, especially to clean or transform it. This is where Item Pipelines come in. We saw the pipeline concept when downloading images, but pipelines are also useful for data post-processing.
You can define custom pipeline classes in pipelines.py. Each pipeline is a Python class with a process_item(self, item, spider) method that gets called for every item. Within process_item, you can clean or validate the item, and either return it (to pass it to the next pipeline or output) or drop it.
To activate a pipeline, you add it to ITEM_PIPELINES in settings with an order number (just like we did with ImagesPipeline). Lower numbers run earlier. For instance:
ITEM_PIPELINES = {
    "myproject.pipelines.CleaningPipeline": 300,
    "myproject.pipelines.DuplicatesPipeline": 400,
}
This means Scrapy will send every item through CleaningPipeline, then DuplicatesPipeline, then to export or other final processes. Within those, you implement the cleaning logic.
If you don’t need that level of customization, sticking with the built-in feed exports via -o and -O flags is perfectly fine. You can still do minor cleaning in the spider itself (e.g., strip a string response.css('::text').get().strip()). But for larger projects, pipelines help keep your parse code focused on extraction and let dedicated classes handle post-processing.
Adding Headers, Handling Cookies, and Rotating User Agents
When you’re scraping websites, especially at scale, you need to be mindful of getting blocked or cloaked by anti-scraping measures. Websites can detect scrapers and respond with CAPTCHAs, bans, or different content. Scrapy gives you tools to help mimic real browser behavior. Three important aspects are HTTP headers, cookies, and user agents.
Custom Headers & User-Agent
By default, Scrapy identifies itself with a default user agent string, something like Scrapy/2.x (+https://scrapy.org). This is perfectly legal, but some servers might block obvious scrapers on principle.
A common technique is to impersonate a normal web browser’s User-Agent string. You can set a default USER_AGENT in your settings.py, for example:
USER_AGENT = "Mozilla/5.0 (Windows NT 10.0; Win64; x64) AppleWebKit/537.36 (KHTML, like Gecko) Chrome/100.0.4896.127 Safari/537.36"
This string is a recent Chrome browser’s identification. By doing this, your spider will send this header with every request, which can help you blend in.
Beyond user agent, you can add other headers as needed. For example, some sites check the Referer header or require specific headers for AJAX calls. You can add default request headers in settings via the DEFAULT_REQUEST_HEADERS dictionary, or on a per-request basis by providing a headers argument to scrapy.Request/SplashRequest.
Rotating User Agents
Using one User-Agent string is better than the Scrapy default, but using rotating user agents can further reduce the chance of detection. This means cycling through a list of user agent strings for each request.
You can implement this by writing a custom downloader middleware or by using a third-party package like scrapy-fake-useragent or scrapy-useragents. For a simple approach, you might keep a list of strings and randomly choose one for each request:
import random
USER_AGENTS = [ "Mozilla/5.0 (Windows NT 10.0; Win64; x64)...",
                "Mozilla/5.0 (X11; Linux x86_64)...",
                ... ]
# in your spider or middleware:
request.headers['User-Agent'] = random.choice(USER_AGENTS)
Scrapy’s architecture makes it easy to plug this in globally using a downloader middleware that sets User-Agent on each request. There are guides and utils available to do this, so you don’t have to reinvent the wheel.
Handling Cookies
By default, Scrapy manages cookies for you. It will retain cookies (like session IDs) sent by the server and send them back on subsequent requests to the same domain.
This is usually what you want, as it mimics a normal browser session. If you need to disable cookies (for example, to appear like a fresh new session on every request, or if you want to ignore cookie-based tracking), you can set COOKIES_ENABLED = False in settings.
If you need to set specific cookies (say, you have a session cookie from a login you did outside of Scrapy, or you want to start logged in), you can either specify cookies in the Request meta or use the Cookie header in your DEFAULT_REQUEST_HEADERS.
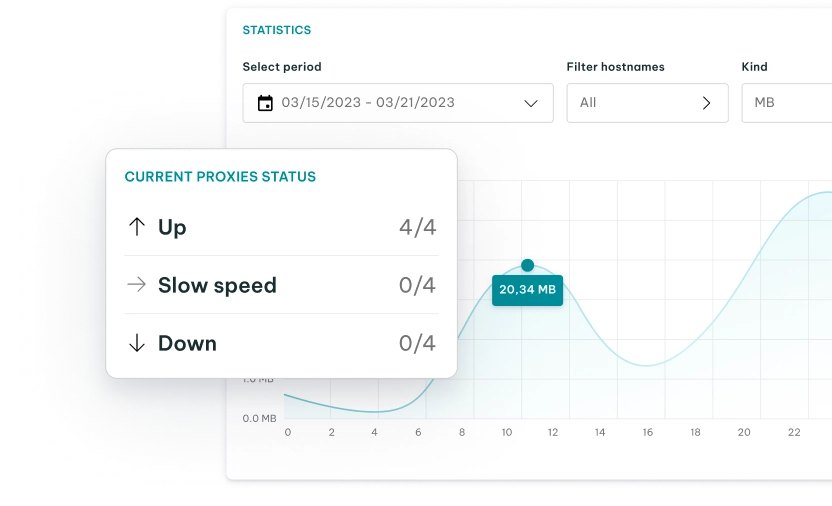
Rotating Proxies
Sometimes changing user agents isn’t enough because the target site is tracking IP addresses. If they see too many requests from one IP in a short time, they might throttle or block you. This is where residential proxies come in.
Using proxies means routing your requests through different IP addresses. To use a proxy in Scrapy, you can set the proxy meta on a request. For example:
request = scrapy.Request(url, callback=self.parse)
request.meta['proxy'] = "http://123.45.67.89:3128"
This would route the request through the proxy at that IP and port. If you have a list of proxies, you could randomize which one you assign to each request (similar to rotating user agents). There are also middleware packages like scrapy-rotating-proxies and scrapy-proxies that automate this.
Global Pool, Precise Targeting, Zero Contracts
Premium Residential Proxies
Final Thoughts
All in all, Scrapy is an excellent tool to build a Scrapy Python crawler that can navigate websites and gather information in a structured way.
In this guide, we covered how to start a Scrapy project, create a basic Spider, follow links for web scraping across multiple pages, download images with pipelines, render JavaScript content with Splash, and apply techniques to avoid blocks like custom headers and user agents.