From web scraping, social media management, and e-commerce to personal data protection - there are many reasons to use an anti-detect browser. These tools are popular for a reason. Businesses, marketers, entrepreneurs, and security-focused individuals take advantage of them every day.
Although focused on social media management and affiliate marketing, DICLoak is more than capable of advanced web scraping, automation, and beyond. Most importantly, you don’t need to be an expert to take full advantage of its features.
In this article, we’ll cover DICloak’s key features and explain how to combine it with IPRoyal proxies to ensure all your tasks run smoothly. Also, we have a special offer for DICloak users - use the code IPRoyal20 at checkout to get an extra 20% off!
What Is DICloak?
DICLoak primarily focuses on making privacy protection accessible to everyone. It’s currently available on Windows (64 and 32-bit), as well as macOS (with Intel and Apple silicon). Even though a premium plan is necessary to take full advantage of it, a free version is also available.
Here are some of DICloak’s key features:
- Fingerprint control
Using a different IP address for multi-accounting purposes is not enough. Every browser we use has its own unique digital fingerprint, which can easily reveal information we don’t want to share. In other words, web scraping without fingerprint manipulation almost always ends with a ban. DICloak enables users to modify all aspects of their fingerprints, including the operating system, user agent, language, location, time zone, and more.
- Profile isolation
Keeping browser profiles separated is essential, as it prevents data leaks and minimizes the chances of detection. DICloak isolates all browser profiles so they look like each one is coming from a different device. As an added bonus, users can create profile groups for easier navigation and project management.
- Automation
Multi-accounting becomes significantly easier with the ability to automate certain operations like account creation and website navigation. DICloak offers extensive RPA templates and customizable scripts to automate repetitive tasks and synchronize actions across multiple profiles. The synchronizer also supports delays to mimic genuine user behavior.
Setting Up a DICloak Proxy With IPRoyal
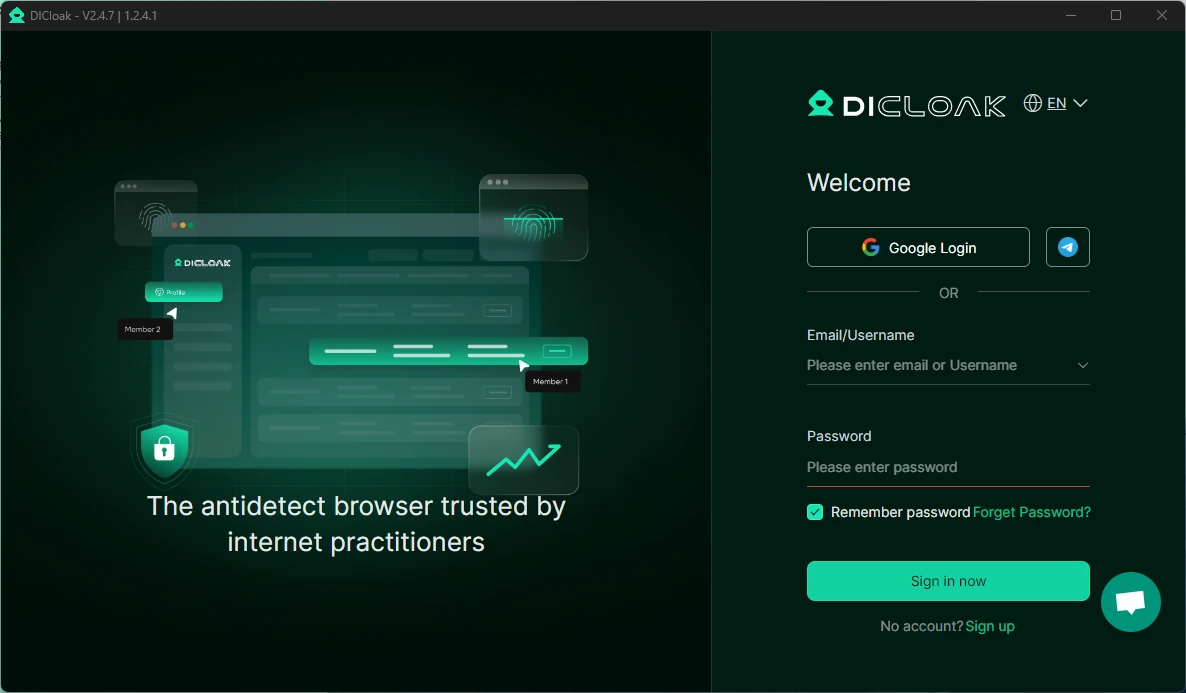
1. Download DICloak, sign up if needed, and sign in.
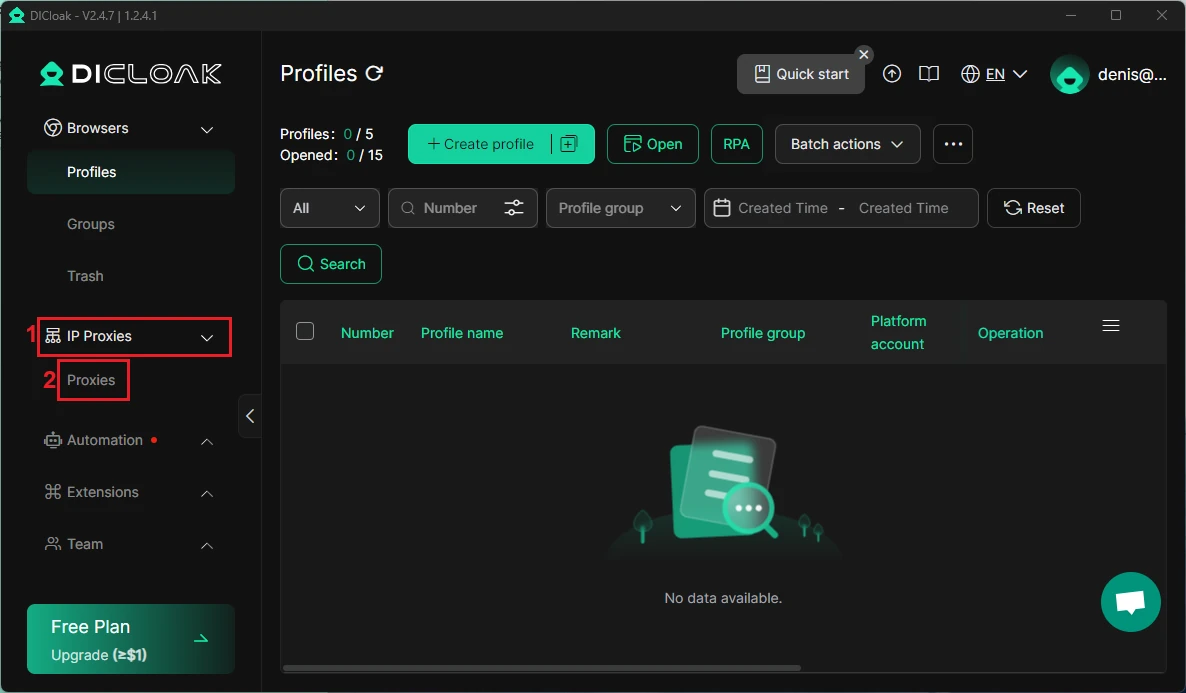
2. Click the IP Proxies (1) tab in the menu on the left to expand it and select Proxies (2).
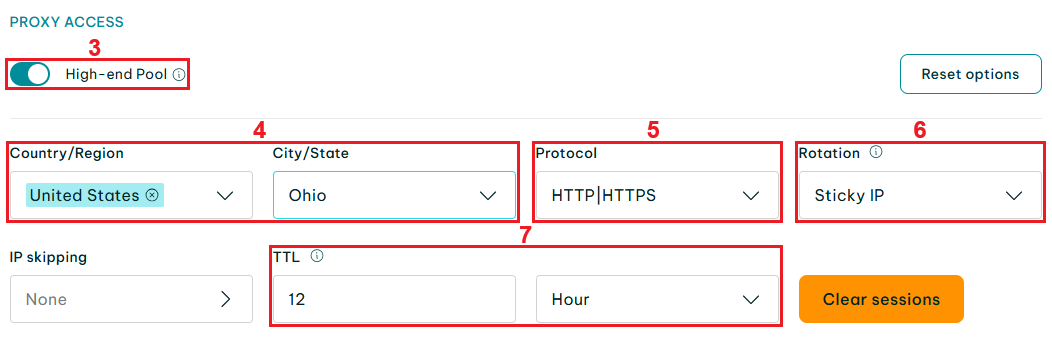
3. Visit the IPRoyal dashboard to configure your proxies. We’ll use high-end (3) residential proxies from Ohio, United States (4), with HTTP/HTTPS protocol (5), sticky sessions (6) and a session duration (7) of 12 hours.
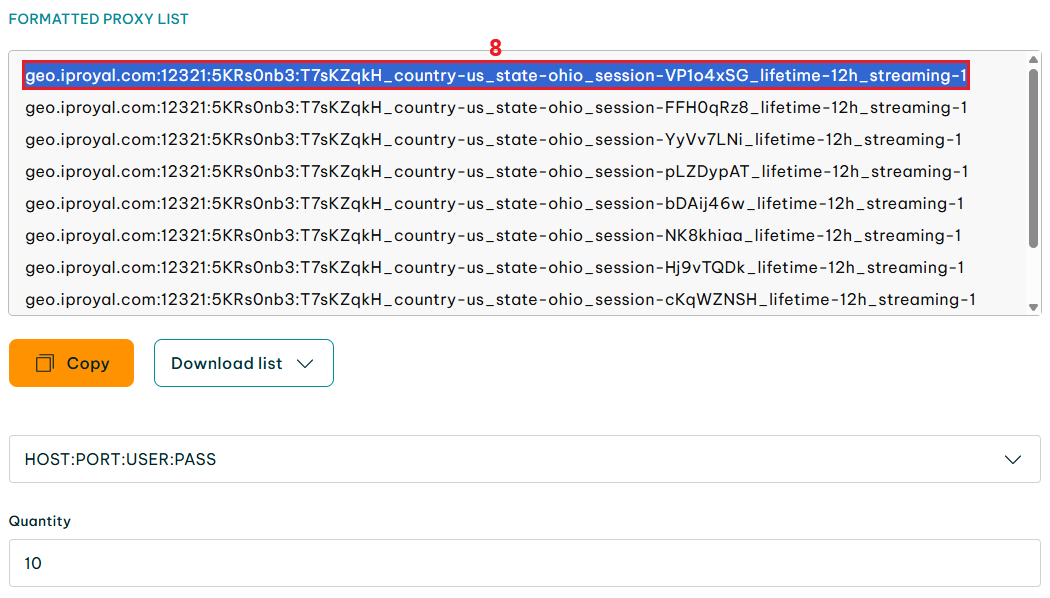
4. Scroll down to the Formatted proxy list section. Each row is a unique set of credentials that contains the proxy hostname (or IP), port, username, and password. Select one line (8) and copy it to your clipboard (by pressing Control + C on Windows, Command + C on macOS).
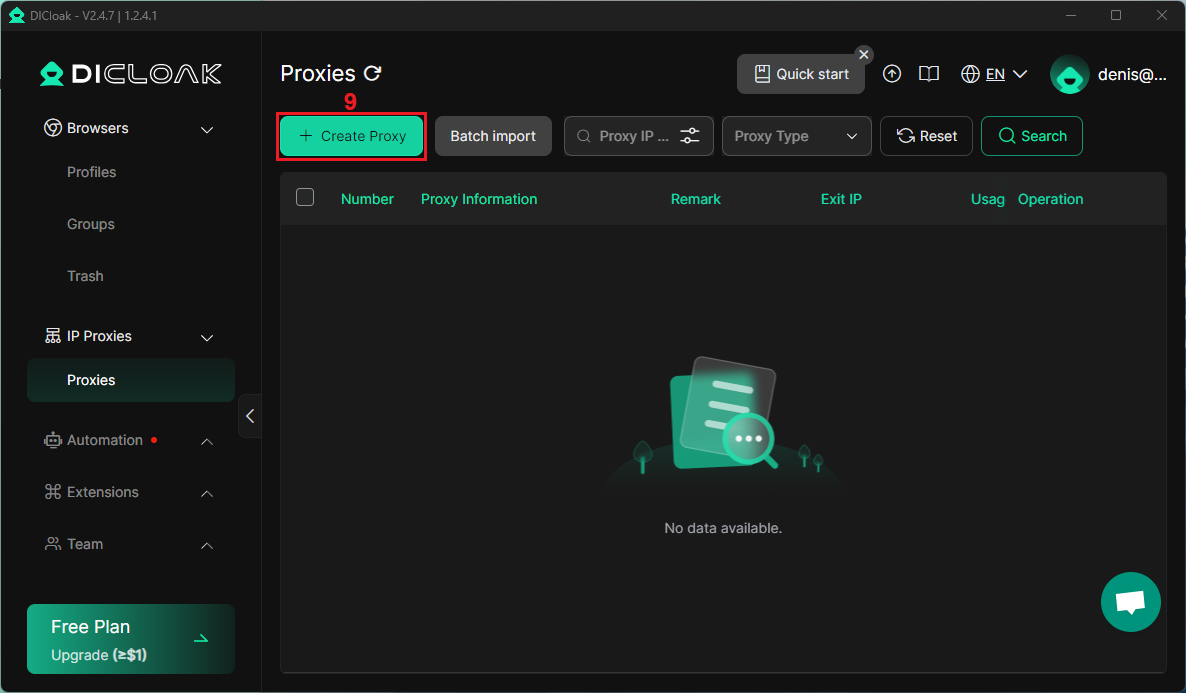
5. Return to DICloak and click the Create Proxy (9) button.
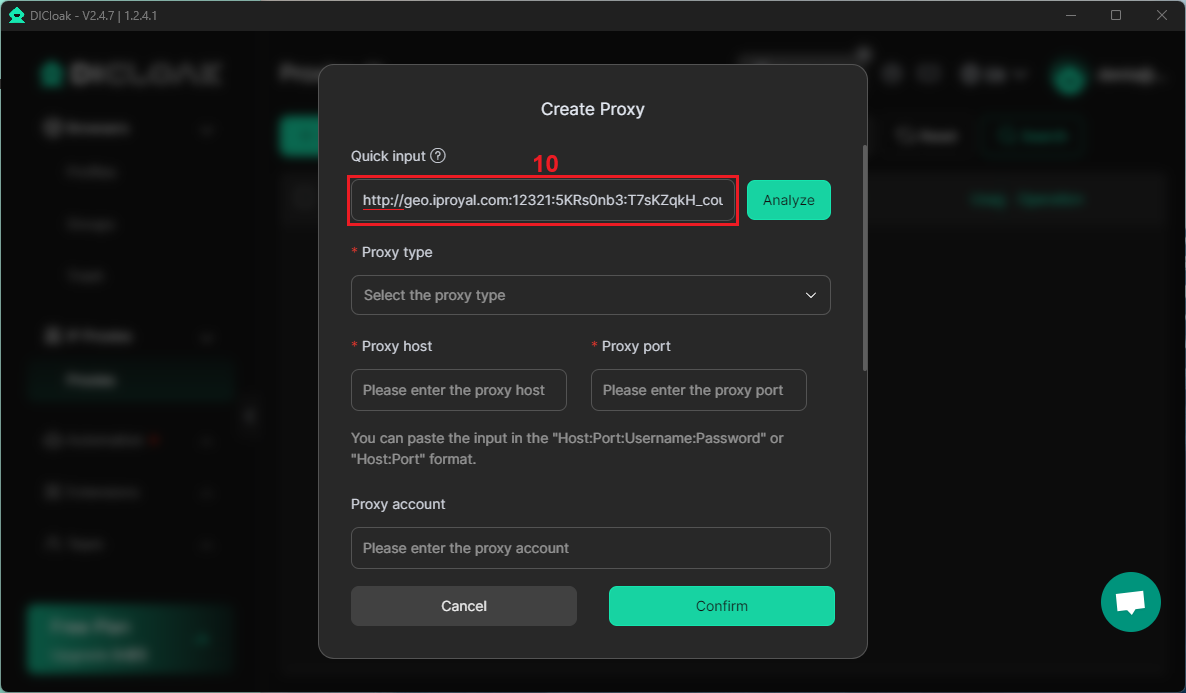
6. Paste your credentials into the Quick input (10) field. Note that DICloak requires a proxy type at the beginning of the string. We’re using an HTTP/HTTPS proxy, so we’ll add http:// at the beginning. Alternatively, you can use socks5:// for SOCKS5 proxies. Your credentials string should look like this:
http://geo.iproyal.com:12321:5KRs0nb3:T7sKZqkH_country-us_state-ohio_session-eur1EQC3_lifetime-12h_streaming-1
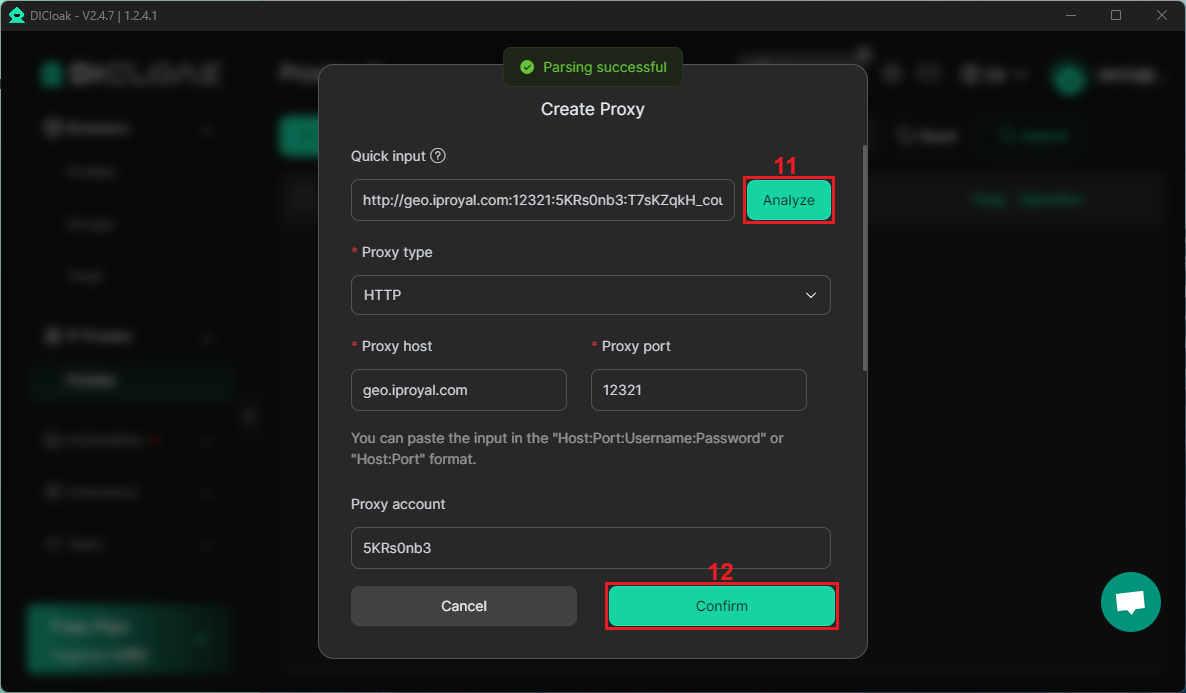
7. Click the Analyze (11) button, and DICloak will fill in all the necessary fields using your credentials string. Once it’s done, click the Confirm (12) button.
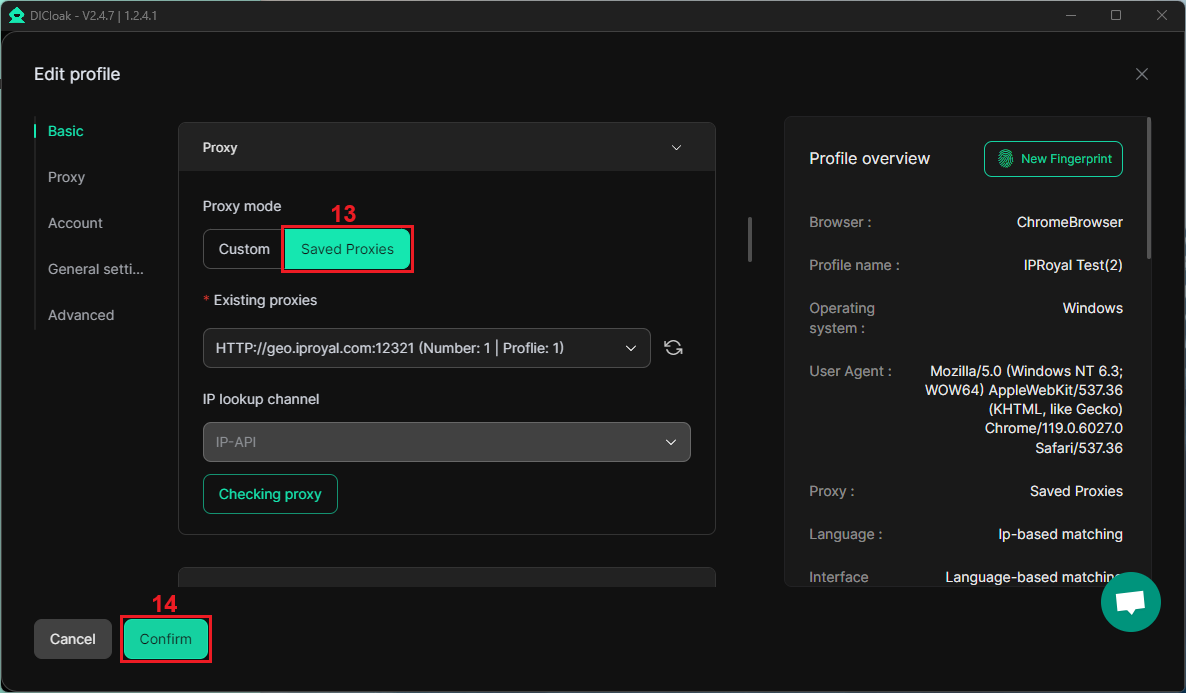
8. To add your newly created proxy to a profile, edit a profile (or create a new one) and find the Proxy section. Check the Saved Proxies (13) button, select your proxy from the list of saved proxies, and click the Confirm (14) button.
9. Finally, launch your profile and visit IPHey or a similar website.
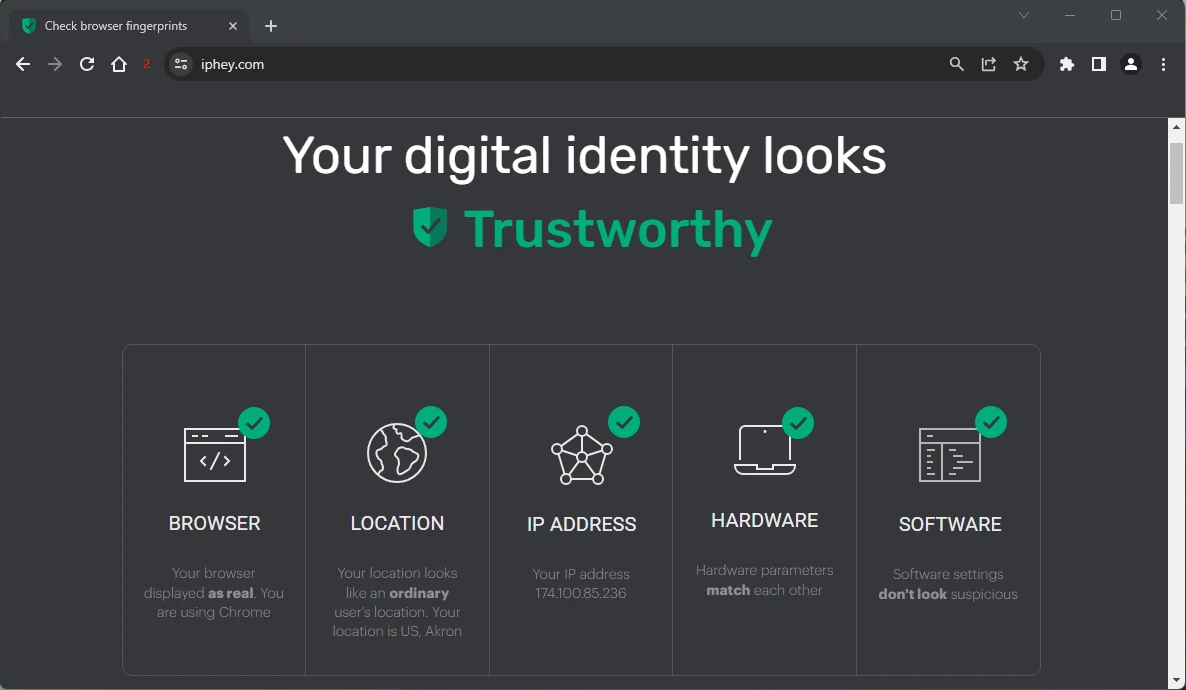
10. If everything looks okay, your profile is ready.
Why Use IPRoyal as Your DICloak Proxy Provider?
It’s common knowledge that all anti-detect browsers need high-quality proxies to ensure privacy and perform best. Here’s why IPRoyal’s residential proxies make an excellent option for DICloak and any other anti-detect browser:
- Over 32 million genuine residential IPs in 195 countries
- Subscription and pay-as-you-go pricing plans with non-expiring traffic
- HTTP/HTTPS and SOCKS5 support
- Precise geo-targeting options (country, state, city, and ISP level)
- Competitive pricing with bulk discounts of up to 75%
Don’t forget to take advantage of our special offers for DICloak users - get an extra 20% off IPRoyal proxies by using the code IPRoyal20 at checkout!
Final Thoughts
DICloak has a lot to offer, from great features to customizable plans with competitive pricing. It’s an all-in-one solution for those who need secure multi-account management, web scraping, and more. However, as with all similar solutions, it needs high-quality proxies to reach its full potential.