If you’ve been keeping up with our blogs, you already know what anti-detect browsers are and what they can do. Unlike “regular” browsers, these provide you with full control over the information you share with the web servers you interact with.
With a standard browser, you share your IP address, location, software settings, and hardware information with each web server you interact with. Anti-detect browsers like ixBrowser enable you to modify this browser fingerprint as needed.
As a result, you can generate unique browser profiles and switch between them as needed without having to use multiple devices. That way, you can manage countless profiles on any website or other online platform from a single device without getting detected.
In this article, we’ll cover ixBrowser’s key features and offer a step-by-step guide on how to configure it with IPRoyal proxies.
What Is ixBrowser?
The first thing that stands out about ixBrowser is the pricing. The website boasts a free version that will meet the needs of 99% users, with profiles limited to generating 10 per day and opening them 100 times per day, support for custom extensions, profile transfers, member permissions, and more.
The browser also offers paid plans, starting at only $3.99/month. These plans offer some additional features, including advanced fingerprint control, batch commands, API support, and cloud storage. Still, even the most advanced (Enterprise) plan only costs $19.99 per month, which is significantly more cost-effective compared to other solutions we’ve seen.
In terms of key features, ixBrowser offers everything you expect from a robust anti-detect browser:
- Full fingerprint customization
- Cloud storage and synchronization
- Team management features
- Extension support
Another thing that impacts the pricing is your choice of proxies. You can purchase static or rotating residential proxies directly from the browser starting at:
- $3.6/month for a static residential proxy
- $2.3/month for a static datacenter proxy
- $5.49/GB of rotating residential proxy traffic
Why Use IPRoyal as Your ixBrowser Proxy Provider?
Of course, you also have the option to source your proxies elsewhere. IPRoyal residential proxies make a great option for ixBrowser because each IP address in our pool comes from a genuine device with a residential internet connection. In other words, there’s no way for any website or platform to distinguish your ixBrowser profiles from other genuine visitors.
Our proxies offer some additional advantages:
- A global pool of 32M+ residential proxies in 195 countries
- Precise geo-targeting (with country, state, and city-level precision)
- Customizable IP rotation (sticky sessions up to 7 days)
- Pay-as-you-go pricing with non-expiring traffic
- Excellent value with discounts for bulk orders
Setting Up an ixBrowser Proxy With IPRoyal
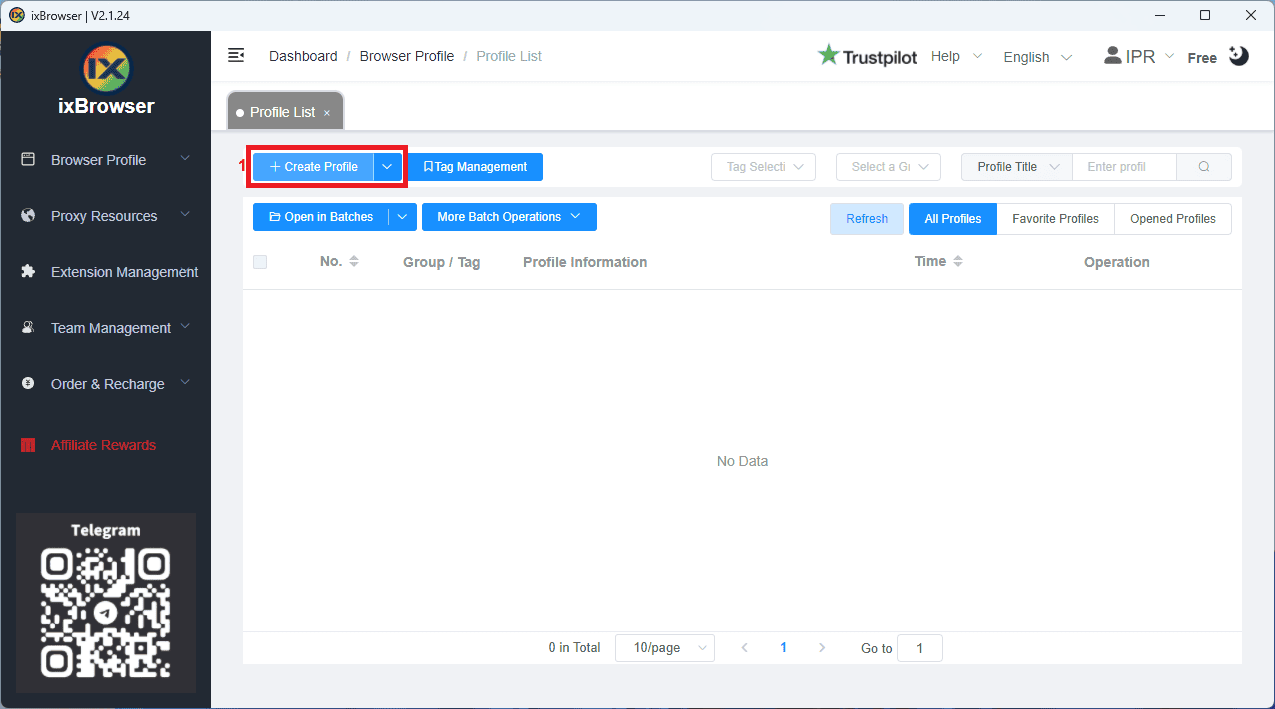
1. Download the latest version of ixBrowser from the website. Launch the browser, sign up, and click the Create Profile (1) button.
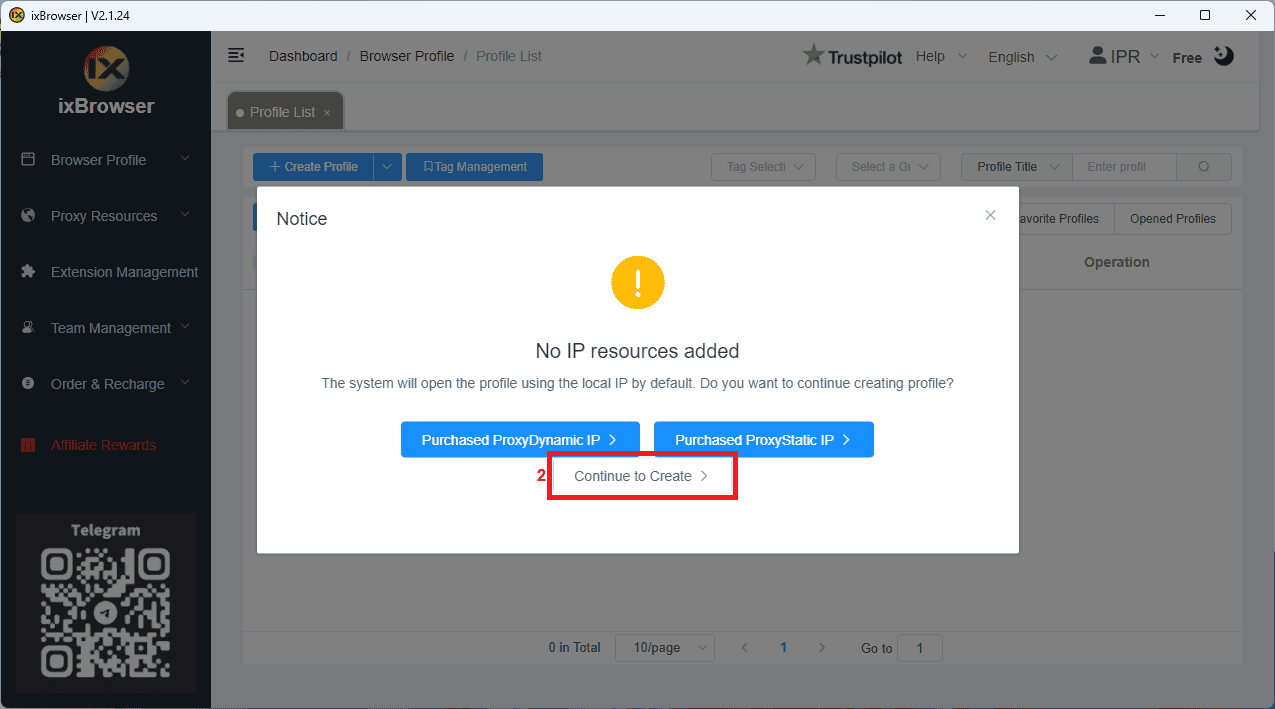
2. You will see a notification that no proxies are set. Click the Continue to Create (2) button.
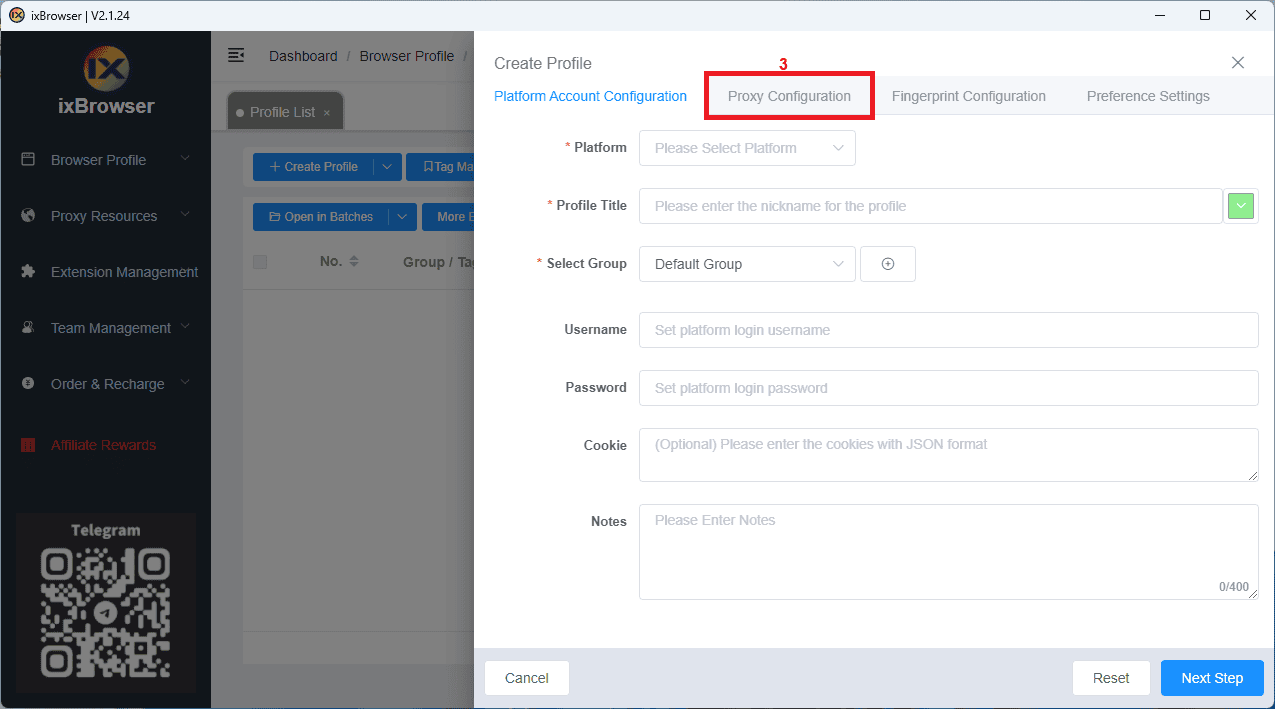
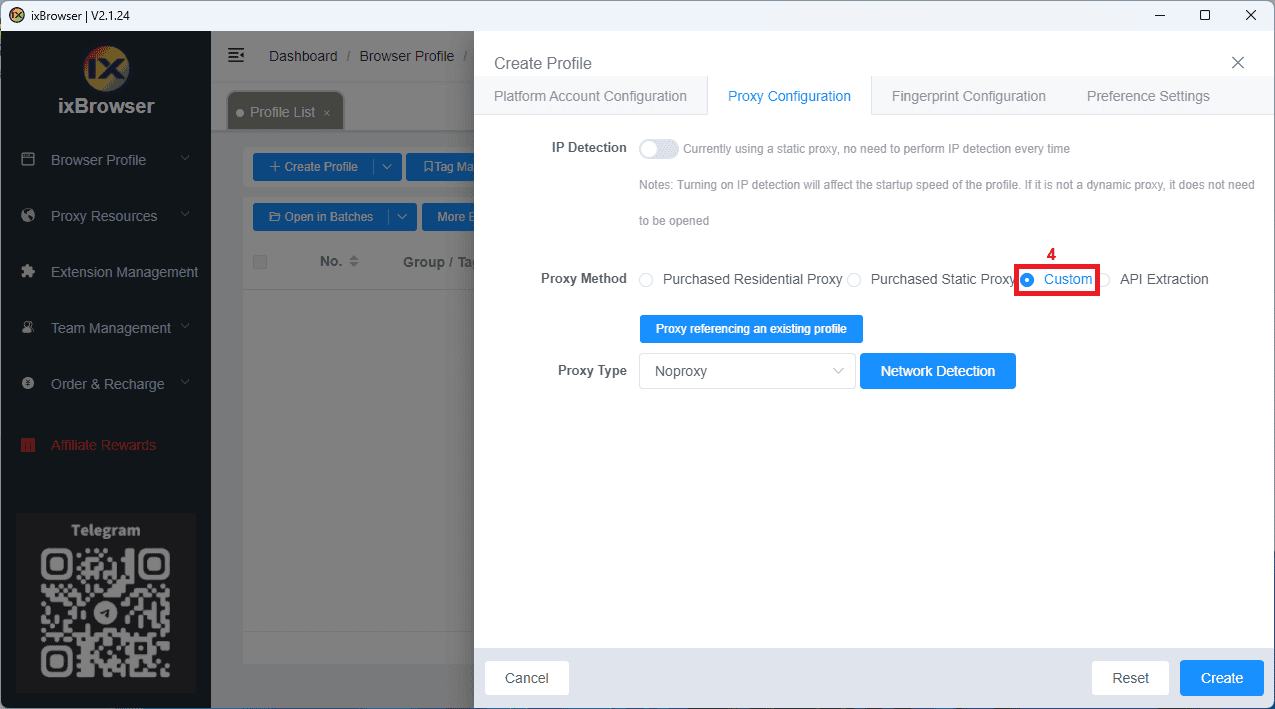
3. The profile creation card will open. Select the Proxy Configuration (3) tab.
4. Select Custom (4) as the proxy method.
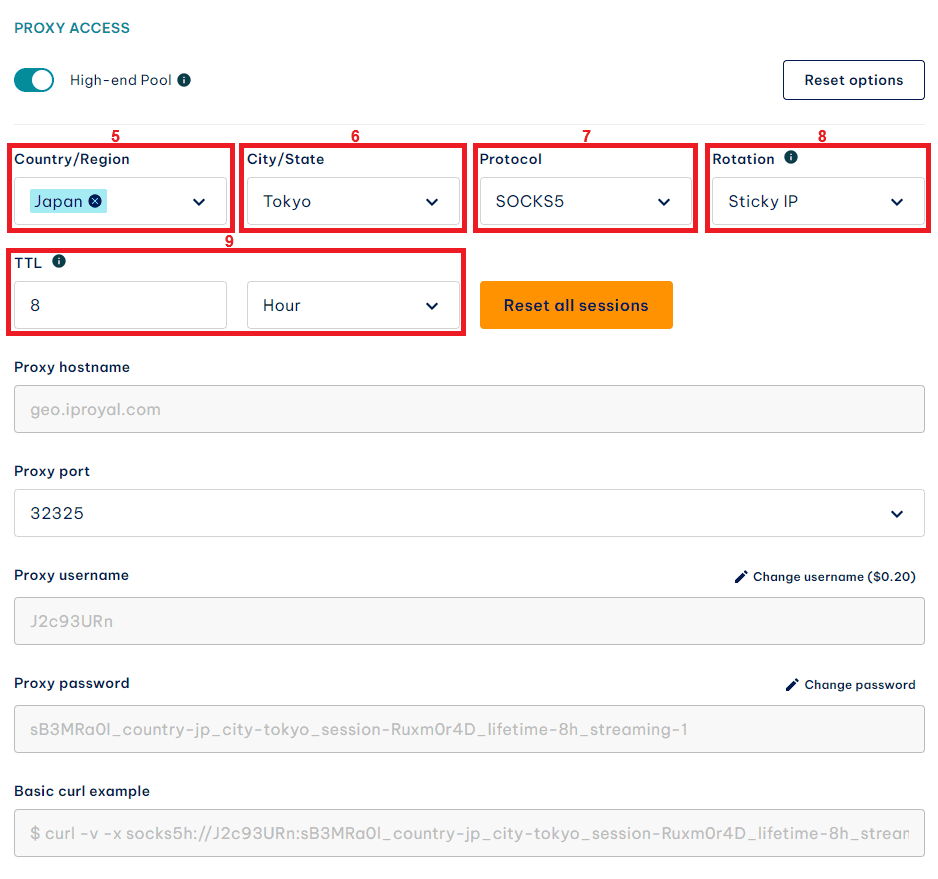
5. Now it’s time to get your proxy credentials from the IPRoyal dashboard. We’ll use high-end (5) Residential proxies from Tokyo, Japan (6), SOCKS5 protocol (7), and sticky sessions (8) with a TTL (time-to-live) of eight hours (9).
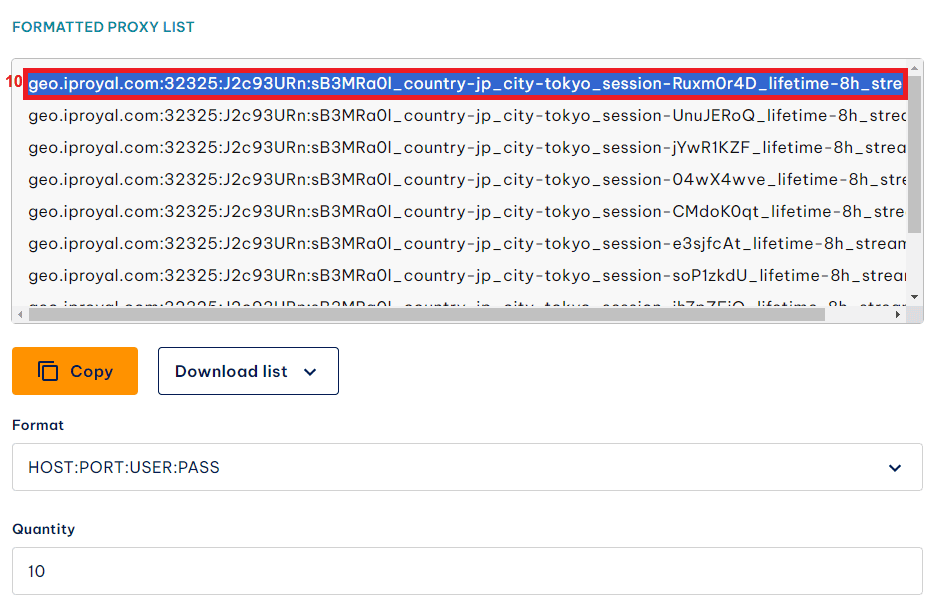
6. Once you’ve configured your proxy settings, get your credentials from the Formatted Proxy List (10). Each line is a separate set of credentials containing your hostname, port, username, and password. Since ixBrowser doesn’t support batch proxy importing, you’ll have to import each set of credentials manually.
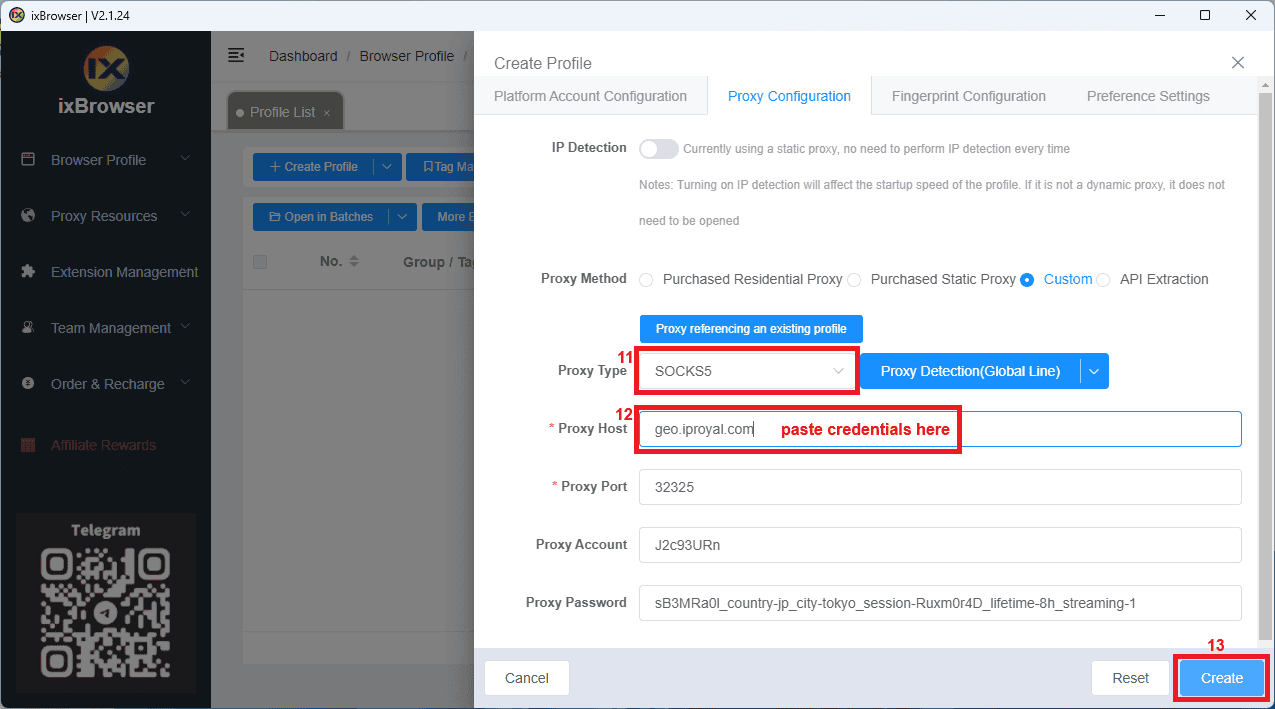
7. Now it’s time to transfer these credentials to ixBrowser. Select SOCKS5 as the Proxy Type (11). Copy a complete line from the IPRoyal dashboard and paste it into the Proxy Host field (12). Since ixBrowser recognizes the host:port:username:password format, it will distribute this information in the remaining fields automatically. Once you’re done configuring your profile, click the Create (13) button.
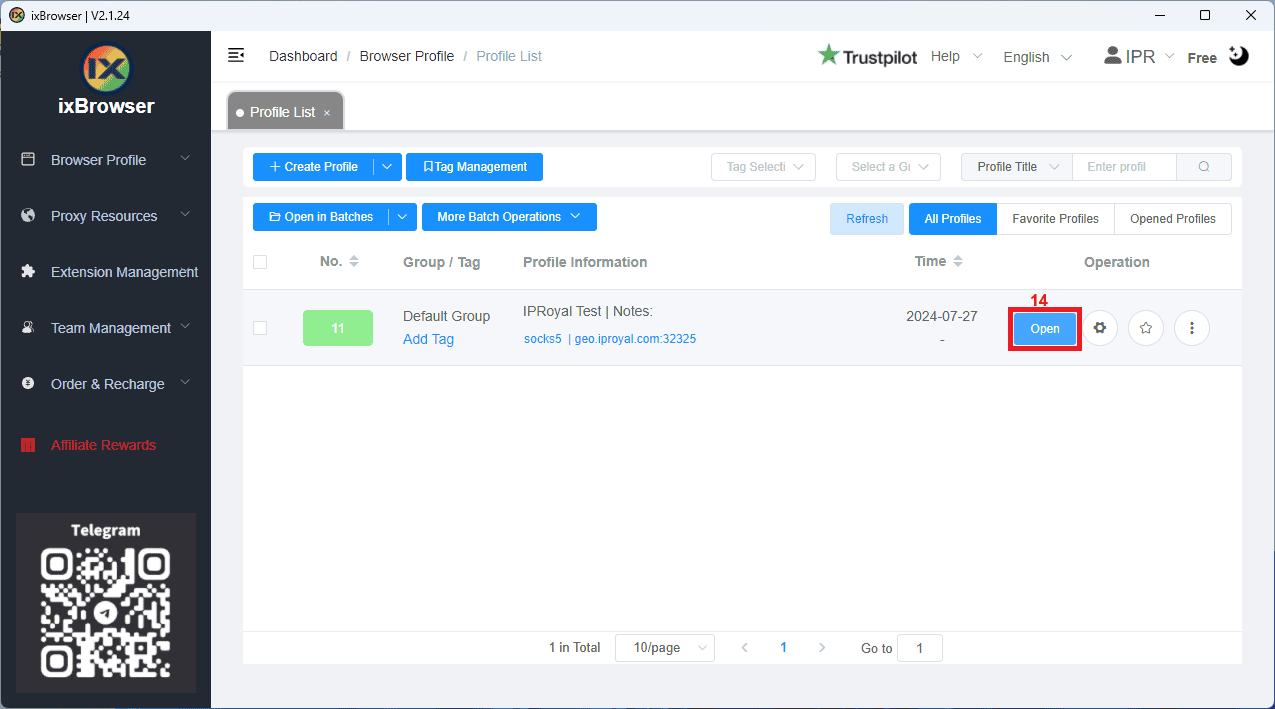
8. In the main menu, click the Open (14) button to launch your profile.
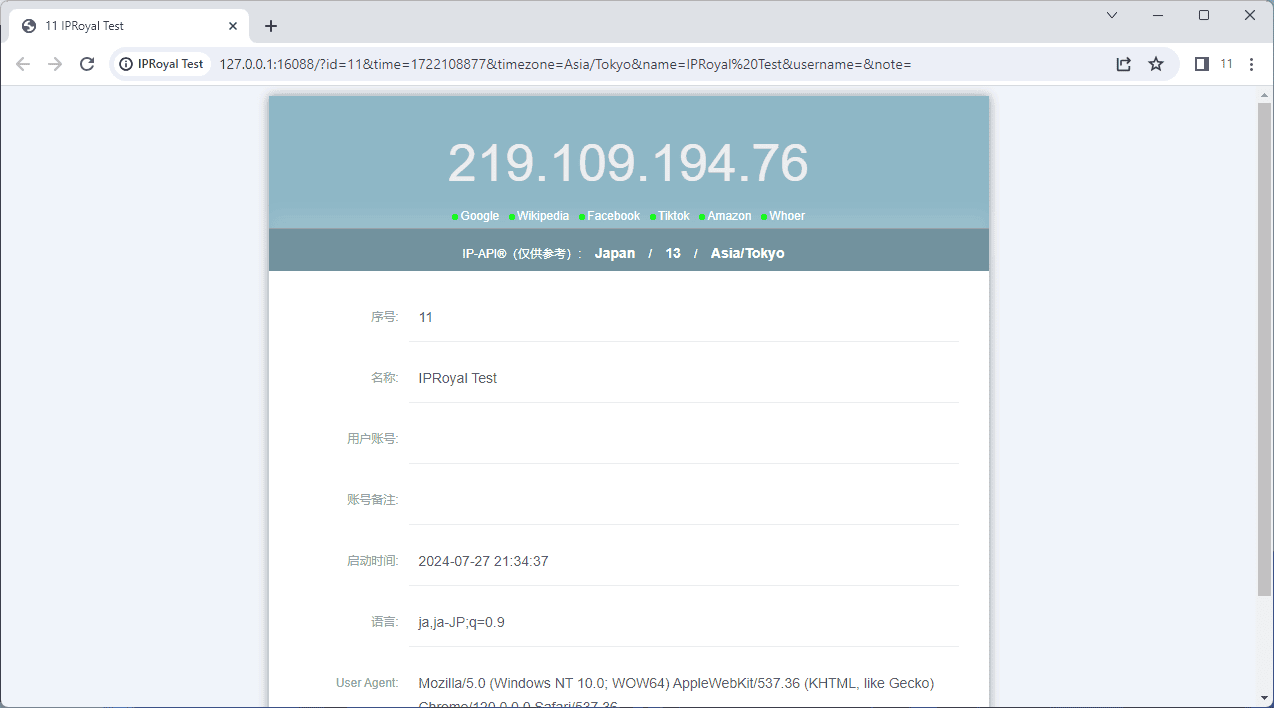
9. A browser window will open with additional information about your IP address and browser profile.
10. You can also test your fingerprint using BrowserScan or any similar website.
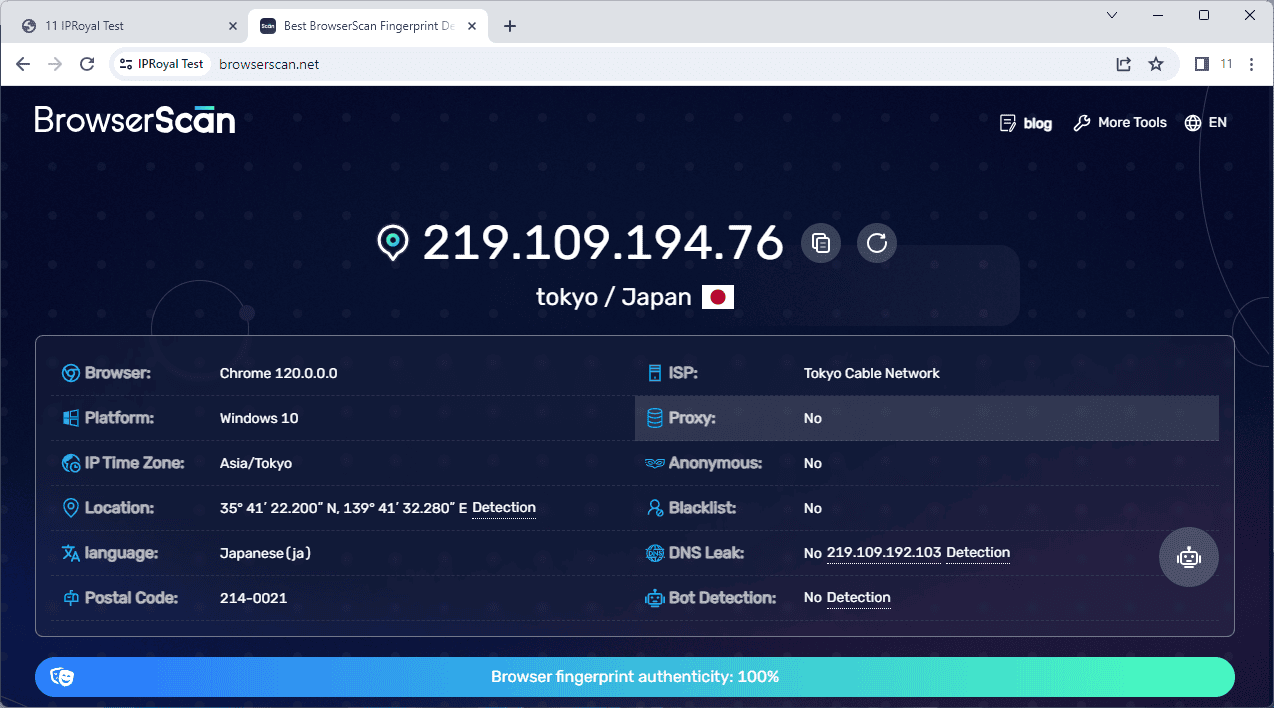
If your profile looks 100% authentic, it’s ready to use.
Final Thoughts
Remember, anti-detect browsers and the profiles you create are only as reliable as the proxy servers you use with them. Regardless of which IPRoyal proxy service you decide to use for this purpose, you’ll be able to take advantage of everything ixBrowser has to offer.