'/%3e%3cellipse%20opacity='0.34'%20cx='327.5'%20cy='339'%20rx='264.5'%20ry='264'%20fill='url(%23paint1_linear_12724_35442)'/%3e%3cdefs%3e%3clinearGradient%20id='paint0_linear_12724_35442'%20x1='327'%20y1='-2.524e-06'%20x2='327'%20y2='389.286'%20gradientUnits='userSpaceOnUse'%3e%3cstop%20stop-color='%2327D9E5'/%3e%3cstop%20offset='0.927406'%20stop-color='%23004047'%20stop-opacity='0'/%3e%3c/linearGradient%3e%3clinearGradient%20id='paint1_linear_12724_35442'%20x1='328.02'%20y1='74.7771'%20x2='328.02'%20y2='395.312'%20gradientUnits='userSpaceOnUse'%3e%3cstop%20stop-color='%2327D9E5'/%3e%3cstop%20offset='0.927406'%20stop-color='%23004047'%20stop-opacity='0'/%3e%3c/linearGradient%3e%3c/defs%3e%3c/svg%3e)
How to Use IPRoyal Proxies With Norconex Web Crawler
Integrations

Milena Popova
Web crawling is widely used, but also technologically challenging. The process involves scanning websites and other online data sources to gather and channel information to search engines, business intelligence repositories, news aggregators , and similar platforms.
Because the internet is so vast, with billions of websites, web crawlers must process a substantial amount of data . For example, proprietary crawlers like Googlebot crawlers or AmazonProductDiscoverybot continuously deal with thousands and even millions of websites.
Web crawling is not synonymous with web scraping , which typically deals with a significantly smaller number of targeted sites. However, both technologies can also benefit from proxies to bypass geographical content blocks or rotate IPs to avoid CAPTCHAs. Let’s see how to do it using a powerful open-source web crawler, Norconex.
What Is Norconex?
Norconex is a popular web crawler primarily built on Java language . While the company also offers solutions for crawling file systems, this article will focus exclusively on its web crawling tool.
As its website states , Norconex aims to provide a configurable and easy-to-understand GUI-less crawling tool that doesn’t require extensive knowledge. For a long time, it was known as Norconex HTTP Collector , so you may still come across this name.
Of course, you will have to deal with coding for many tasks, and combining Norconex with third-party tools you use will make the most out of it. On the other hand, its online documentation is an excellent resource, and you can also refer to its GitHub repositories for additional information.
Norconex prioritizes customization and modulation instead of a more rigid GUI, which is also supported by its open-source code. As such, it can also be efficiently deployed in numerous projects, including search engine indexing, content gathering and updating, website optimization by identifying broken links, and much more. Let’s review essential Norconex features in more detail.
- Collect, import, and commit processes
At the Norconex core are the collect, import, and commit processes . The collector is the parent process that controls the entire crawling operation, using multiple crawlers to extract online data. You can also use a single crawler as a collector, as Norconex leaves customization paths open.
The import process parses gathered data to make it ready for the end user. Lastly, the committer knows how to communicate with the user’s repositories and passes this data successfully . These three essential Norconex processes ensure its versatility and efficiency in solving numerous data collection challenges.
- Broad file type support
Typically, web crawlers focus on discovery and indexing. That is not the case with Norconex. Alongside HTML documents and URLs inside, it can also download PDFs, XML files, RSS feeds, and spreadsheets . Also, its built-in committers support CSV, JSON, and XML files. Amazon CloudSearch, Apache Solr, Elasticsearch, and other popular committers must be installed separately using install scripts.
- Customization
Broad customization is one of Norconex’s strongest features. It provides a solution based on modulation so that you can easily integrate it with additional tools that you use . It also leaves opportunities to introduce new Java code to extend these capabilities for more tech-savvy users. Norconex provides an XML configuration option, which is a much more human-friendly markup language compared to Java.
- Additional features and benefits
This web crawler offers many more benefits. It supports optical character recognition to grab data from images in PDFs. It uses a delay function to avoid server overload or anti-bot detection. Norconex is capable of crawling JavaScript-heavy sites and deduplicates documents. It also inspects robots.txt rules to avoid possible issues, but we suggest heading over to its website for a complete overview.
Why Use Proxies With Norconex?
Norconex hosts its infrastructure primarily in the US, which can create issues when crawling geographically restricted websites . Because web crawling often involves vast amounts of data, crawling websites in Europe or Japan may become challenging and expensive.
Simultaneously, globally available regional pages may still redirect users to restricted local subdomains , limiting access to information. In such cases, using residential proxy servers helps the crawler connect to sites from genuine people’s devices in the region.
For this, Norconex provides proxy support via XML markup code. Setting it up can be somewhat complicated, so here’s our step-by-step guide on integrating IPRoyal proxies with Norconex on Windows. Keep in mind that this is only an example, and you will have different files to modify when tailoring it for your needs.
How to Set Up Norconex With IPRoyal Proxies
Install Java
Start with setting up a Java Development Kit version 11+ or newer.
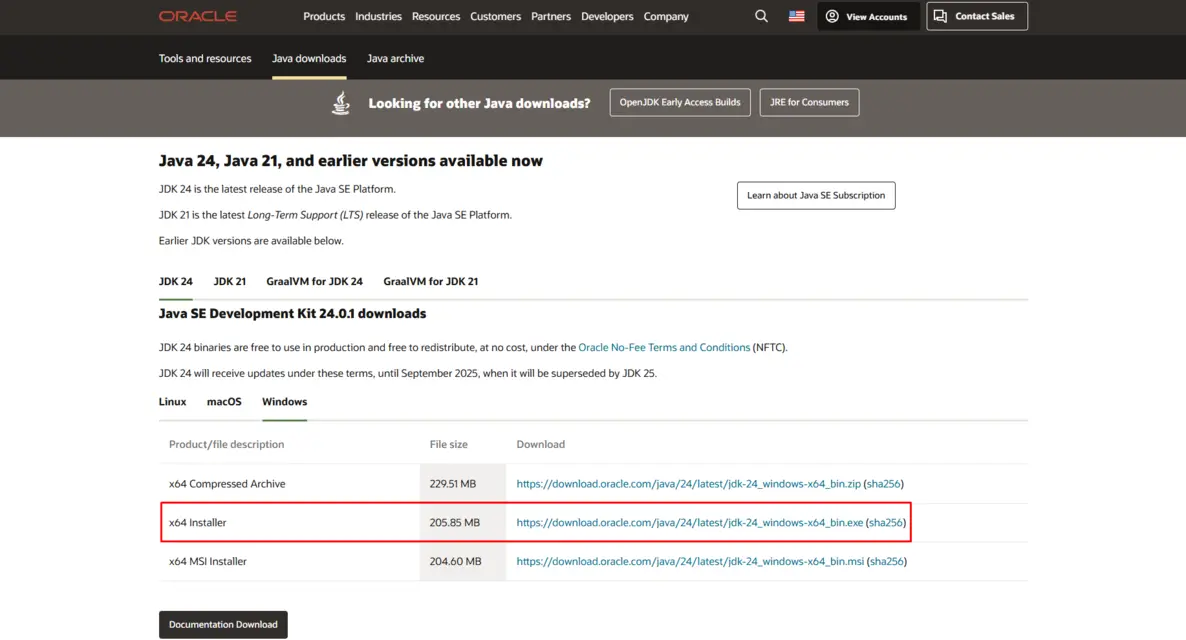
1. Download Java JDK 11+ . We will use Oracle JDK as an example , but Eclipse Temurin and Microsoft Build of OpenJDK also fit perfectly.
2. Scroll down a bit, choose the ‘Windows’ tab, and download the x64 installer .
3. Locate the installation .exe file in your download folder and double-click it.
4. It is best to use the default installation folder , so click ‘Next’ a few times.
You will also need to set the JAVA_HOME environment variable. Here’s how:
- Go to your JDK installation path. In our case, it is C:\Program Files\Java\jdk-24. Copy the full path.
- Click the ‘Windows’ button and type “Environment Variables”. Click on ‘Edit the system environment variables’.
- In the advanced system properties box, click on the ‘Environment Variables’ option at the bottom.
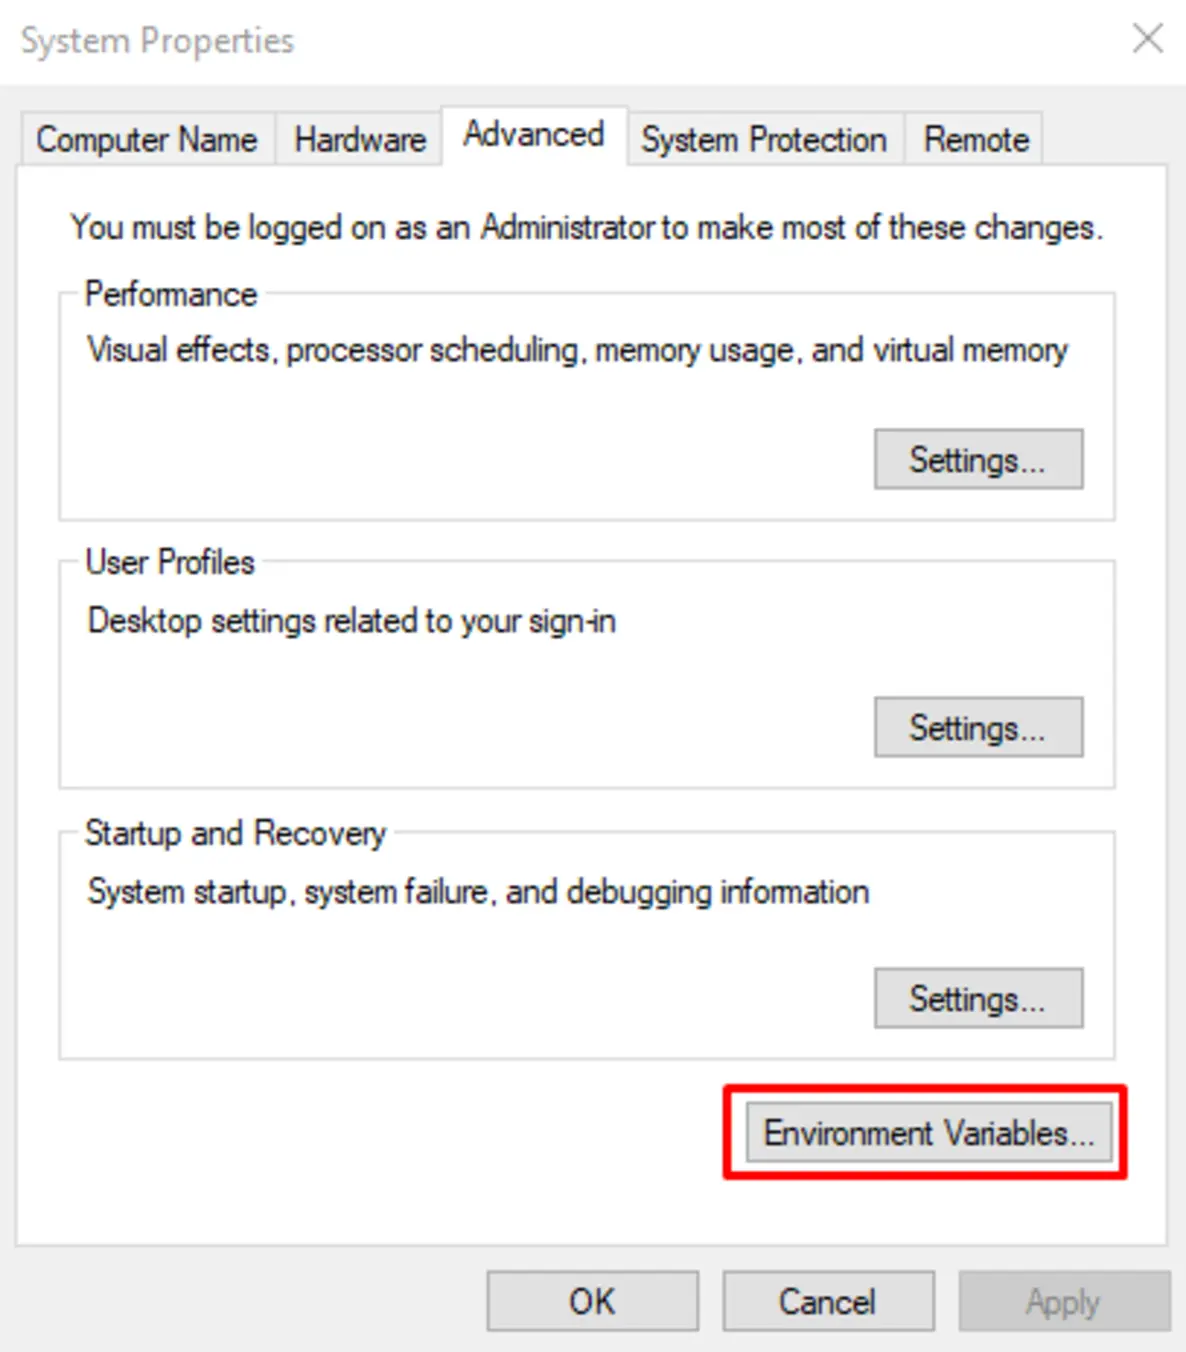
- Click ‘New’ under the lower ‘System variables’ table.
- Type “JAVA_HOME” in the ‘Variable name’ section.
- Paste your JDK installation path in the ‘Variable value’ section and click ‘OK’.
- Locate the ‘Path’ variable in the same ‘System variables’ box. Select it and click ‘Edit’.
- Click ‘New’ on the right side and type“%JAVA_HOME%\bin”.
- Click ‘OK’ three times to confirm changes on all windows.
- Verify successful Java installation. Press the ‘Windows’ button and type “cmd” to open Command Prompt. Type “java -version”. You should see something like this.

Finally, type “echo %JAVA_HOME%”. If it shows your JDK installation path, you have set up the Java environment for Norconex successfully.
Install Norconex and Configure Proxies
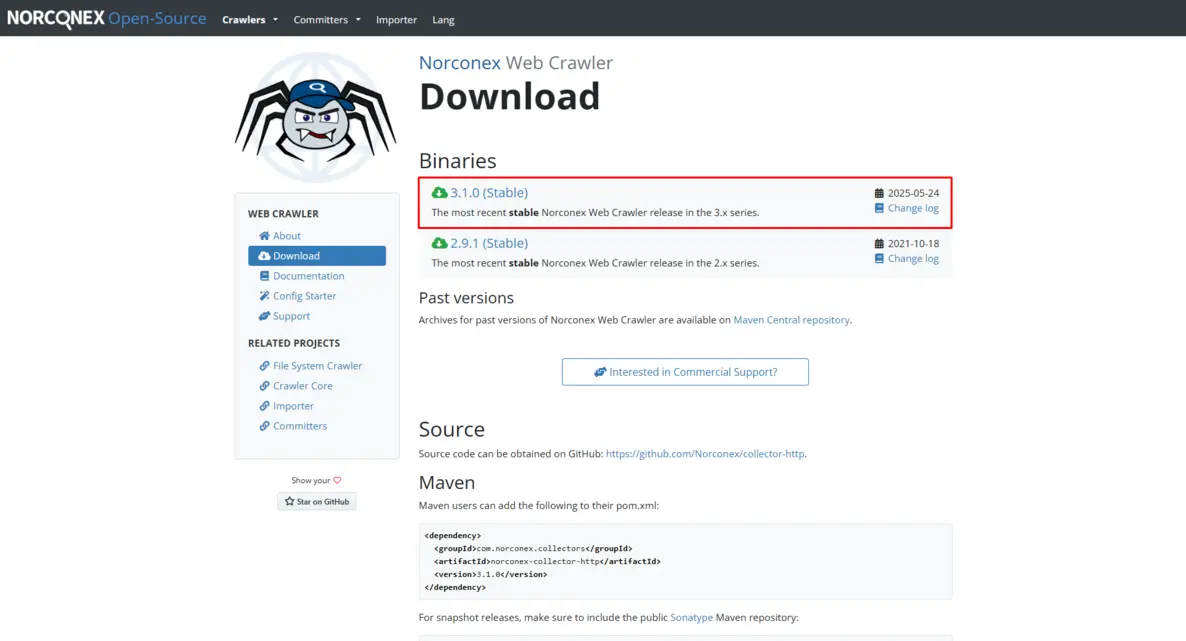
1. Download the latest stable version of Norconex web crawler .
2. Create a dedicated folder for Norconex. We will use C:\Norconex for this example.
3. Locate the downloaded Norconex .zip file and right-click on it. Extract the files to the folder you have created for it.
4. In the Norconex folder, you will have to modify the .xml file.
5. Go to where you extracted Norconex and then to the ‘Examples’ folder there.
6. Find the ‘collector-http-config-reference.xml’ file, right-click on it, and open it with your code editor. We are using Visual Studio Code for this example.
7. Within it, locate the ‘<httpFetchers>’ and ‘</httpFetchers>’ opening and closing tags. Keep in mind that these tags will always be placed within the ‘<crawler>’ block. For the full XML hierarchical structure, it is best to refer to Norconex guides.
8. Copy the following code within them:
<httpFetcherFactory class="com.norconex.collector.http.fetch.impl.GenericHttpFetcherFactory">
<proxySettings>
<host>proxy.iproyal.com</host>
<port>12321</port> <!-- Replace with your assigned port -->
<scheme>http</scheme> <!-- or “https” if you bought TLS exits -->
<credentials>
<username>your-username</username>
<password>your-password</password>
</credentials>
<urlFilter>.sample\.co\.jp.</urlFilter> <!-- Apply proxy only for matching URLs -->
</proxySettings>
</httpFetcherFactory>
9. It should look like this:
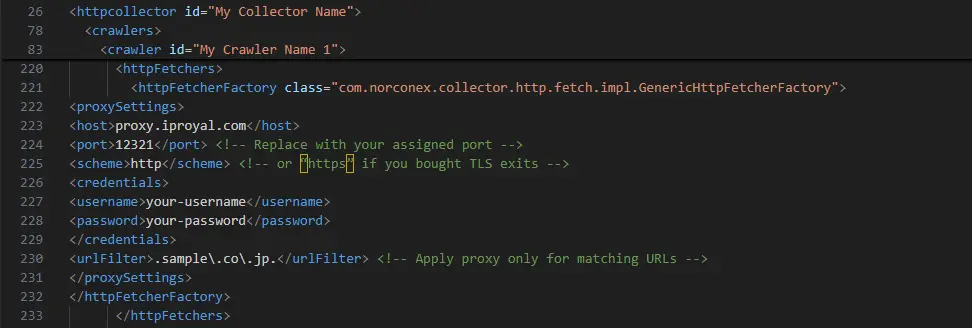
This ends the general exemplary flow of adding proxies to Norconex . You will have to input real proxy details for it to work. Also, keep in mind that the ‘collector-http-config-reference.xml' is a reference guide, and you will be working within your XML structure on real projects.
Why Use IPRoyal as Your Norconex Proxy Provider?
Web crawlers demand a fast and reliable infrastructure with access to a globally distributed proxy server network. Our Residential Proxies are fully compatible with this robust web crawler, built to support high-volume, region-specific crawling with:
- Over 32M+ unique residential IP addresses in 195 countries
- Non-expiring traffic without a monthly commitment
- Precise geo-targeting at the country, state, city, and ISP level
- Fully customizable IP rotation settings
- Volume-based pricing and 24/7 support
Final Thoughts
Professionals with decades of experience developed Norconex, so this powerful web crawler has a wealth of features to offer. However, issues like geographical content restrictions can be challenging to deal with. Coupled with residential proxies, it can access localized websites to gather data that would otherwise be unavailable.