Datacenter Proxies Quick-Start Guide

This quick-start guide will show you how to integrate IPRoyal Datacenter Proxies into your workflows - for web scraping, ad verification, market research, testing, and beyond.
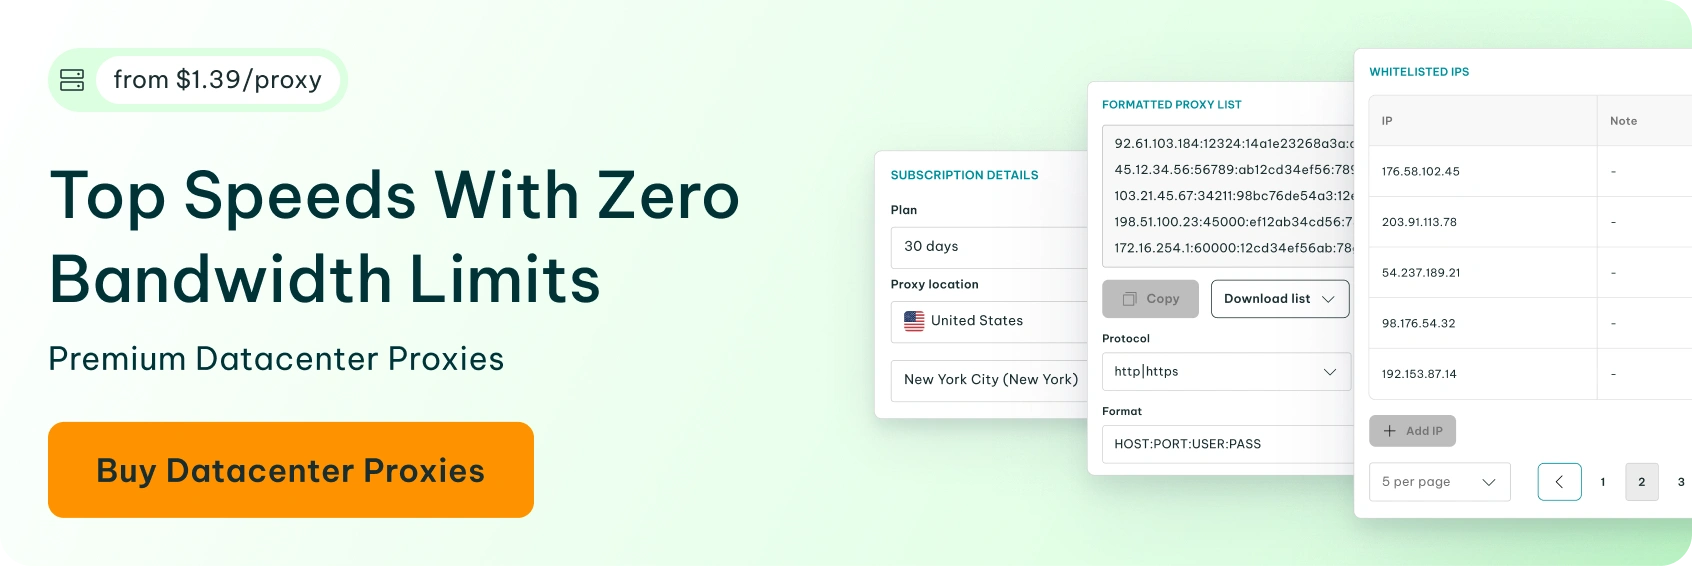
IPRoyal Datacenter Proxies offer dedicated IPv4 addresses around the world with support for HTTP/HTTPS and SOCKS5 protocols and unlimited bandwidth, subject to our Fair Usage Policy. You also get fine-grained geo-targeting by country, state, or city, and flexible authentication, including IP whitelisting.
In this guide, you’ll find step-by-step instructions to:
- Purchase and access Datacenter Proxies
- Configure settings in the IPRoyal dashboard
- Use proxy credentials
- Manage access with IP whitelisting
- Manage your Datacenter Proxies orders
How to Purchase IPRoyal Datacenter Proxies
Datacenter Proxies are available via a subscription and can be purchased directly from your dashboard.
To place your order:
- Log in or create an account at iproyal.com
- Select ‘Datacenter’ in the menu on the left and click ‘Create a new order’
- Expand the ‘Pricing and bundle discounts’ section and choose a plan (30, 60, or 90 days)
- In the ‘Subscription Details’ section, choose the ‘Proxy location’
- Enter the number of IPs in the ‘Number of proxies’ field
- Click the ‘Add City/State’ button and choose more precise geo-targeting options
- To order proxies from multiple available locations, click the ‘Add Another Country’ button and repeat steps 4 to 6
- Enable the ‘Extra Requirements’ option if you need specific subnets, ISPs, or other custom needs
- Click ‘Continue’
- Choose your preferred payment method
- If you have a coupon code, click ‘Have a coupon’ to apply it
- Click ‘Complete order’
How to Configure IPRoyal Datacenter Proxies
Once your order is confirmed, open your dashboard and click on your order to access the ‘Proxy details’ section.
The dashboard gives you full control over your Datacenter Proxies, including credentials management, protocols, authentication, and more. We’ll step through some of these below.
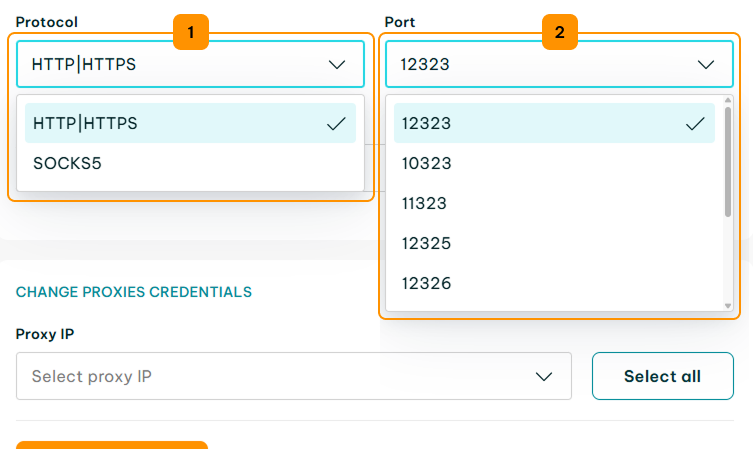
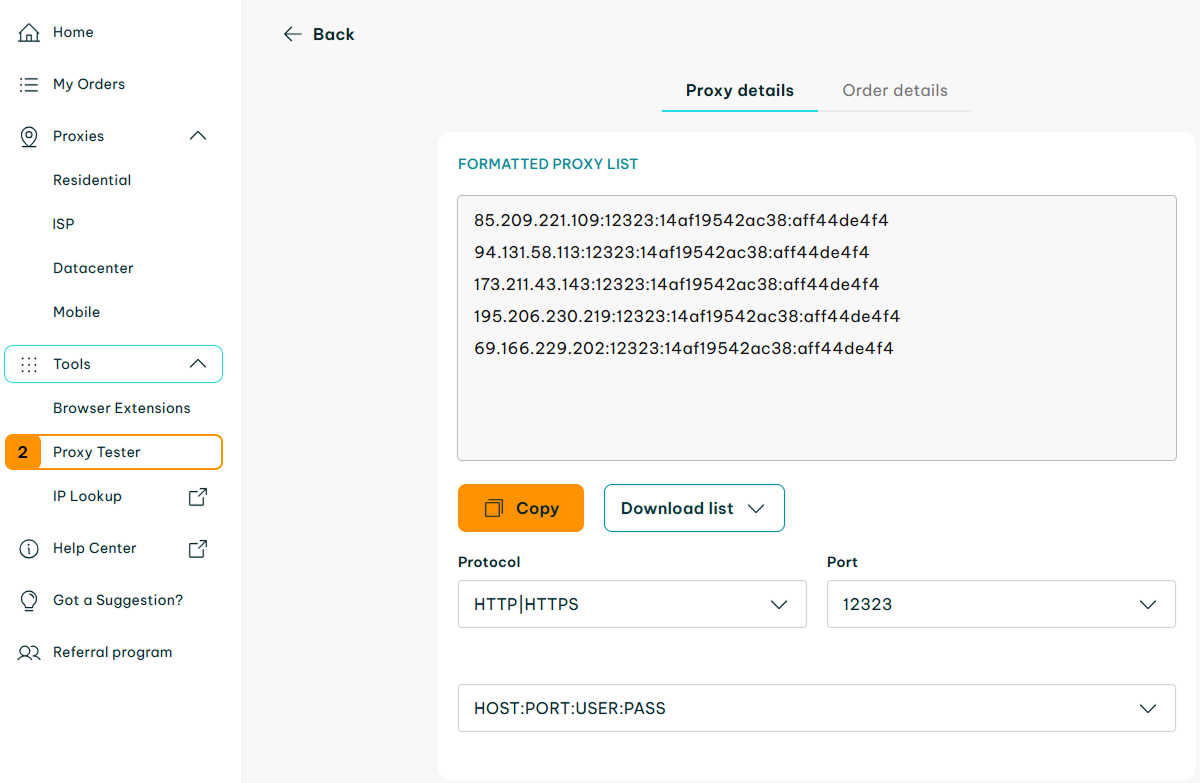
1. Select the Proxy Protocol and Port
Choose between HTTP|HTTPS and SOCKS5 in the ‘Protocol’ section (1). The default ports are 12323 (HTTP/HTTPS) and 12324 (SOCKS5), but you can customize these if needed in the ‘Port’ section (2). All changes are automatically updated in the ‘Formatted Proxy List’ section.
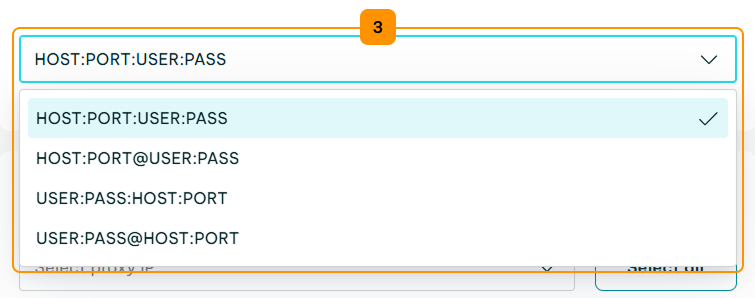
2. Select the Credentials Format
For easier integration with various tools, you can choose your preferred credentials format (3). All changes are automatically reflected in the ‘Formatted Proxy List’ section.
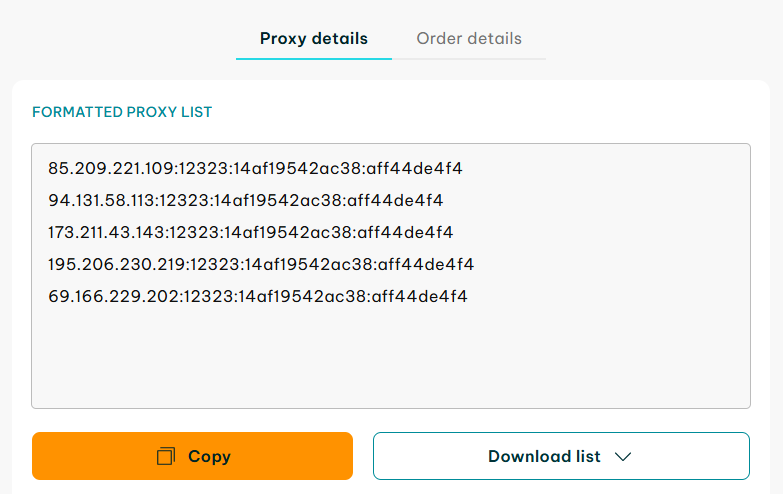
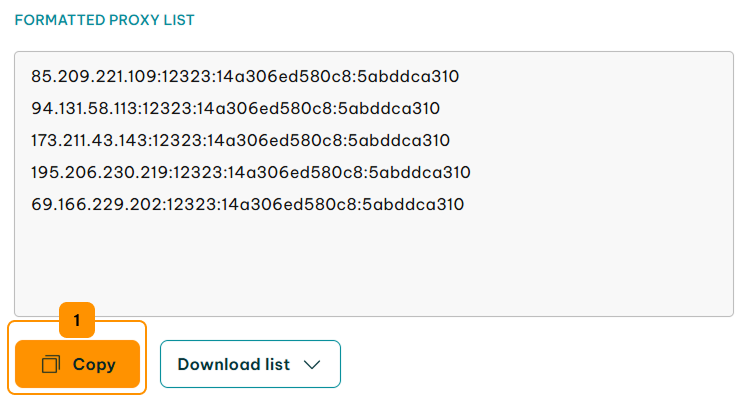
How to Use the Formatted Proxy List
Once configured, your proxies are ready to use with your software, automation tools, browser extensions, and more.
To get started, click the ‘Copy’ (1) button to copy your proxy credentials to the clipboard.
Next, use the IPRoyal Proxy Tester to quickly verify your proxy configuration, connectivity, and speed. It’s a great way to ensure your proxies work correctly before integrating them into your workflow.
1. Select ‘Proxy Tester’ (2) from the menu on the left.
2. Ensure the format (3) matches your Formatted Proxy List. Paste your sessions in the input field (4) and click the ‘Begin test’ (5) button.
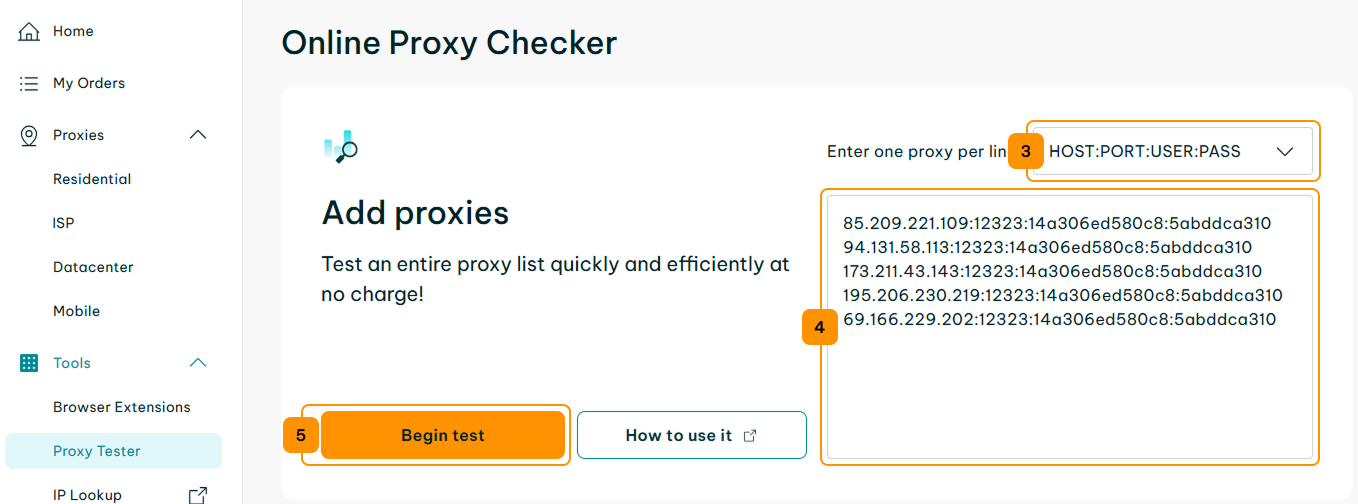
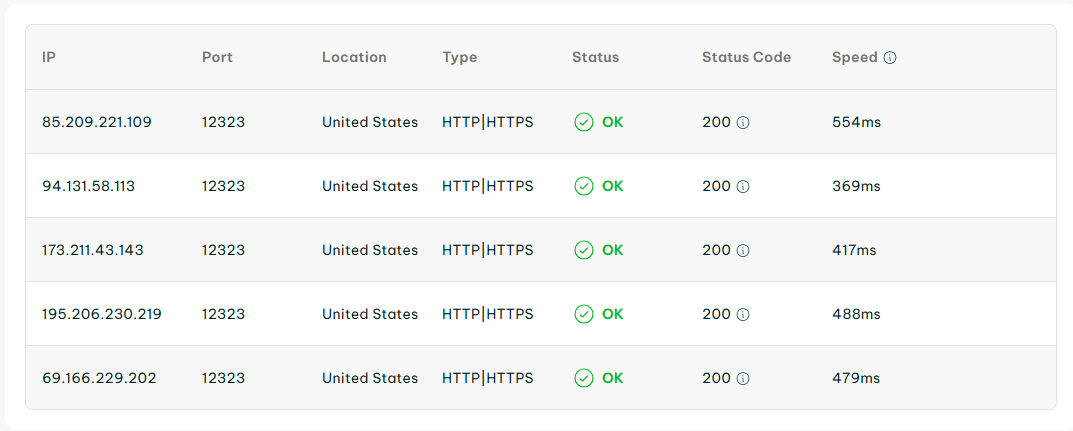
3. You will instantly get results for each provided IP address.
You can find more information about making requests in our Proxy Strings documentation.
How to Manage IPRoyal Datacenter Proxies Authentication
Beyond the basic proxy configuration, IPRoyal also offers two authentication options: username/password and IP whitelisting.
Username/Password Authentication
Each IPRoyal Datacenter Proxy comes with a username and password. You can change these for easier management.
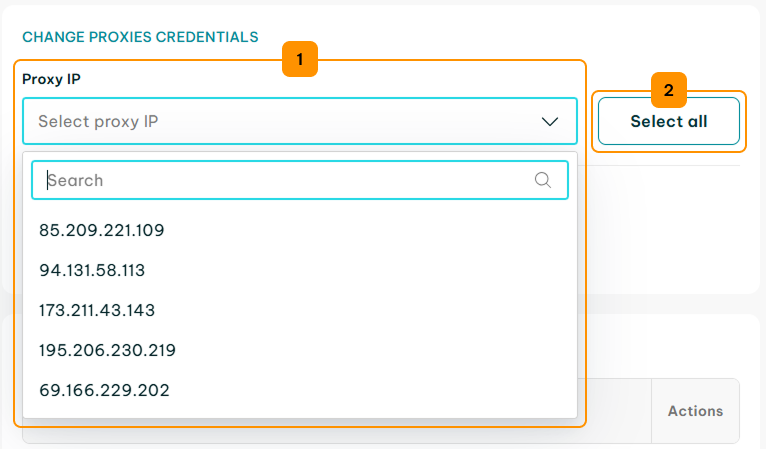
1. Navigate to the ‘Change Proxies Credentials’ section. Choose the IPs you want to modify in the ‘Proxy IP’ (1) section or click ‘Select all’ (2) to choose all IPs in your order.
2. Enter the new username in the ‘Username’ (3) field and the new password in the ‘Password’ (4) field. Alternatively, you can tick the ‘Random password’ (5) box to assign a random password.
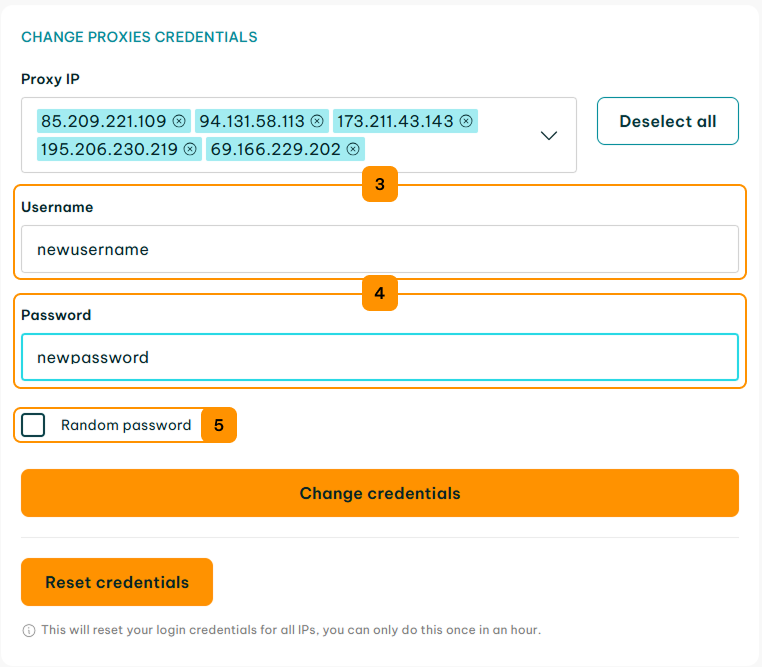
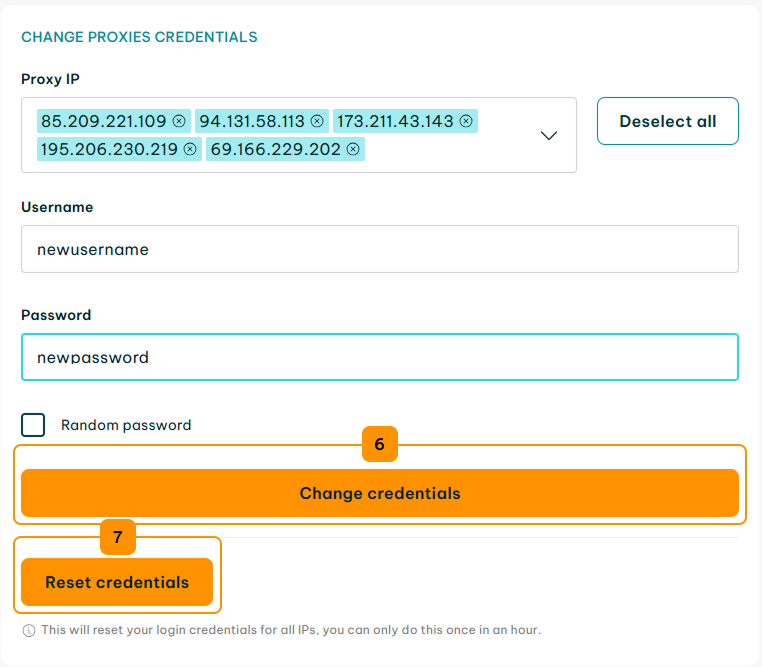
3. Click the ‘Change credentials’ (6) button to apply your changes. You can also reset the username and password for selected IPs using the ‘Reset credentials’ (7) button. Note that you can change or reset your proxy credentials once per hour.
IP Whitelisting
Whitelisting is an authentication method that lets you grant proxy access to specific IP addresses without sharing usernames and passwords. It’s especially useful for teams that need to manage multiple users securely.
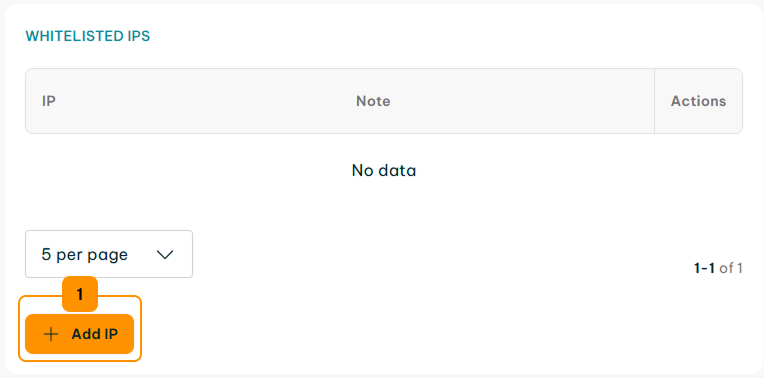
1. Navigate to the ‘Whitelisted IPs’ section and click the ‘Add IP’ (1) button.
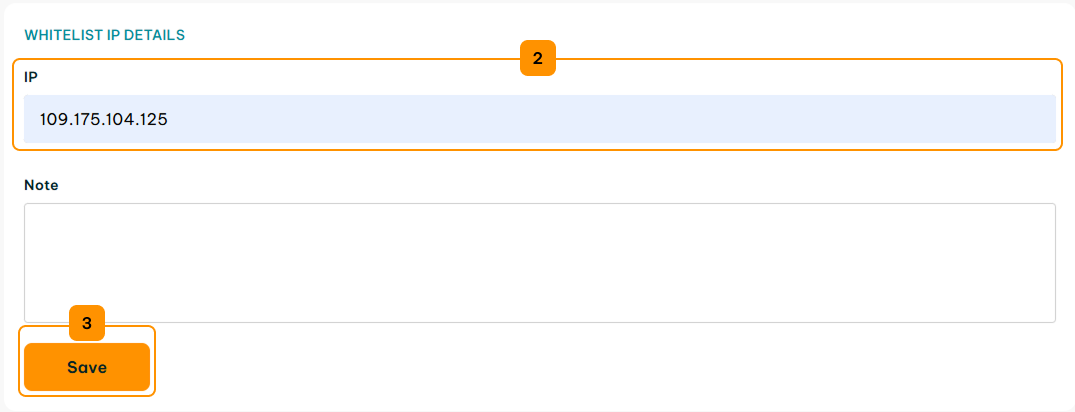
2. Add the IP address you want to whitelist in the ‘IP’ (2) field and click ‘Save’ (3).
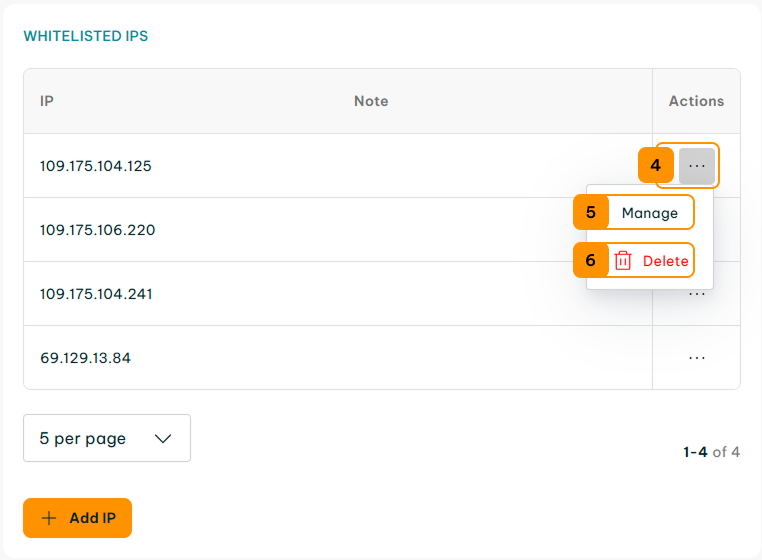
3. To modify or remove a whitelisted IP address, click the ‘More options’ (4) button next to it and select ‘Manage’ (5) or ‘Delete’ (6).
How to Manage IPRoyal Datacenter Proxies Orders
All Datacenter Proxies orders are subscription-based. You can modify your subscription settings at any time in the ‘Order details’ tab.
You can also manually extend an order by clicking the ‘Extend’ option in the ‘Datacenter Orders’ section.
For more information, see our Extending an Order documentation.