IP Whitelisting Authentication Quick-Start Guide

This guide will introduce you to IP whitelisting. We will explain what it is, how it works, the setup procedure, and the key benefits.
What Is IP Whitelisting
IP whitelisting (or IP filtering) is one of the available proxy authentication methods for our Residential, Datacenter, and ISP proxies. It involves creating a list of trusted IPs that you allow to use your residential proxy traffic without providing a username and a password. At the same time, access to all other IP addresses is denied by default.
This list of approved IPs is known as a whitelist, and its primary purpose is to work as an access control filter.
What Are the Benefits of IP Whitelisting
Whitelisting IPs offers several advantages over the more common username/password authentication.
- Enhanced security
- Improved access control
- Abuse prevention
- Easier scaling
As IP whitelisting ensures only particular IPs can access and use proxy servers, it significantly reduces the risks of unauthorized access. By limiting access to trusted IPs exclusively, protecting sensitive data and resources becomes a lot easier.
On top of that, IP whitelisting simplifies credential management. Instead of sharing usernames and passwords, all you need is the IP and port information from the IPRoyal dashboard. Finally, it streamlines access management and saves time spent managing growing networks.
How to Whitelist IP Addresses With IPRoyal
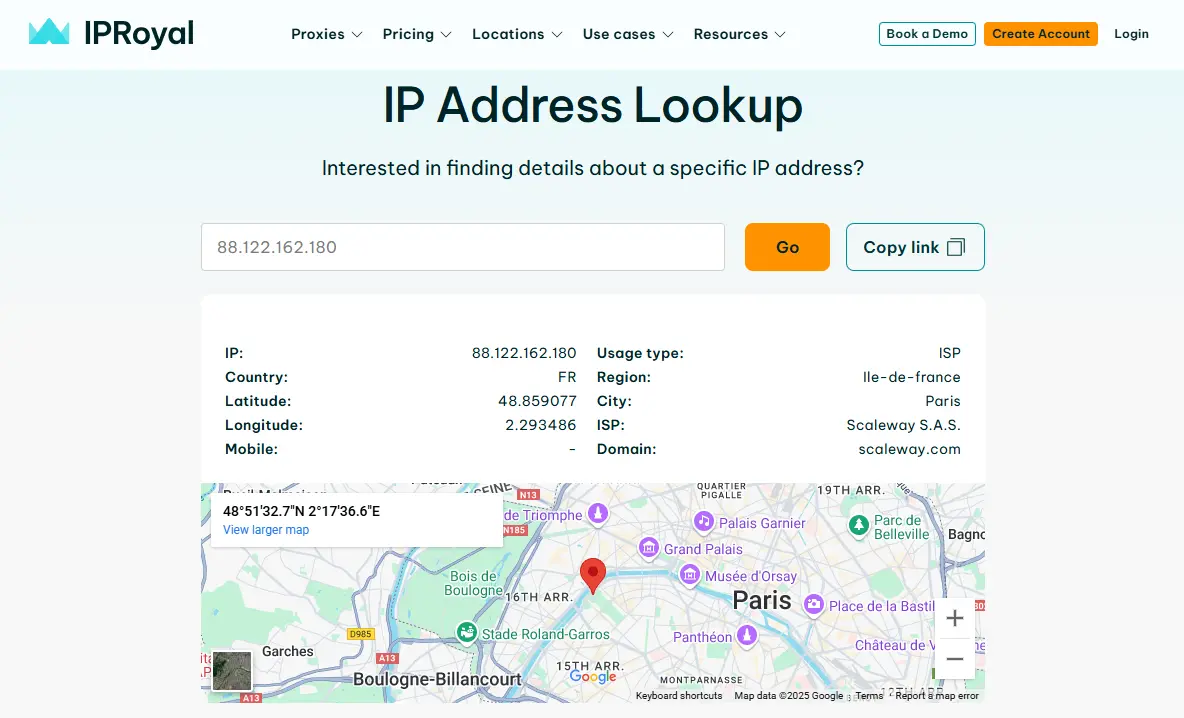
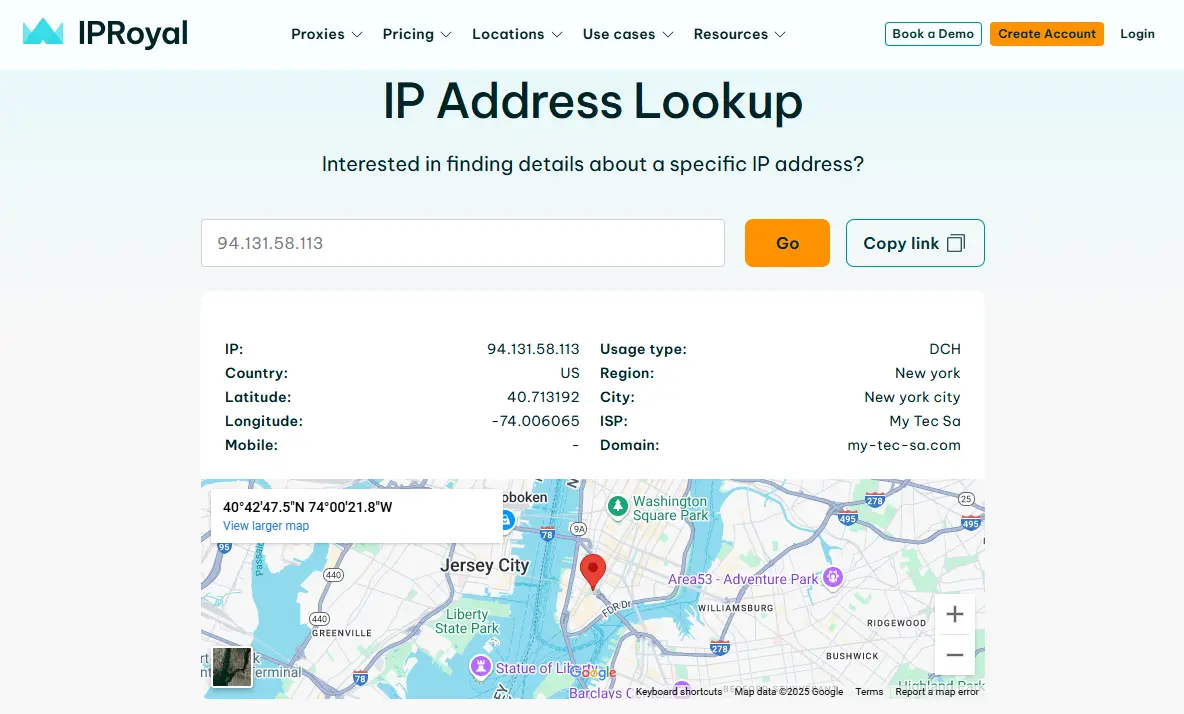
To start, prepare the list of IP addresses you want to whitelist. If you want to whitelist your IP address and you don’t know what it is, you can check by using our IP Lookup page or a similar service.
Residential Proxies
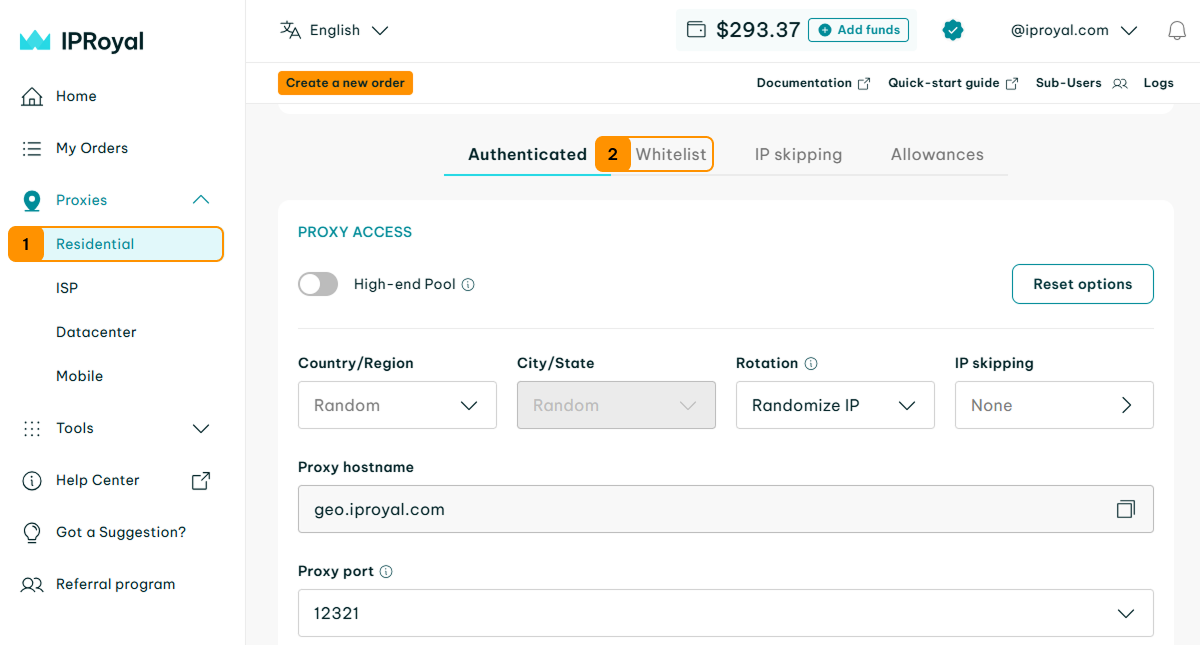
1. Open the IPRoyal dashboard and click on ‘Residential’ (1). Scroll down and click the ‘Whitelist’ (2) button.
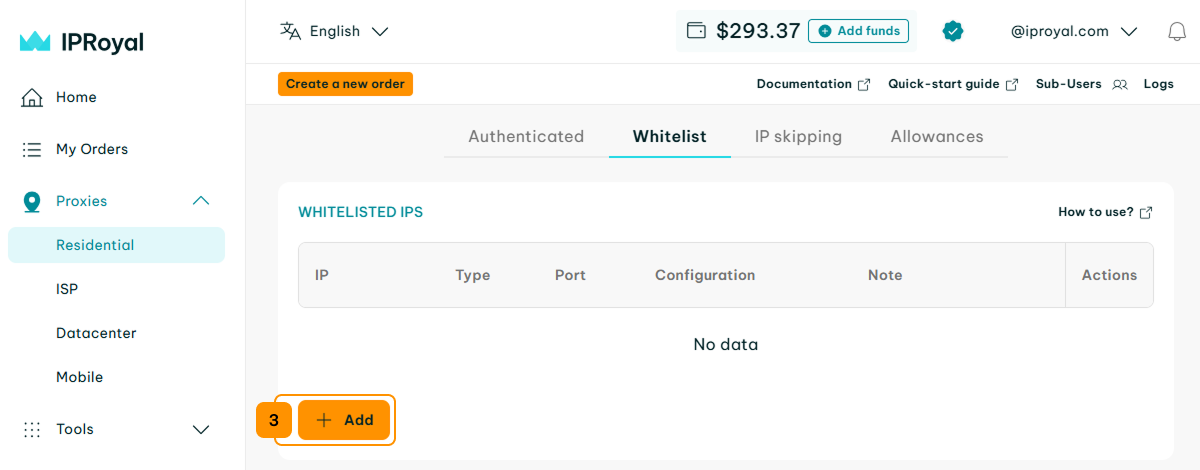
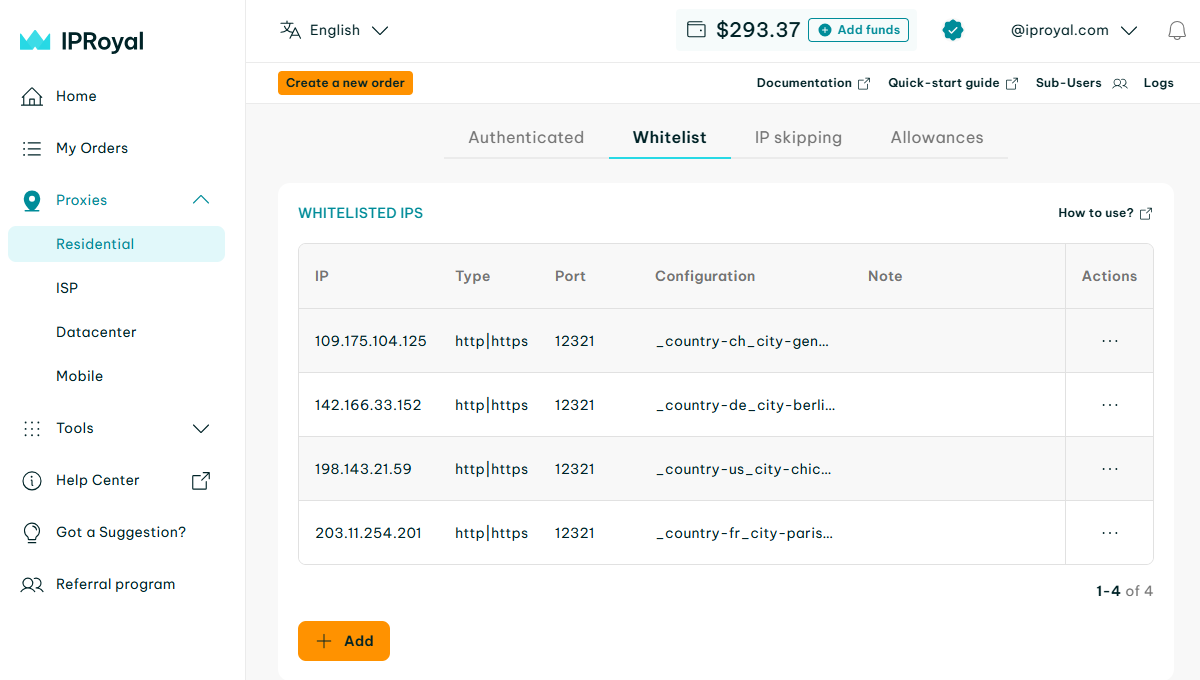
2. This will take you to the IP whitelist configuration page. Click the ‘Add’ (3) button.
3. Use the ‘Configuration’ section (4) to configure your proxies the same way you would if you used the standard username + password authentication. In the ‘Options’ section, add the IP address you want to whitelist (5). Once you’re done, click the ‘Create’ (6) button.
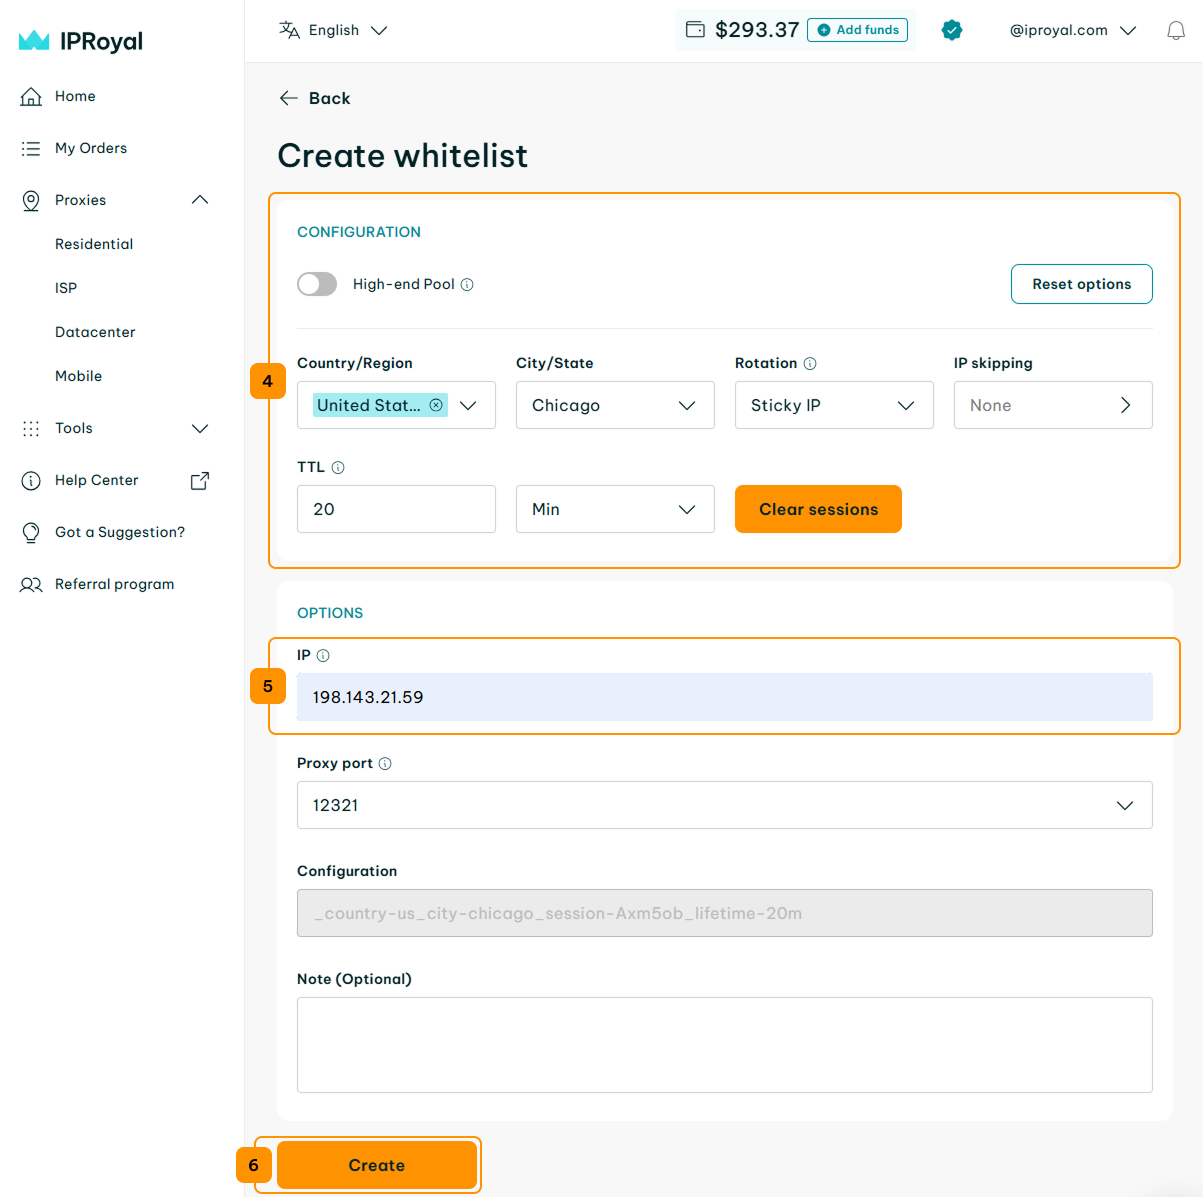
4. You can add more IP addresses by repeating the steps 1 to 3. The whitelisted IPs can share configuration information, but you can also generate a unique configuration (including country, state, session type, and session duration) for each IP address.
ISP & Datacenter Proxies
IP whitelisting for ISP and Datacenter proxies is configured at the product level. As a result, all orders under the same product share a single unified whitelist. Update it once, and the change applies across all your orders instantly.
Note: An IP address can only be whitelisted by one IPRoyal account at a time.
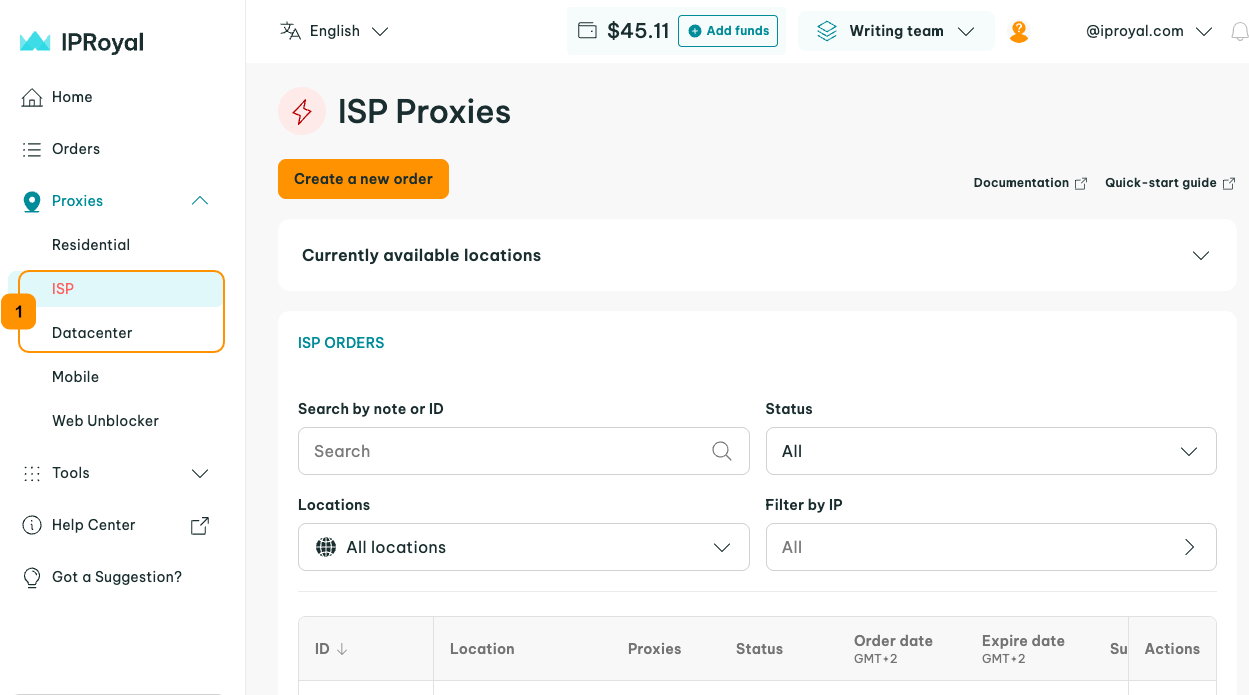
1. Open the IPRoyal dashboard and click on ‘ISP’ or ‘Datacenter’ (1).
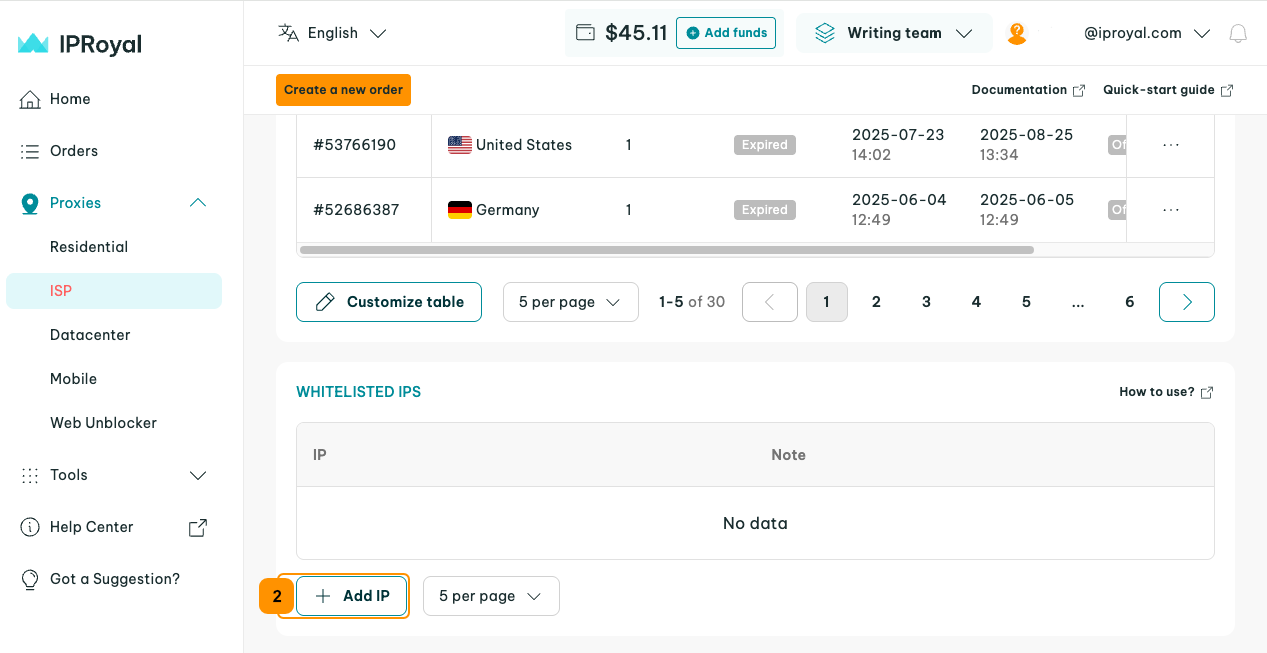
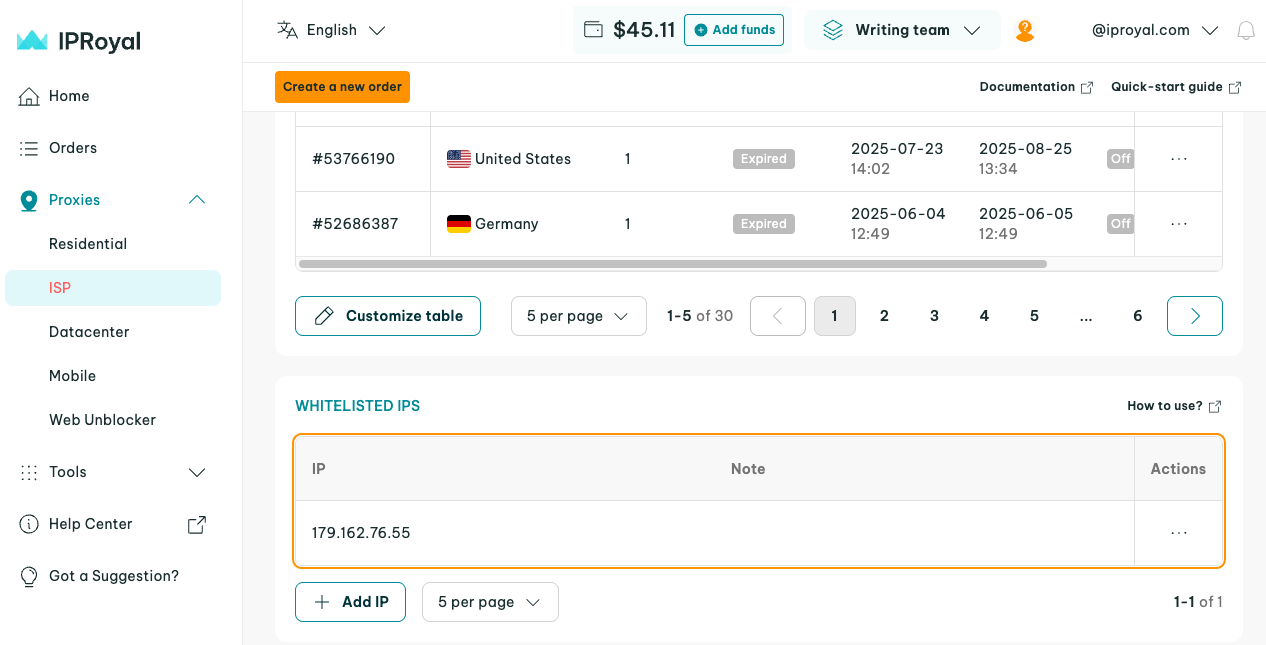
2. Scroll down to the ‘Whitelisted IPs’ section and click the ‘Add IP’ (2) button.
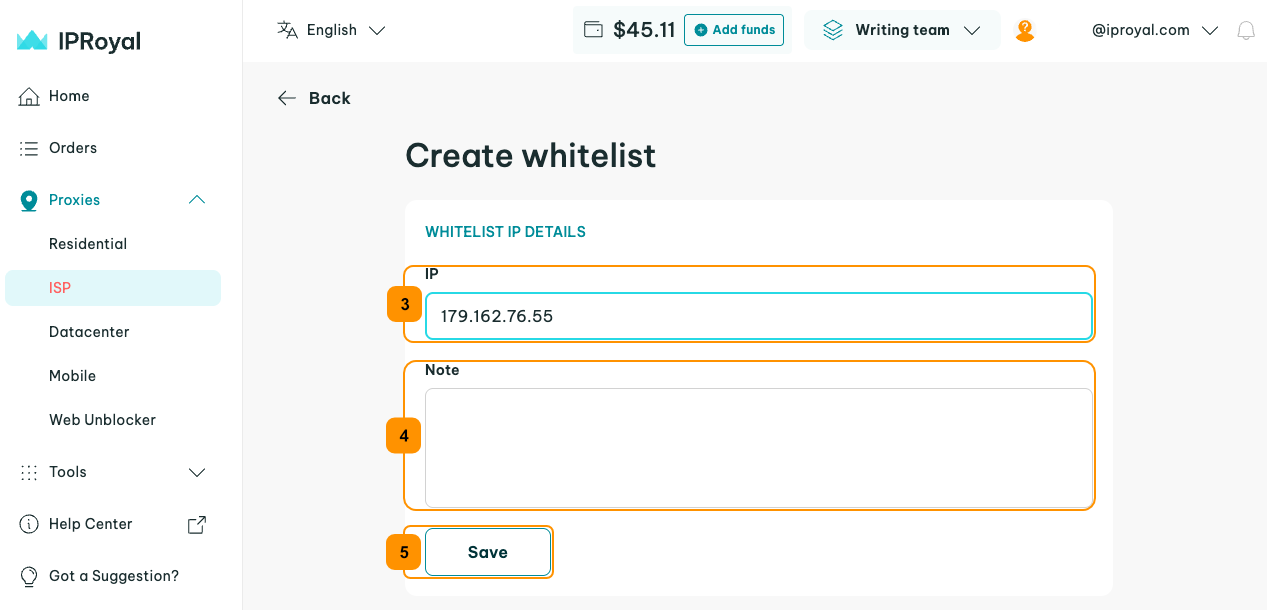
3. Enter the IP you wish to whitelist in the ‘IP’ (3) field, add a note (4) if you want to make it easier to manage your whitelist later, and click the ‘Save’ (5) button.
4. The IP address will now appear in your 'Whitelisted IPs' list. All your orders under that product will immediately have access using this IP.
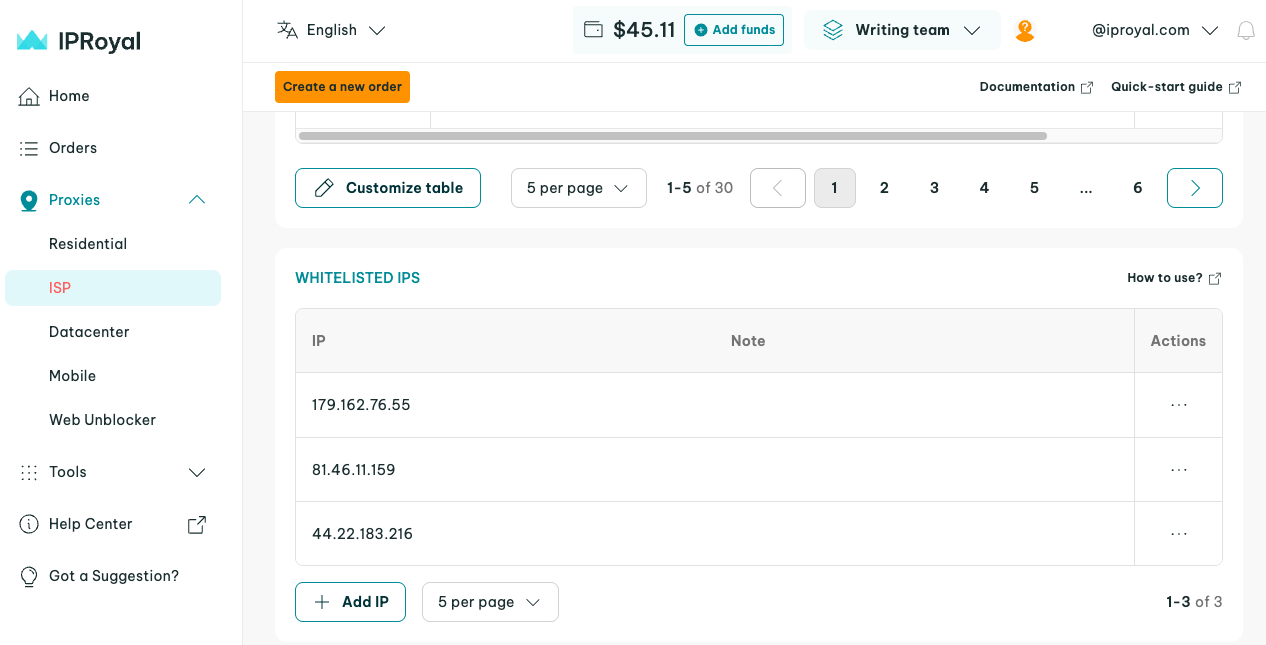
5. You can add more IP addresses by repeating these steps.
How to Use IPRoyal Proxies With Whitelisted IPs
To start using proxies with your whitelisted IPs, you need the IP and PORT information from the IPRoyal dashboard.
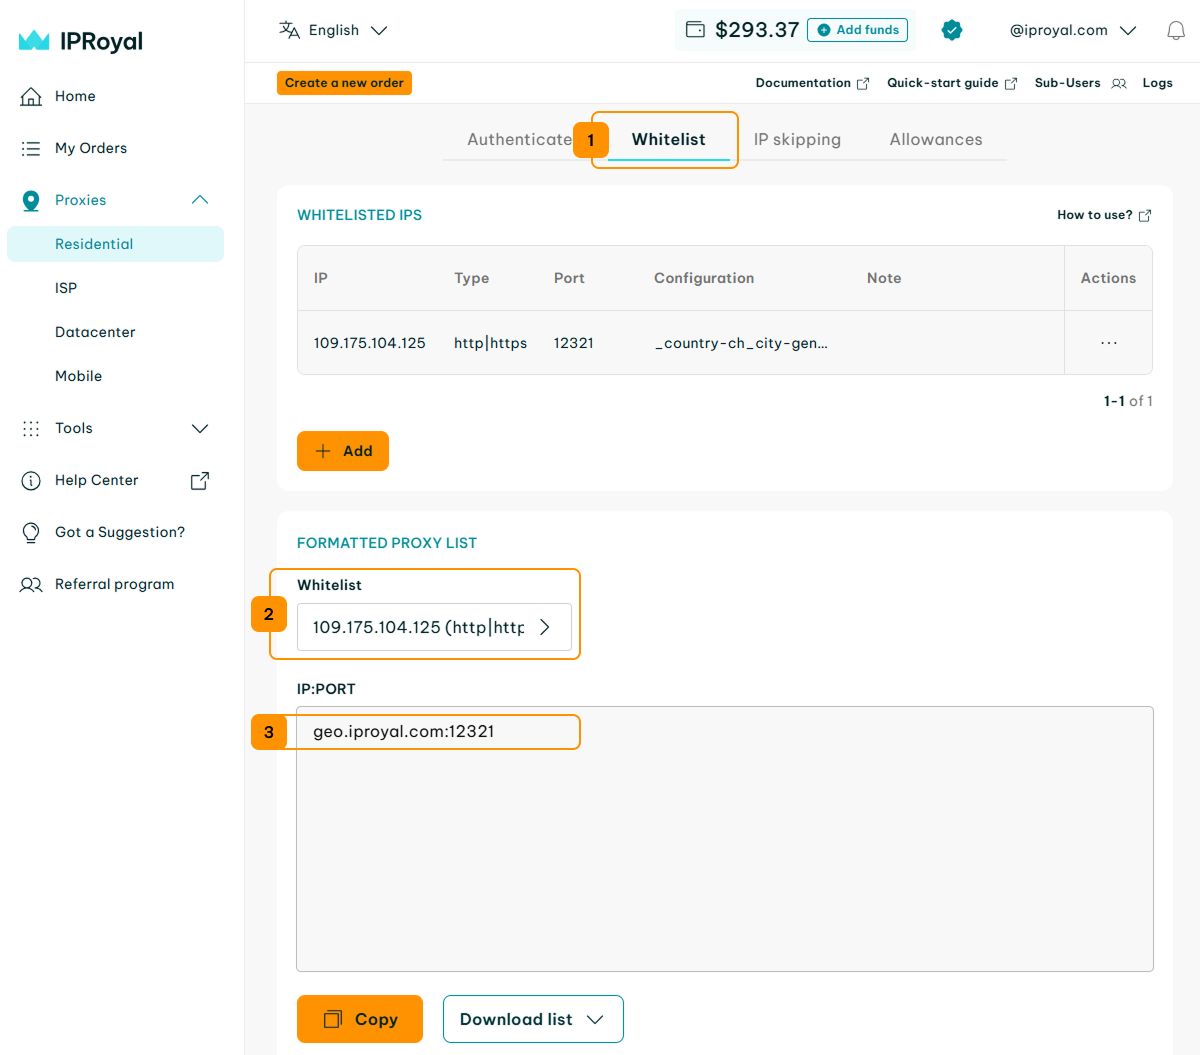
- For Residential Proxies, click on the ‘Whitelist’ (1) button and scroll down to the ‘Formatted proxy list‘ section. Select the whitelisted IP from the ‘Whitelist’ (2) drop-down menu and copy the IP:PORT information (3).
- For ISP and Datacenter Proxies, click on your active order in the dashboard. In the ‘Formatted proxy list’, copy the HOST:PORT information (1) for the proxy you want to use.
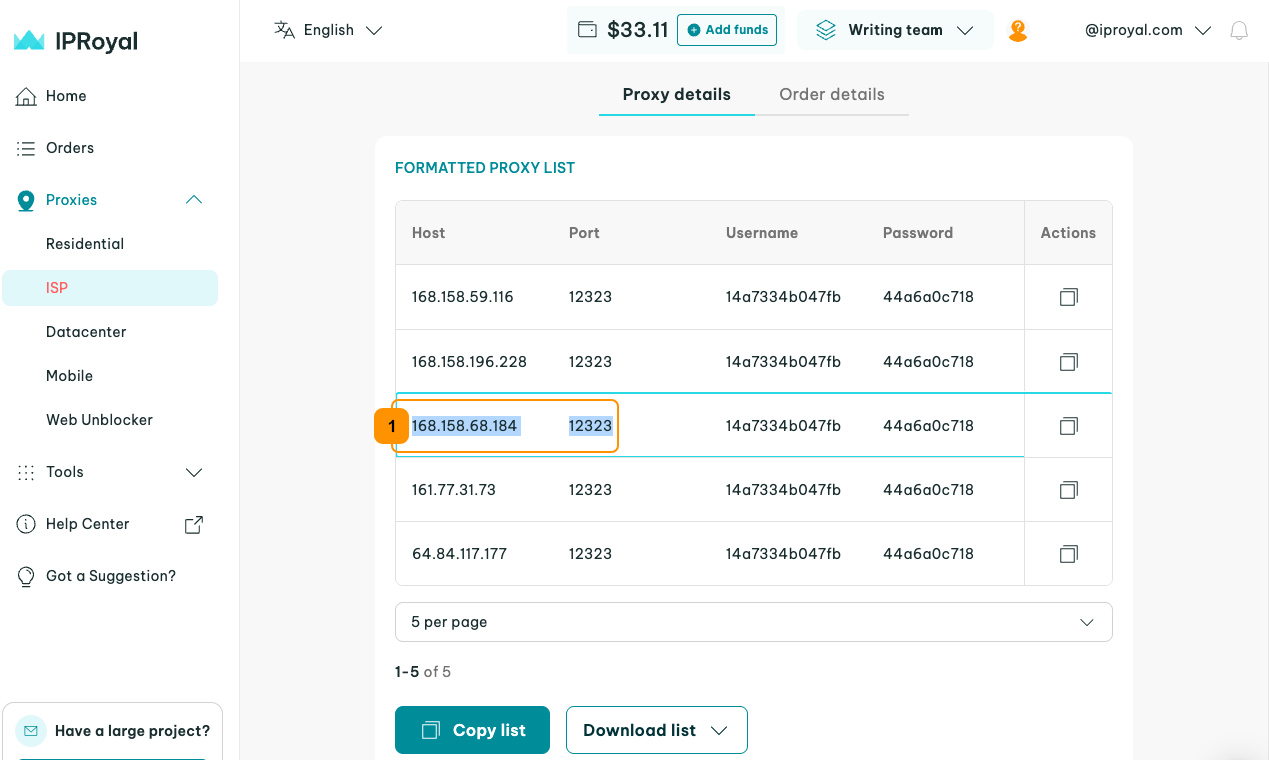
Add the HOST and port information to your web scraper, anti-detect browser, proxy manager, or any other tool, and save your proxy configuration. All requests sent from the IP addresses you whitelisted will go through IPRoyal proxies according to your configuration settings.
We’ll use Windows 11 proxy settings as an example. Alternatively, you can use our browser extensions (available for Chrome and Firefox) or check out our integration guides for specific operating systems and software.
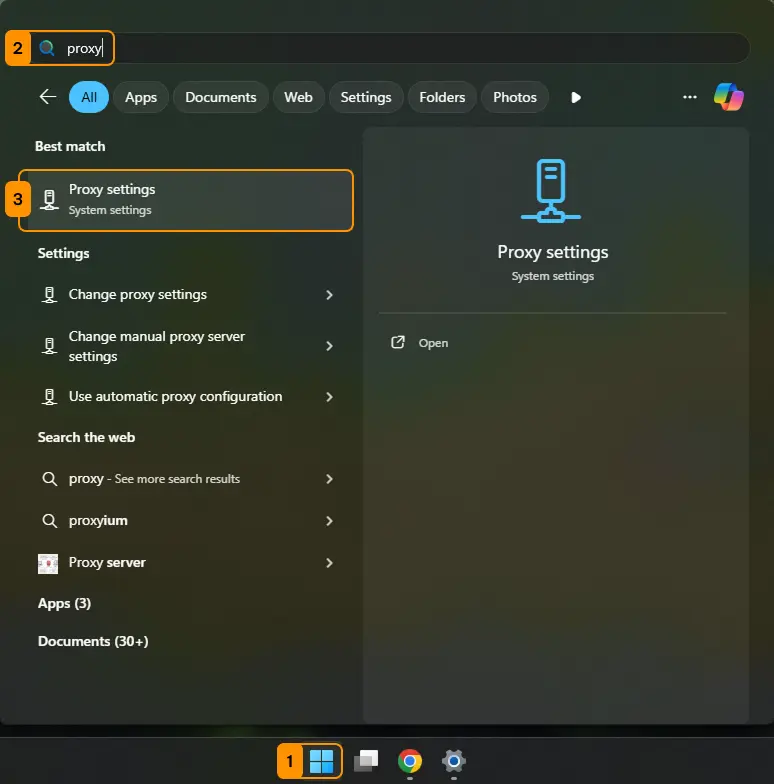
1. Click the ‘Start’ (1) button and type ‘proxy’ (2) in the search bar. Click on ‘Proxy settings’ (3).
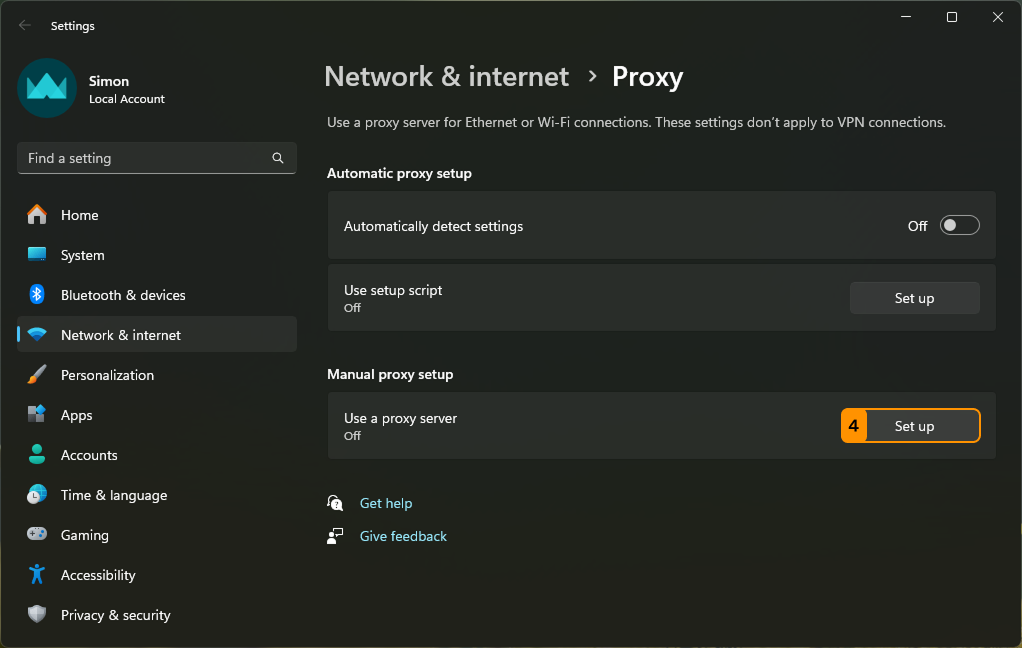
2. Click the ‘Set up’ (4) button in the ‘Manual proxy setup’ section.
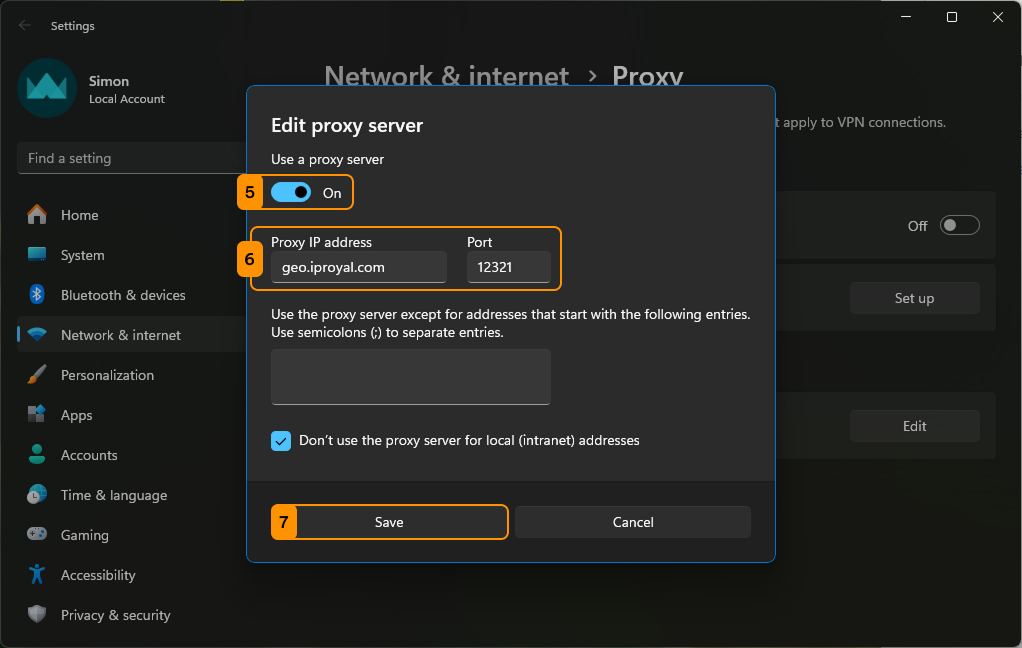
3. Switch the toggle (5) below ‘Use a proxy server’ to ‘On’. Add your host and port information to the appropriate fields (6) and click the ‘Save’ (7) button.
4. Finally, you can visit our IP Lookup page again to verify your requests are sent via IPRoyal proxies.